Introduction to Garlic Bread Rolls
Making homemade garlic bread rolls is an experience that can transform your dining table into something truly special. Imagine the aroma wafting through your kitchen as you combine fresh ingredients to create this delightful treat. Not only are these rolls the perfect sidekick to pasta dishes or salads, but they also secretly steal the spotlight at any meal.
Why homemade garlic bread rolls are a must-try?
First off, there’s nothing quite like sinking your teeth into a warm, soft roll that’s brimming with garlicky goodness. The joy of eating garlic bread rolls is more than just flavor—it’s about the experience of preparing them. You can use simple ingredients like flour, yeast, garlic, butter, and herbs. When crafted at home, these ingredients merge into delightful rolls that taste infinitely better than your typical store-bought options.
Did you know that studies suggest homemade meals not only taste better but are often healthier? When you control the ingredients, you can let your creativity shine. Feel free to add ingredients like cheese, herbs, or even turkey bacon to give your rolls that extra zing.
Moreover, making these rolls provides an excellent opportunity to bond with friends or family. Picture a cozy weekend where everyone gathers around to create some kitchen magic together! Cooking can be a great stress reliever, and the recipe for garlic bread rolls is forgiving enough for even novice bakers. If you’re curious about tips on baking perfection, check out this guide on baking basics.
In addition to their irresistible taste and the joy of preparation, homemade garlic bread rolls can elevate your meals. They’re great for gatherings, cozy dinners, or even just a casual night in with your favorite movie. Plus, they pair beautifully with a range of sides—from chicken ham to a fresh green salad.
So why not dive into this delightful cooking adventure? Your taste buds will thank you, and your dining companions will be clamoring for seconds. Get ready to roll up your sleeves and bring this classic dish to life!

Ingredients for Garlic Bread Rolls
Essential Ingredients for the Dough
To create irresistible garlic bread rolls, you’ll need some common pantry staples. Gathering these ingredients beforehand will make the process a breeze:
- All-purpose flour: The backbone of your dough. It gives your rolls that wonderful structure and chewiness.
- Active dry yeast: For that perfect rise. Fresh yeast can make a world of difference in flavor and texture.
- Warm water: Activate the yeast with warm water, creating a lovely environment for it to thrive.
- Sugar: Just a touch to feed the yeast and enhance flavor.
- Olive oil: Adds richness to the dough and gives a lovely, subtle taste.
- Salt: Essential for balancing flavors in your garlic bread rolls.
Making the Garlic Butter
Now, onto the real star of the show: the garlic butter! This is what takes your rolls to the next level. Here’s what you’ll need:
- Unsalted butter: For spreading that creamy goodness.
- Garlic cloves: Freshly minced garlic delivers an aromatic kick.
- Parsley: Fresh or dried, this herb brightens up the flavor and adds a pop of color.
- Parmesan cheese (optional): A sprinkle can elevate your rolls, adding a savory depth.
With these delicious ingredients on hand, you’re well on your way to crafting divine garlic bread rolls that are sure to impress at your next dinner gathering. Don’t forget to check out this guide on bread-making techniques for some helpful tips!
Preparing Garlic Bread Rolls
Making garlic bread rolls is a delightful experience that brings the comforting aroma of garlic and butter into your kitchen. These rolls are not just a side dish; they can elevate any meal, serve as a snack, or even be a part of your next gathering. Let’s dive into the straightforward steps to prepare these heavenly bites!
Gather Your Tools and Ingredients
Before we roll up our sleeves, let’s ensure you have everything ready. Here’s what you’ll need:
-
Tools:
-
Mixing bowl
-
Measuring cups and spoons
-
Whisk or fork
-
Rolling pin (optional, but helpful)
-
Baking sheet
-
Parchment paper (for easy cleanup)
-
Ingredients:
-
3 cups of all-purpose flour
-
1 packet (2 ¼ teaspoons) of active dry yeast
-
1 teaspoon of sugar
-
1 teaspoon of salt
-
1 ¼ cups of warm water (105°F to 110°F)
-
4 tablespoons of unsalted butter, softened
-
4 cloves of garlic, minced
-
Fresh parsley, chopped (optional for garnish)
Having everything in place makes the process smoother and more enjoyable!
Create the Garlic Butter Mix
Now, let’s concentrate on that essential element—garlic butter. In a small bowl, combine the softened butter with the minced garlic. This mix is the heart of your garlic bread rolls, imparting that memorable flavor. If you like, add a dash of salt or a sprinkle of parsley for an extra burst of freshness. Set this mixture aside to allow the flavors to meld together beautifully.
Combine Dry Ingredients for the Dough
In a large mixing bowl, whisk together your flour, yeast, sugar, and salt. These dry ingredients are foundational to your rolls, contributing to their lovely rise and fluffy texture. Make sure to evenly distribute the yeast; uneven mixing will affect how the rolls rise.
For a deeper dive into the science of baking, check out resources from the American Society of Baking.
Mix Wet Ingredients and Form the Dough
Now it’s time to introduce your warm water to the dry mixture. Gradually pour it in while stirring with a wooden spoon or your hand. This blending will lead to a sticky yet manageable dough. Don’t worry if the dough seems a bit rough at first; it will come together!
Knead the Dough Until Soft and Tacky
Lightly flour your countertop and transfer the dough. Knead it for about 8 to 10 minutes until it becomes soft and tacky but not overly sticky. Proper kneading develops the gluten, making your garlic bread rolls rise beautifully. If you’re unsure how to knead, just fold, push, and rotate the dough. It’s almost like giving it a gentle massage!
Shape the Rolls and Let Them Rise
Once your dough is ready, divide it into equal pieces, typically about 12. Shape each piece into a ball and place them on a parchment-lined baking sheet, leaving some space for them to expand. Cover your rolls with a towel and let them rise in a warm area for about 30 to 60 minutes, or until they double in size. This is the magic moment!
Bake the Rolls to Golden Perfection
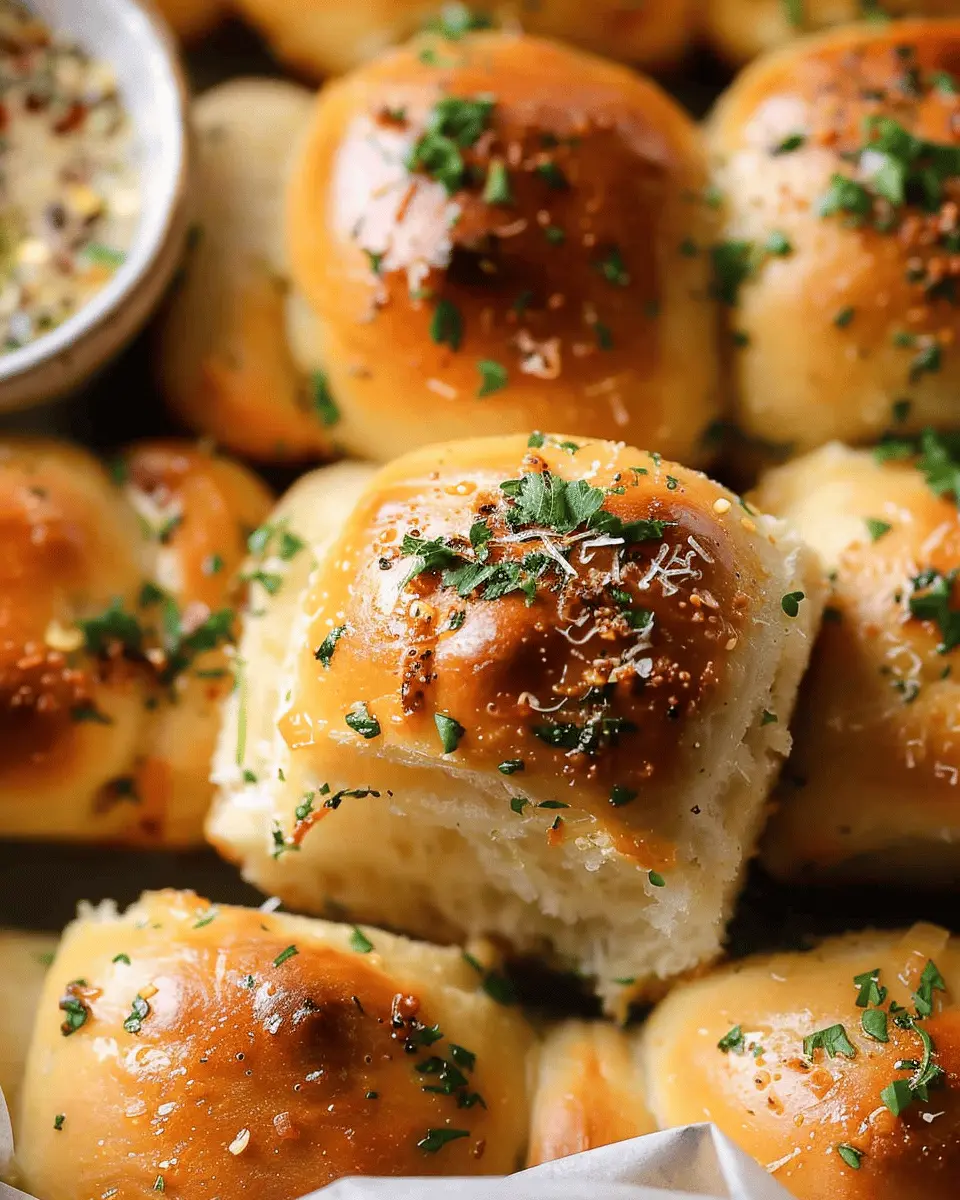
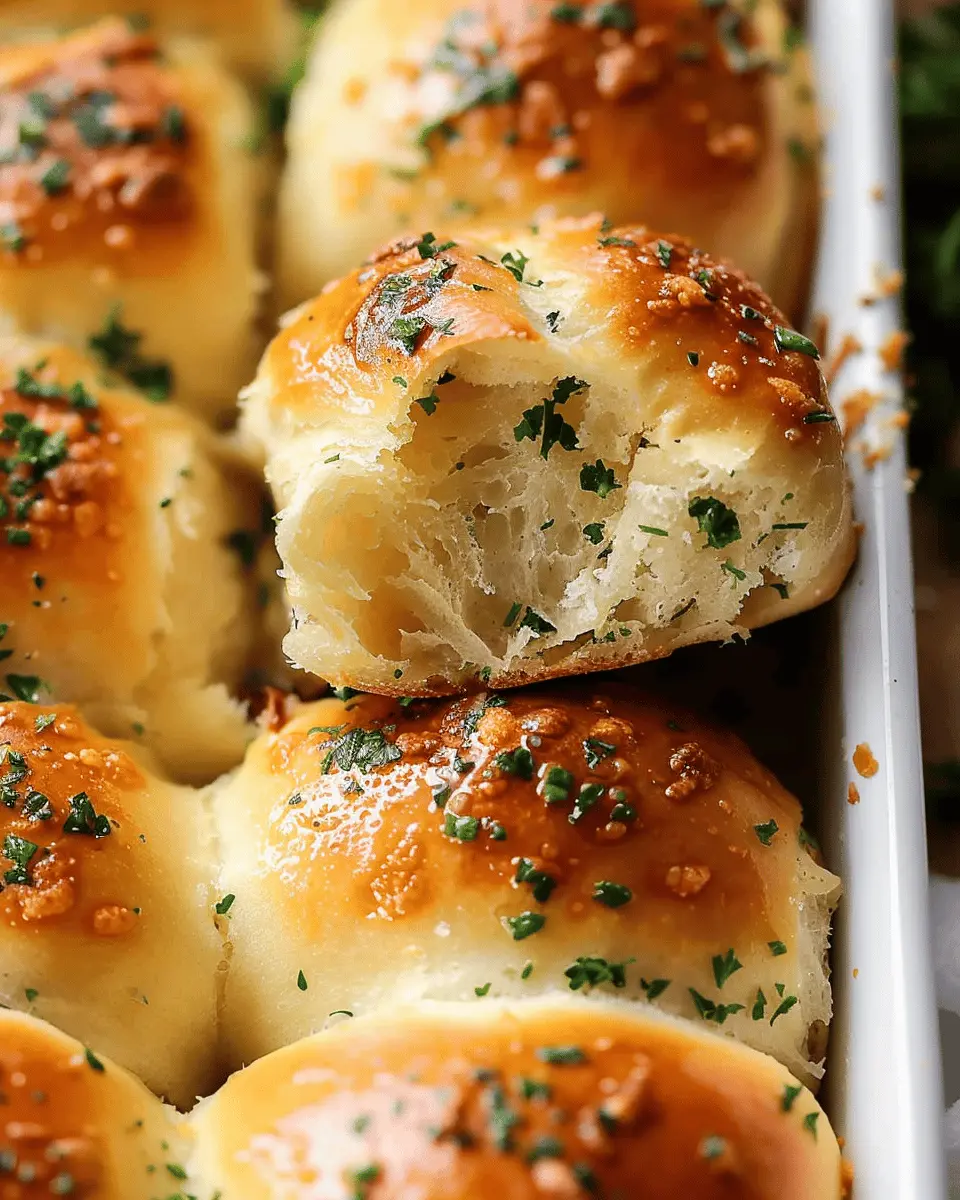
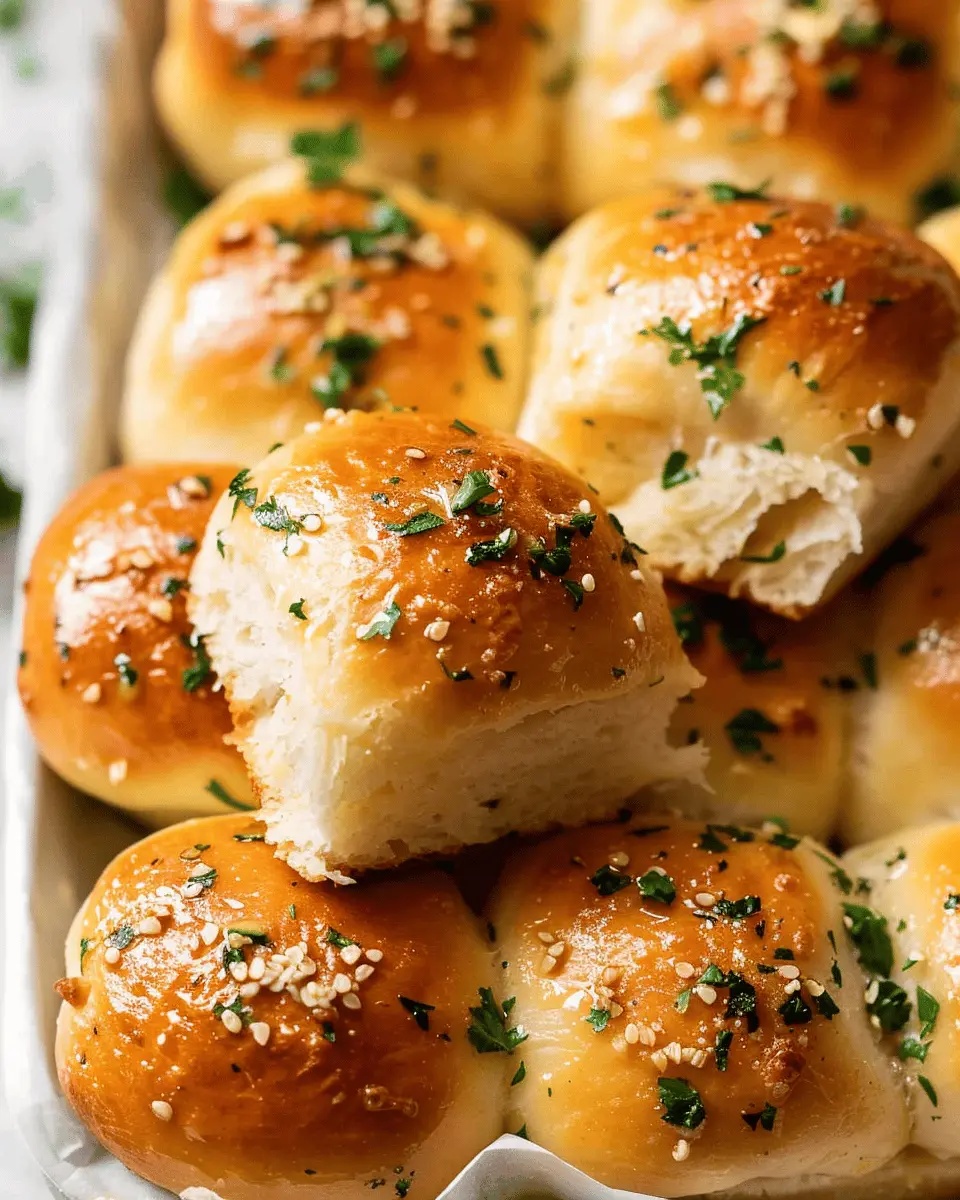
Preheat your oven to 375°F (190°C). Once your rolls have risen beautifully, it’s finally time to bake! Brush the tops with the garlic butter mix and bake in the preheated oven for 15 to 20 minutes or until they turn a golden brown. The aroma that fills your kitchen will be irresistible, and your taste buds will thank you!
Once baked, let them cool slightly before serving—they’re perfect on their own or alongside pasta, soups, or even with turkey bacon sandwiches.
There you have it! Enjoy your deliciously handcrafted garlic bread rolls, and don’t forget to share them with friends. Happy baking!
Variations on Garlic Bread Rolls
When it comes to garlic bread rolls, the fun is just beginning after mastering the basics. These rolls offer an incredible canvas for creativity, allowing you to customize flavors based on your personal preferences. Let’s explore some delightful variations that can elevate your garlic bread game!
Adding Herbs and Cheese
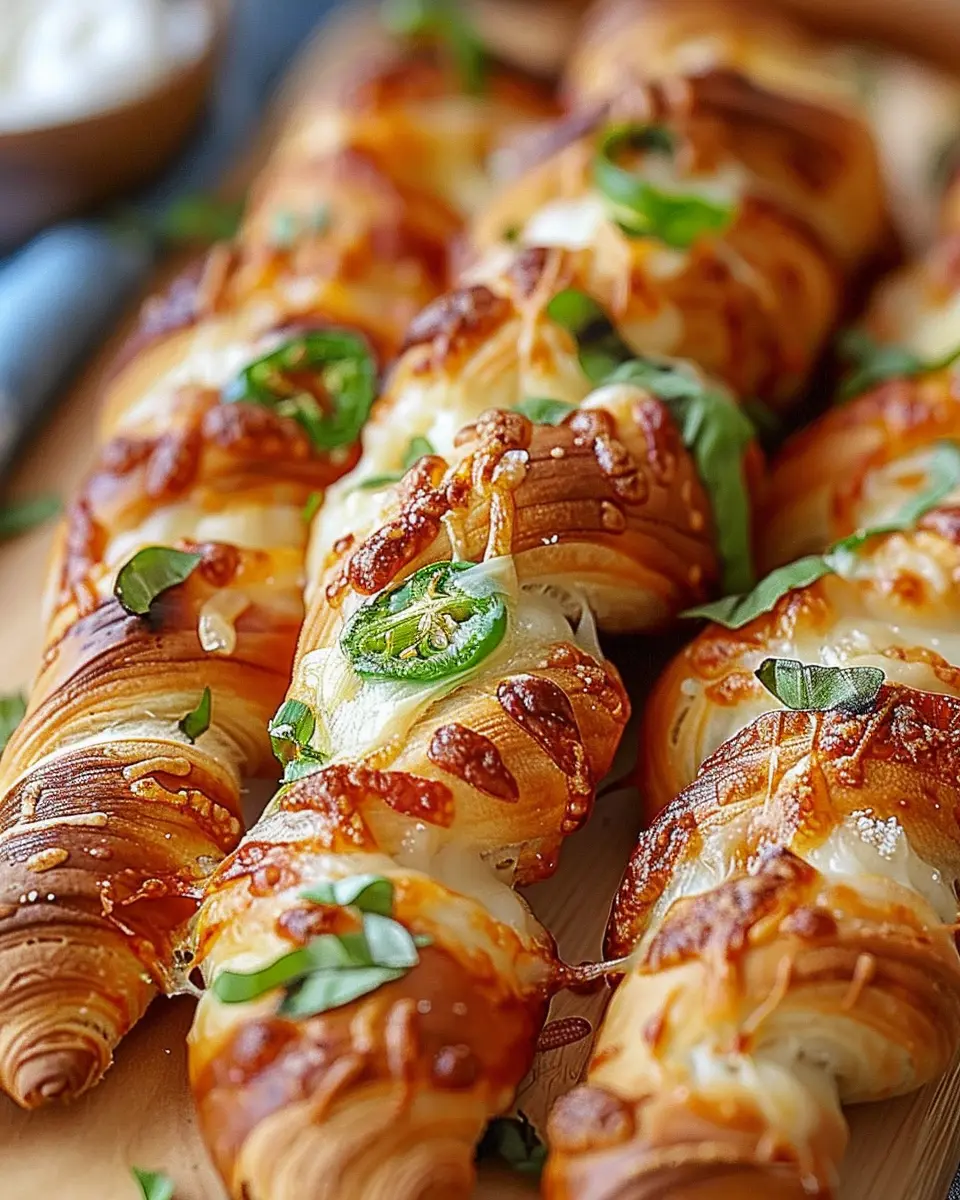
One of the simplest ways to enhance your garlic bread rolls is by incorporating fresh herbs and gooey cheese. Consider mixing in parsley, basil, or oregano into your garlic butter for a fresh burst of flavor. You can also experiment with various cheeses, such as mozzarella, parmesan, or even feta for a Mediterranean twist. But don’t stop there—think about topping your rolls with a sprinkle of chili flakes or freshly ground black pepper for a bit of kick.
Sweet Garlic Rolls for a Unique Twist
Wait, sweet garlic rolls? Yes, you heard that right! By adding a touch of honey or maple syrup into your garlic butter, you create a delightful contrast that pairs surprisingly well with the savory notes. Form your dough into rolls and sprinkle a little cinnamon to amplify those sweet flavors. These rolls make for a fantastic side with dishes like roasted chicken or even as a stand-alone snack.
Not only can these variations spark your creativity, but they also keep the dining experience exciting. You can find more inspiration through resources like The Kitchn or check out food blogs for additional tips and flavor combinations. Your kitchen adventures with garlic bread rolls have just begun!
Cooking Tips and Notes for Garlic Bread Rolls
Measuring Ingredients Accurately
Getting the right measurements is crucial for achieving perfect garlic bread rolls. Use a digital scale when possible for dry ingredients, as this ensures precision. Remember, one cup of flour can weigh differently based on how it’s scooped. Think about investing in a set of measuring spoons and cups for a better baking experience. Accurate measurements can make the difference between light, airy rolls and dense bricks!
Yeast Tips for Beginners
Baking with yeast might seem intimidating at first, but it doesn’t have to be. Always check the expiration date on your yeast for optimal results. If you’re unsure about its potency, proof it by mixing it with warm water and a pinch of sugar—if it bubbles after about 5 minutes, you’re good to go! For those new to making garlic bread rolls, remember that yeast loves warmth. Avoid cold drafts and ensure your dough rises in a cozy, humid spot for the best texture.
By applying these straightforward tips and techniques, you’re on your way to making irresistible garlic bread rolls that will impress your friends at your next gathering. For more insights, check out this Baking with Yeast guide.
Serving Suggestions for Garlic Bread Rolls
Perfect Pairing with Soups and Salads
Garlic bread rolls are not just a side; they’re the ultimate companion for your favorite soups and salads. Imagine dipping warm, buttery garlic bread rolls into a comforting bowl of tomato basil soup—each bite enhances the experience! They’re also fantastic with a crisp Caesar salad, providing that crunchy contrast that makes every forkful even more delightful. If you’re looking to elevate a chicken noodle soup, adding these rolls on the side can transform a simple meal into something truly special.
For a healthier option, consider pairing them with a light arugula salad dressed in lemon vinaigrette. The tanginess of the dressing complements the rich flavor of the garlic bread rolls, creating a balanced bite.
Creative Garlic Roll Appetizers
Feeling adventurous? Use your garlic bread rolls as a base for appetizers! Slice them into smaller pieces and top with ingredients like Turkey Bacon or Chicken Ham, melted cheese, and fresh herbs. It’s a fun way to impress guests during your next gathering.
You can also try creating bite-sized garlic roll sliders! Stuff them with your favorite fillings like roasted veggies and spread a zesty mayo for an explosion of flavor.
The versatility of garlic bread rolls shows they are more than just an accompaniment—they can take center stage! Explore more recipes or tips on New York Times Cooking or Bon Appétit for additional inspiration.
Time Breakdown for Garlic Bread Rolls
When preparing garlic bread rolls, having a clear understanding of the timing ensures your baking success. Here’s how your time will be spent:
Preparation Time
You’ll need about 15-20 minutes for assembling the ingredients and mixing the dough. It’s a straightforward process—just combine your yeast, flour, garlic, and a touch of butter until they come together.
Rising Time
Let the dough rise for approximately 1 hour. This crucial step allows the yeast to work its magic, giving your rolls that soft, fluffy texture we love. For the best results, find a warm spot in your kitchen.
Total Baking Time
Bake the rolls for about 15-20 minutes until they’re golden brown. No one can resist that aroma wafting from your oven!
These rolls are perfect for dinner parties or cozy nights in—check out more tips for making them a hit on The Kitchn. Enjoy the process, and soon, you’ll have delightful garlic bread rolls to share!
Nutritional Facts for Garlic Bread Rolls
When you’re indulging in garlic bread rolls, it’s helpful to know what you’re savoring.
Calories per roll
Each roll typically contains around 150 calories, making it a delightful yet manageable treat that complements any meal.
Breakdown of carbs, fats, and protein
- Carbohydrates: Approximately 22g
- Fats: Roughly 6g
- Protein: About 4g
These delicious rolls provide a nice balance, with carbs offering energy, a hint of fat for flavor, and protein to keep you satisfied. For more detailed nutrition information, you might find sites like Healthline and USDA helpful in understanding how these ingredients affect your dietary goals. Enjoying garlic bread rolls in moderation can certainly be part of a balanced diet!
FAQs about Garlic Bread Rolls
Can I use different types of flour?
Absolutely! While the classic recipe for garlic bread rolls often calls for all-purpose flour, you can experiment with alternatives to suit your preferences or dietary needs. For instance, whole wheat flour can add a nutty flavor and increase the nutritional value. If you’re aiming for gluten-free options, try almond flour or a gluten-free all-purpose blend. Just keep in mind that the texture may vary slightly, so you might need to adjust the liquid content in your recipe.
How do I store leftover garlic bread rolls?
Storing your garlic bread rolls properly can keep them tasting fresh for days. Here’s how:
- At Room Temperature: If you plan to eat them within two days, place the rolls in an airtight container or wrap them in foil to prevent them from drying out.
- In the Refrigerator: For longer storage, you can keep them in the fridge for up to a week. Just make sure they’re covered to avoid getting stale.
- Freezing: If you want to save some for later, freeze them! Wrap each roll in plastic wrap and then place them in a zip-top bag. They can last up to three months in the freezer. When you want to enjoy them, simply thaw and reheat in the oven.
Can I make these rolls in advance?
Definitely! Making garlic bread rolls in advance is a great idea, especially if you’re entertaining. You can prepare the dough and let it rise according to the recipe, then shape the rolls. Instead of baking them right away, cover and refrigerate them overnight. The next day, simply allow them to come to room temperature, and bake as directed. This way, you’ll have warm, delicious rolls ready to impress your guests without all the last-minute stress.
For more tips on bread-making, you might check out resources from the King Arthur Baking Company. Happy baking!
Conclusion on Garlic Bread Rolls
Recap of the joy of homemade garlic bread rolls
In summary, there’s something profoundly satisfying about indulging in homemade garlic bread rolls. Each roll is a warm, buttery hug for your taste buds, enhanced by that rich yet fragrant garlic essence. Baking them yourself not only fills your kitchen with enticing aromas but also allows for the customization of flavors and ingredients. Plus, what could be better than sharing fresh rolls with friends or family during dinner? For those looking to elevate simple meals, these rolls are the perfect companion. So, grab your ingredients, roll up your sleeves, and enjoy a delightful culinary adventure!
If you want to expand your knowledge on the culinary benefits of garlic or explore other related recipes, consider checking out The World of Garlic. You’ll uncover all the reasons to love this bulbous marvel!
PrintGarlic Bread Rolls: The Easy Way to Elevate Your Meals
Garlic Bread Rolls are a delicious and easy addition to any meal. They combine the flavors of garlic and butter, creating the perfect side dish for pasta, salads, and more.
- Prep Time: 15 minutes
- Cook Time: 25 minutes
- Total Time: 1 hour 40 minutes
- Yield: 12 rolls 1x
- Category: bread
- Method: baking
- Cuisine: Italian
Ingredients
- 4 cups all-purpose flour
- 1 tablespoon sugar
- 2 teaspoons salt
- 1 packet instant yeast
- 1 ½ cups warm water
- 4 tablespoons unsalted butter
- 4 cloves garlic, minced
- 2 tablespoons fresh parsley, chopped
Instructions
- In a large bowl, mix warm water with yeast and sugar. Let it sit until frothy.
- In another bowl, combine flour and salt.
- Add the flour mixture to the yeast mixture and mix until a dough forms.
- Knead the dough on a floured surface for about 10 minutes.
- Place the dough in a greased bowl and cover it with a towel. Let it rise for 1 hour.
- Preheat the oven to 375°F (190°C).
- In a small saucepan, melt butter and sauté garlic until fragrant. Stir in parsley.
- Once the dough has risen, punch it down and shape it into rolls.
- Place the rolls on a baking sheet, brush with garlic butter, and let them rise for another 30 minutes.
- Bake for 20-25 minutes or until golden brown.
- Brush with more garlic butter before serving.
Notes
- For extra flavor, you can add grated cheese on top of the rolls before baking.
- These rolls are best served warm.
Nutrition
- Serving Size: 1 roll
- Calories: 200
- Sugar: 1g
- Sodium: 250mg
- Fat: 8g
- Saturated Fat: 5g
- Unsaturated Fat: 2g
- Trans Fat: 0g
- Carbohydrates: 26g
- Fiber: 1g
- Protein: 4g
- Cholesterol: 15mg
Keywords: Garlic Bread Rolls