Introduction to Perfect Dutch Oven Pumpkin Bread
Why is homemade pumpkin bread so comforting?
Homemade pumpkin bread exudes warmth and nostalgia, making it a favorite for cozy gatherings and chilly afternoons. The sweet aroma of spices like cinnamon and nutmeg fills your kitchen, creating a comforting atmosphere that instantly feels like home. Whether you’re enjoying it fresh out of the oven or toasted with a little butter, pumpkin bread offers a delightful blend of flavors and textures that not only nourishes the body but also soothes the soul.
Brief history of pumpkin bread
Pumpkin bread has its roots in the blend of Native American and European culinary traditions. Initially, pumpkins were celebrated for their versatility, being used in savory dishes and desserts alike. The recipe for pumpkin bread as we know it began to emerge in the United States during the 19th century when clever home bakers started experimenting with their fall harvest. While pumpkin pie often steals the spotlight during Thanksgiving, pumpkin bread has established itself as an equally beloved treat, known for its moist crumb and delightful sweetness. For those curious about the evolution of pumpkin dishes, check out this insightful overview from The Spruce Eats.
The magic of using a Dutch oven
Using a Dutch oven to make your perfect Dutch oven pumpkin bread elevates the baking experience to another level. This versatile kitchen tool ensures even heat distribution, allowing your bread to bake uniformly while retaining moisture. Many home bakers swear by the Dutch oven method because it mimics a professional baking environment—trapping steam within the pot helps create a wonderfully tender crust and a beautifully risen loaf.
Imagine pulling a golden-brown, perfectly baked loaf from the oven, its aroma wafting through your home. Plus, the rustic presentation of serving pumpkin bread directly from the Dutch oven adds a charming touch to your table. So why wait? Embrace the joys of autumn with this simple yet delightful recipe that promises to be a staple in your kitchen for seasons to come!
Ingredients for Perfect Dutch Oven Pumpkin Bread
Essential ingredients you’ll need
To whip up a delicious perfect Dutch oven pumpkin bread, gather these essential ingredients:
- 1 cup of pumpkin puree (canned or freshly made)
- 3/4 cup sugar (brown or white, depending on your preference)
- 1/2 cup vegetable oil or melted coconut oil
- 2 large eggs
- 2 cups all-purpose flour
- 1 teaspoon baking soda
- 1/2 teaspoon baking powder
- 1 teaspoon cinnamon
- 1/2 teaspoon nutmeg
- 1/2 teaspoon salt
These components create a moist, dense bread that’s bursting with the warm flavors of fall. Remember, high-quality ingredients make a difference!
Optional add-ins for added flavor
Want to elevate your perfect Dutch oven pumpkin bread? Consider these optional add-ins:
- 1/2 cup chopped walnuts or pecans for crunch
- 1/2 cup chocolate chips for a sweet surprise
- A dash of vanilla extract for depth
- Dried cranberries or raisins for a fruity touch
Playing around with these add-ins not only enhances flavor but makes your bread uniquely yours. Give them a try and explore even more combinations!
For more ideas on choosing the right ingredients, check out this guide on Baking Essentials.
Preparing Perfect Dutch Oven Pumpkin Bread
Making perfect Dutch oven pumpkin bread is not just about mixing ingredients; it’s an art that brings together flavors, textures, and the joy of baking. Let’s walk through the steps that will take you from pantry to table with this delightful autumn treat.
Activate the yeast
The critical first step is to activate your yeast. Use 1 packet of active dry yeast and combine it with 1 cup of warm water (around 110°F). A dash of sugar (about 1 teaspoon) helps to feed the yeast and kickstart the activation process. Allow this mixture to rest for about 5–10 minutes. You’ll know it’s ready when it foams up and has a pleasant aroma—it’s like a little magic show in your kitchen!
This process is crucial as it ensures that your bread will rise beautifully. Remember, fresh yeast is key; check the expiration date before use. If you’re curious about the science behind yeast activation, you can find detailed articles on sites like King Arthur Baking, which offer great insights into baking fundamentals.
Mix the pumpkin puree with other ingredients
Once your yeast is activated, it’s time to bring the star ingredient front and center—pumpkin puree! In a large mixing bowl, combine 1 cup of pumpkin puree with:
- 2 tablespoons of brown sugar
- 1 teaspoon of cinnamon
- ½ teaspoon of nutmeg
- ½ teaspoon of ginger
- 1 teaspoon of salt
- 1 large egg
Stir in the activated yeast mixture until everything is well combined. This is the moment to infuse your bread with seasonal flavors that will make your kitchen feel warm and inviting.
Next, gradually fold in about 3 to 4 cups of all-purpose flour, one cup at a time. You’ll start to see the dough come together. This brings us to the next important step: kneading.
Kneading the dough—what to look for
Take the dough out of the bowl and onto a floured surface. Knead the dough for about 5–7 minutes, or until it becomes smooth and elastic. If you’re unsure how to knead, remember to push the dough away from you with the heel of your hand, then fold it back over.
An important thing to watch for is the texture. The dough should be slightly tacky but not overly sticky. If you find it too sticky, sprinkle a little more flour until the right consistency is reached. For a great visual guide, check out some YouTube tutorials that demonstrate kneading techniques, as seeing it can make it easier to grasp.
First rise and folding techniques
After kneading, place the dough in a greased bowl, cover it with a clean kitchen towel, and let it rise in a warm spot for about 1 hour or until it has doubled in size. This is your first rise.
When it’s done, gently deflate the dough and give it a couple of folds to develop the gluten structure. This step not only enhances the texture but also contributes to a beautifully airy loaf. Fold it in half, turn it 90 degrees, and repeat a couple of times before forming it into a ball.
Chilling the dough overnight
For an unparalleled depth of flavor, consider letting your dough chill overnight in the refrigerator. After the first rise and folding, cover it tightly with plastic wrap and place it in the fridge. This cold fermentation process will help the flavors marry beautifully, yielding a richer taste in your perfect Dutch oven pumpkin bread.
By the time you’re ready to bake the next day, your dough will have developed a wonderful aroma and texture, all while saving you time the following morning.
In conclusion, these steps form the backbone of crafting an exceptional Dutch oven pumpkin bread. Embrace the process, be patient, and soon you’ll have a warm, fragrant loaf that is perfect for your fall gatherings or cozy evenings at home. Sharing this joy of baking is truly what makes the experience special!
Variations on Perfect Dutch Oven Pumpkin Bread
Pumpkin bread is such a versatile treat and can easily be tailored to fit your personal taste. Here are some variations that’ll elevate your perfect Dutch oven pumpkin bread experience!
Adding spices for extra warmth
Spices can transform your loaf into a festive delight. Consider experimenting with a blend of:
- Nutmeg: Adds a warm, nutty flavor.
- Ginger: Gives it a zesty kick.
- Allspice: Offers a hint of sweetness and depth.
A sprinkle of cardamom can also introduce a unique flavor profile! While you can stick to classic cinnamon, don’t hesitate to explore different spice combinations. Your kitchen will smell heavenly, and your guests won’t be able to resist coming back for seconds.
Incorporating nuts or seeds
For a textural contrast, consider adding nuts or seeds to your perfect Dutch oven pumpkin bread. Here are some options to think about:
- Walnuts: Their crunchy texture adds heartiness.
- Pecans: They offer rich, buttery flavor.
- Pumpkin seeds (Pepitas): Boost the seasonal theme while adding crunch.
You can even toast these nuts slightly to enhance their flavors before folding them in.
Swapping in different flours
Want to change up the nutritional profile? Try swapping in whole wheat flour or almond flour for a nutty flavor and added fiber. A mix of oat flour can also do wonders for texture, giving your loaf a wholesome taste. Feel free to experiment, as this can lead to delightful results!
Incorporating these suggestions will give your perfect Dutch oven pumpkin bread a unique twist that’s sure to impress your family and friends. For more inspiration, check out this pumpkin spice guide.
Cooking Tips and Notes for Perfect Dutch Oven Pumpkin Bread
Importance of Preheating Your Dutch Oven
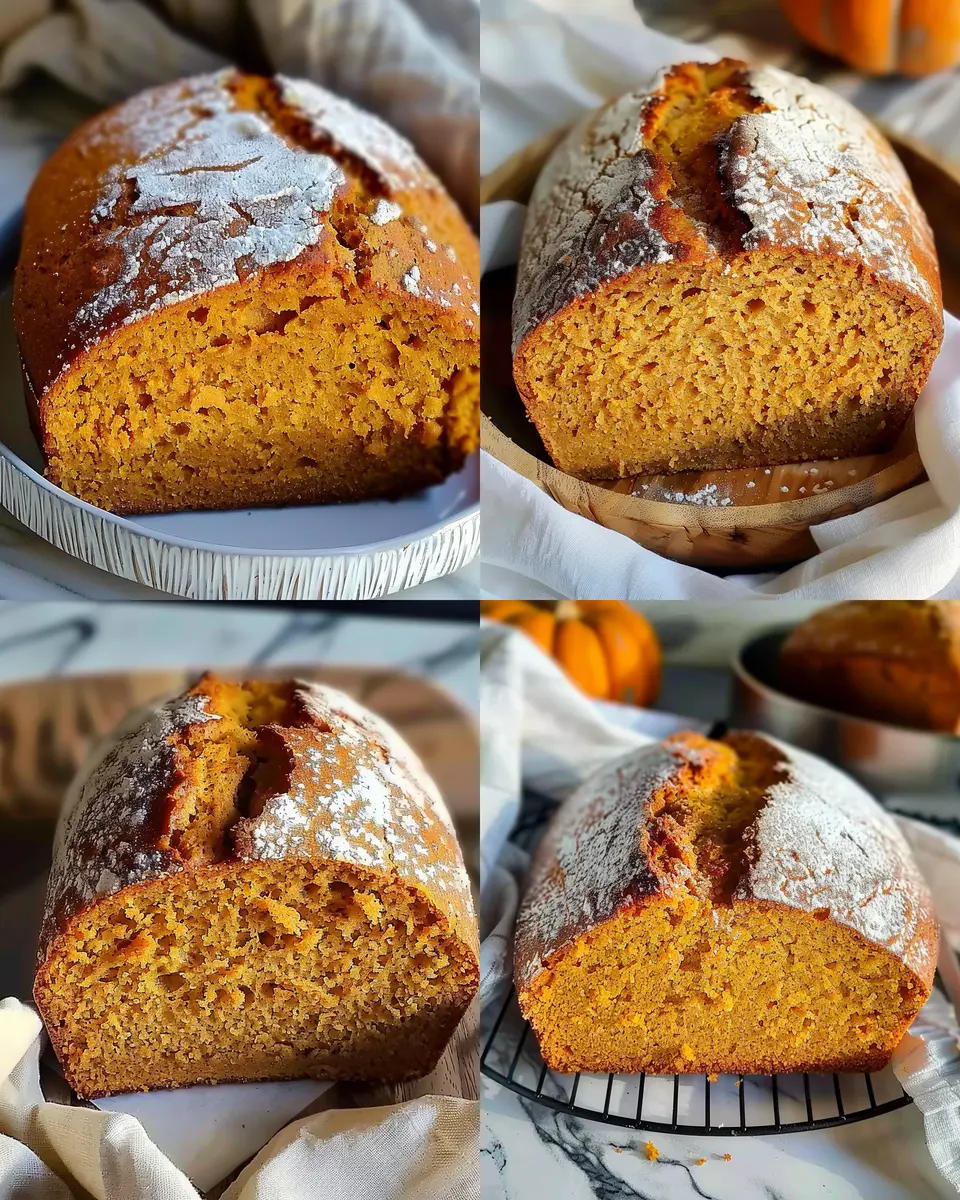
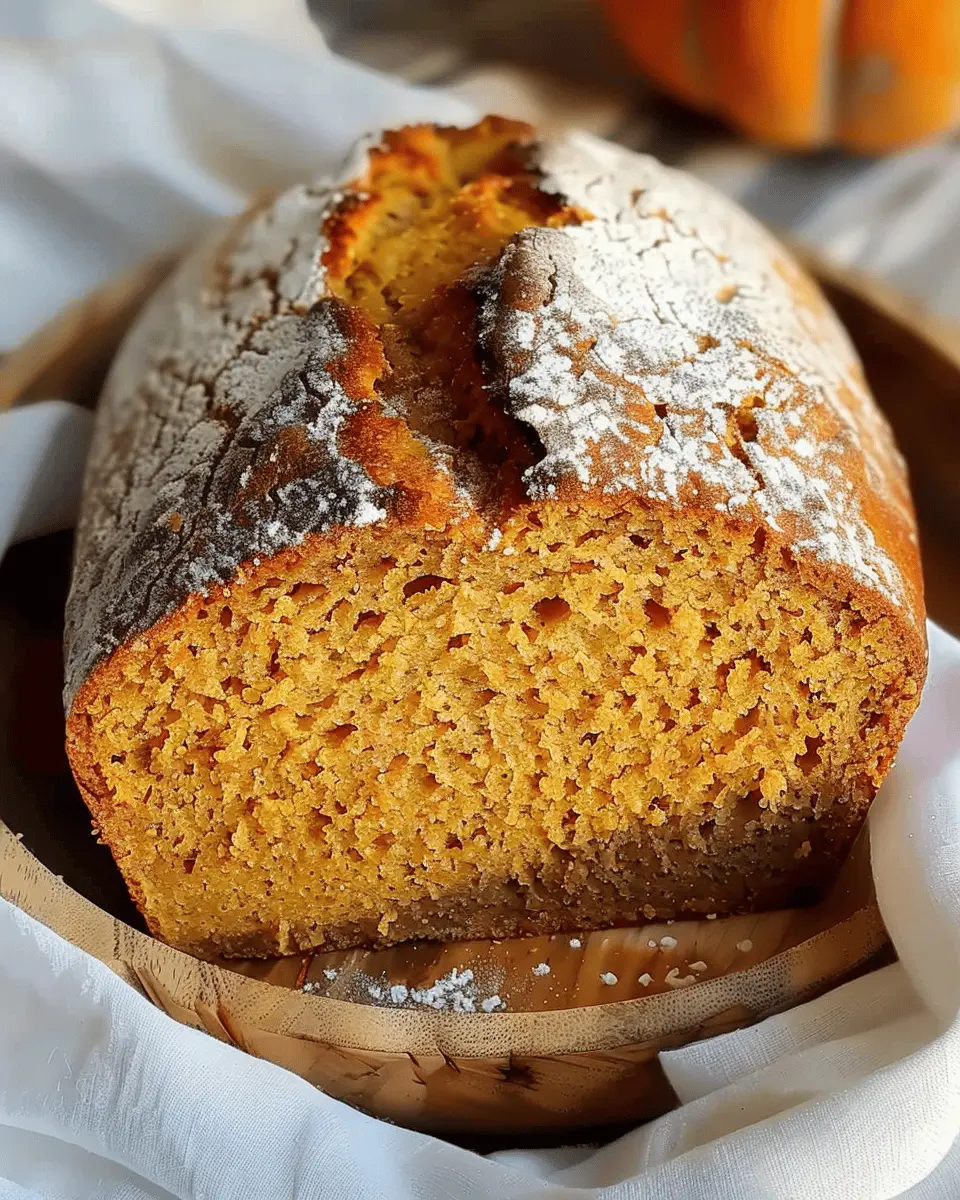
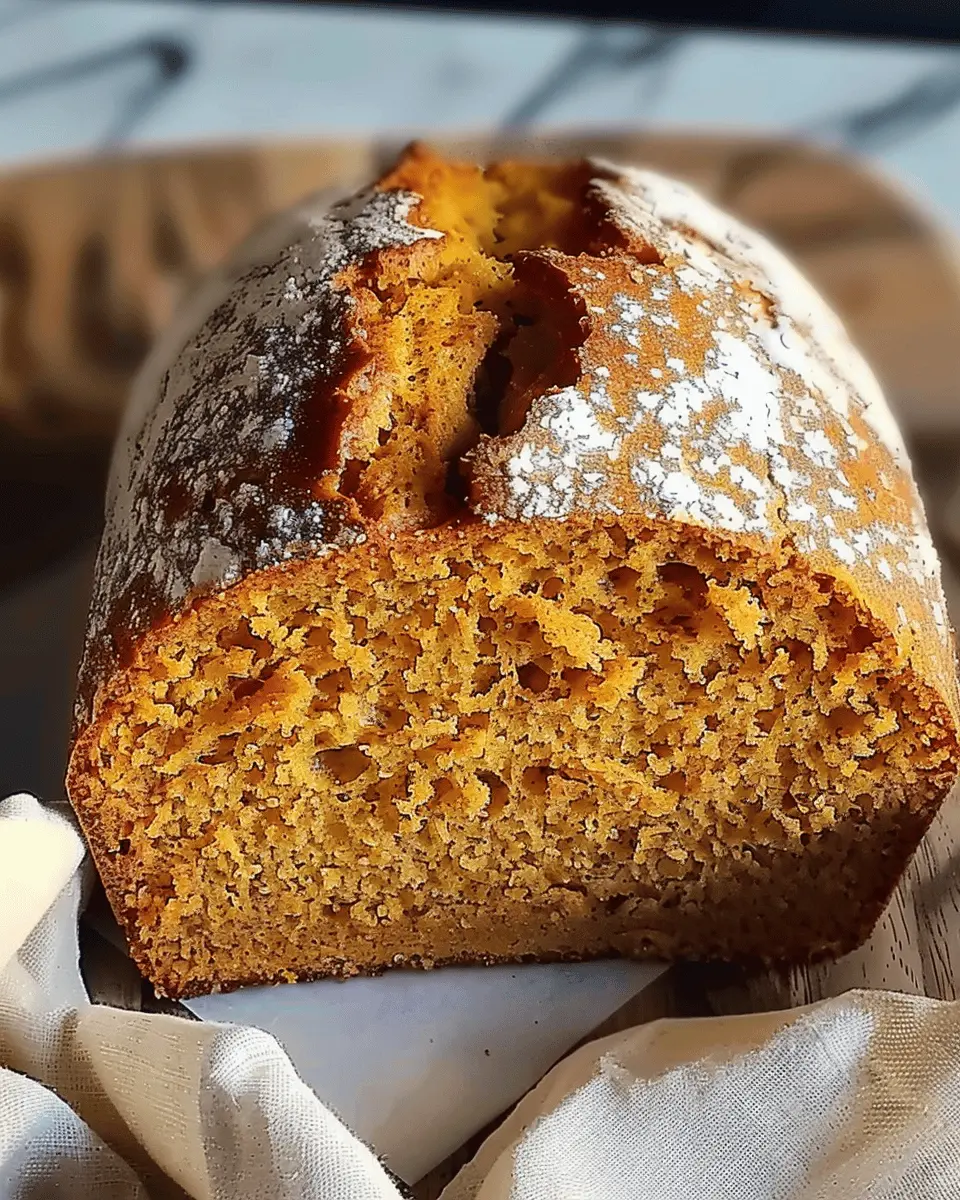
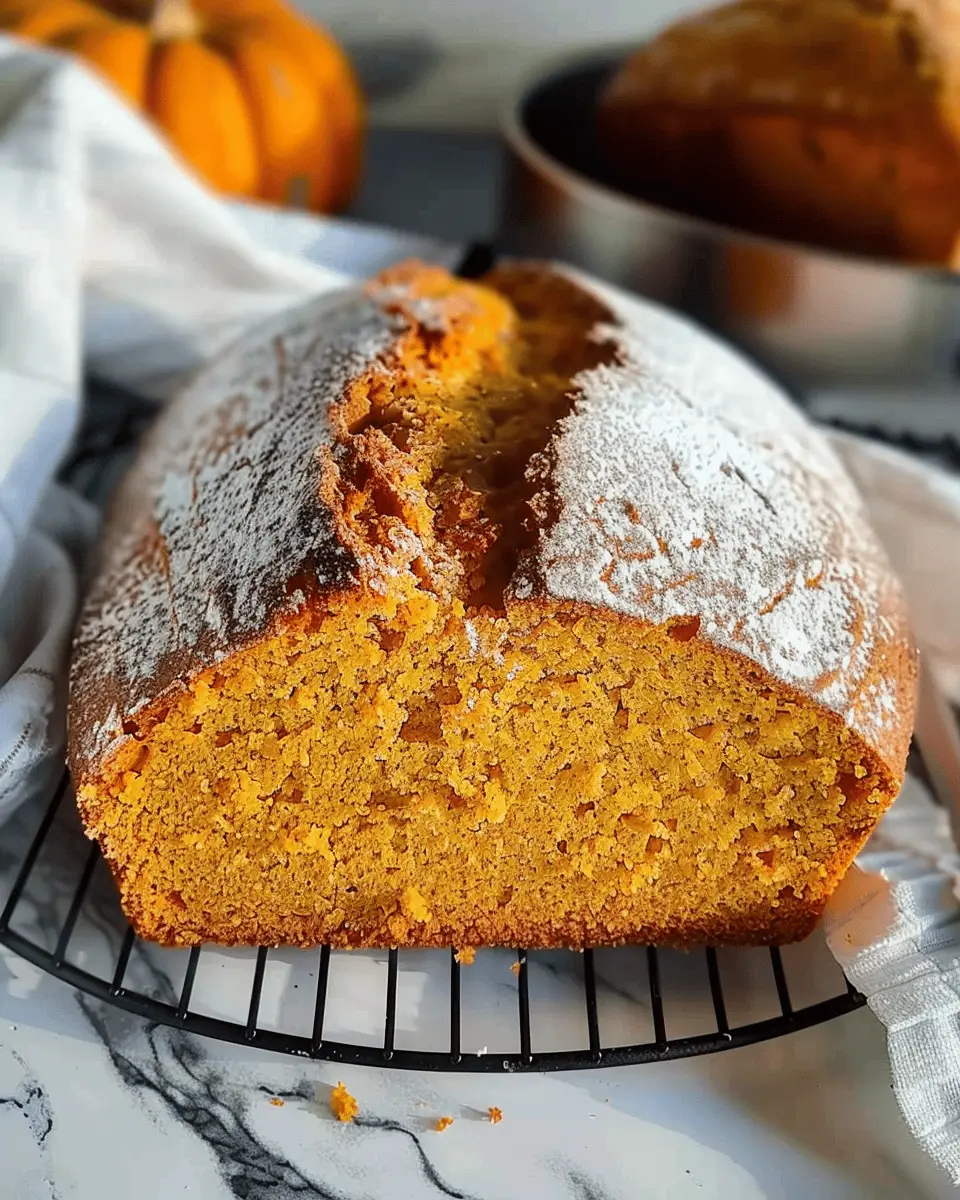
Preheating your Dutch oven is crucial for achieving perfect Dutch oven pumpkin bread. When you heat up the pot before baking, it creates a steamy environment that helps your loaf rise beautifully and develop a delightful crust. Aim for at least 30 minutes of preheating to ensure optimal results. This step is often overlooked, but it can mean the difference between a good loaf and a great one!
How to Achieve a Perfect Crust
To achieve that sought-after crust, consider these tips:
- Use a combination of heat: Bake your bread covered for a portion of the time to trap steam, then remove the lid toward the end to achieve a crisp finish.
- Avoid over-baking: Keep an eye on your loaf toward the end of the baking time. It should be golden brown, but not too dark.
Tips for Storing Your Bread
Storing your homemade pumpkin bread correctly is key to maintaining its deliciousness:
- Wrap it: Once cooled, wrap your bread in plastic wrap or foil to keep it fresh.
- Freeze for later: If you have leftovers, slice and freeze the bread. This way, you can enjoy a slice of that perfect pumpkin bread anytime!
For more tips on storing baked goods, check out resources on FoodSafety.gov. Enjoy your baking adventure!
Serving Suggestions for Perfect Dutch Oven Pumpkin Bread
Enjoying It Plain vs. With Spreads
There’s something truly delightful about enjoying perfect Dutch oven pumpkin bread straight out of the oven. The warm, spiced aroma is enough to transport you to the coziest fall gatherings. If you prefer an extra boost of flavor, try spreading creamy butter, cream cheese, or even a touch of maple syrup on your slices. Each option adds its unique character and enhances the pumpkin’s natural sweetness, making every bite a treat.
Pairing with Soups or Salads
For a satisfying meal, consider pairing your fresh bread with a hearty soup or a light salad. Think about a warm, creamy butternut squash soup or a fresh arugula salad with roasted veggies. These combinations not only complement the pumpkin flavors but also provide a lovely balance of textures and tastes. You can explore some delicious soup recipes to find the perfect match.
Ideas for Serving During Special Occasions
If you’re hosting a gathering, your perfect Dutch oven pumpkin bread can shine on the table as both a conversation starter and a comfort food staple. Slice it up for a fall brunch, or serve it as a side dish during Thanksgiving dinner. You could even make mini loaves to gift to friends or family during the holiday season. The warmth and thoughtfulness behind homemade bread will surely be appreciated!
Time Breakdown for Perfect Dutch Oven Pumpkin Bread
When you’re ready to whip up perfect Dutch oven pumpkin bread, knowing how to manage your time can make all the difference. Here’s a concise breakdown to help you plan your baking adventure:
Preparation time
Getting started is a breeze! You’ll need about 10-15 minutes to gather your ingredients, mix the batter, and prepare your Dutch oven. This initial phase is key to setting you up for success.
Rising time
Patience is essential when it comes to getting that fluffy texture. Allow your dough to rise for approximately 1 to 1.5 hours. This is the perfect time to clean up or maybe even sneak in a quick episode of your favorite show!
Baking time
Once your dough has risen beautifully, you’ll bake it for about 45-50 minutes. As it bakes, the aroma of pumpkin and spices will fill your kitchen, making your wait worthwhile.
Total time
All in all, you’re looking at roughly 2 to 2.5 hours from start to finish. But don’t let the time deter you—this bread is absolutely worth the wait!
Understanding this time breakdown helps you effortlessly sync your cooking and planning. And if you’re interested in more tips on bread-making, check out King Arthur Baking’s Guide for in-depth insights and techniques. Happy baking!
Nutritional Facts for Perfect Dutch Oven Pumpkin Bread
Calories per serving
Each slice of perfect Dutch oven pumpkin bread contains approximately 170 calories, making it a delightful indulgence without the guilt. A perfect snack or breakfast choice, this bread keeps you satisfied while providing all the cozy flavors of autumn.
Breakdown of key nutrients
In addition to being delicious, this pumpkin bread packs a nutritional punch. Here’s a quick look at what you’ll find in every slice:
- Carbohydrates: 27g
- Protein: 4g
- Fat: 6g (mainly healthy fats!)
- Fiber: 2g
These nutrients blend harmoniously to offer not just comfort, but essential energy for your day.
Health benefits of pumpkin
Pumpkin isn’t just a seasonal favorite; it’s also jam-packed with health benefits! It’s an excellent source of beta-carotene, which supports eye health. This vibrant orange fruit is high in antioxidants, aiding in immune function. Plus, with its low calorie and high fiber content, it can help keep you full longer, making it a great addition to your diet.
For more detailed insights on the health advantages of pumpkin, check out Healthline or WebMD. Embrace the season and enjoy the wholesome goodness of your perfect Dutch oven pumpkin bread!
FAQs about Perfect Dutch Oven Pumpkin Bread
Can you make this recipe gluten-free?
Absolutely! Making a perfect Dutch oven pumpkin bread gluten-free is easier than you might think. Simply replace all-purpose flour with a gluten-free all-purpose flour blend. Ensure the blend includes xanthan gum, as it helps mimic the texture of gluten. You can also experiment with almond flour or oat flour for a unique twist! Just remember to check for cross-contamination if you’re baking for someone with Celiac disease.
How do you know when the bread is done?
Determining whether your perfect Dutch oven pumpkin bread is baked to perfection comes down to a couple of reliable techniques:
- Toothpick Test: Insert a toothpick or a knife into the center of the bread. If it comes out clean or with a few moist crumbs (not wet batter), your bread is done.
- Color and Aroma: The bread should have a lovely golden-brown color and emit a delicious pumpkin aroma!
Baking times may vary depending on your oven, so keep an eye on your bread in the last 10-15 minutes.
What can I do with leftover pumpkin bread?
Have you ever wondered what to do with leftover pumpkin bread? Here are some tasty ideas to repurpose those delicious slices:
- Toast It: Lightly toast for breakfast and spread with butter or cream cheese.
- Bread Pudding: Transform it into a decadent bread pudding for dessert.
- Freeze It: Slice your bread and freeze it for future snacks. Just thaw it out as needed!
By keeping these tips in mind, you can enjoy your perfect Dutch oven pumpkin bread even after baking day! For more tips on pumpkin recipes, check out Food Network for inspiration.
Conclusion on Perfect Dutch Oven Pumpkin Bread
Recap of the Recipe
In this recipe for perfect Dutch oven pumpkin bread, we explored a delightful blend of flavors and textures, marrying pumpkin puree with warm spices to create a comforting loaf. By harnessing the even heat distribution of a Dutch oven, you achieve a beautifully baked bread with a golden crust and a moist, tender interior.
Encouragement to Try Making It at Home
I encourage you to whip up this bread in your kitchen! It’s not only an enjoyable baking project, but it’s also perfect for sharing with friends or as a cozy fall treat. With simple ingredients and straightforward steps, you’ll surely impress your taste buds and those of your loved ones. Don’t forget to experiment by adding your favorite mix-ins, such as nuts or chocolate chips. Your perfect Dutch oven pumpkin bread is just a few steps away—so why wait? Give it a try today! For more cooking inspiration, check out resources like Bon Appétit or Savory.
PrintPerfect Dutch Oven Pumpkin Bread: Your Easy Fall Favorite
Enjoy the cozy flavors of fall with this Perfect Dutch Oven Pumpkin Bread, perfect for any gathering or a cozy evening at home.
- Prep Time: 15 minutes
- Cook Time: 50 minutes
- Total Time: 1 hour 5 minutes
- Yield: 1 loaf 1x
- Category: Bread
- Method: Baking
- Cuisine: American
- Diet: Vegetarian
Ingredients
- 1 cup pumpkin puree
- 1/2 cup sugar
- 1/4 cup brown sugar
- 1/3 cup vegetable oil
- 2 large eggs
- 1 1/2 cups all-purpose flour
- 1 teaspoon baking soda
- 1/2 teaspoon baking powder
- 1 teaspoon cinnamon
- 1/2 teaspoon nutmeg
- 1/4 teaspoon salt
Instructions
- Preheat the oven to 350°F (175°C).
- In a large bowl, mix pumpkin puree, sugar, brown sugar, and oil until well combined.
- Add eggs one at a time, mixing well after each addition.
- In another bowl, whisk together flour, baking soda, baking powder, cinnamon, nutmeg, and salt.
- Gradually add dry ingredients to the pumpkin mixture, stirring until just combined.
- Pour the batter into a greased Dutch oven.
- Bake for 45-50 minutes or until a toothpick inserted in the center comes out clean.
- Let cool in the Dutch oven for about 10 minutes, then transfer to a wire rack to cool completely.
Notes
- For a sweeter bread, you can increase the sugar to taste.
- Try adding nuts or chocolate chips for extra texture.
Nutrition
- Serving Size: 1 slice
- Calories: 180
- Sugar: 10g
- Sodium: 150mg
- Fat: 7g
- Saturated Fat: 1g
- Unsaturated Fat: 5g
- Trans Fat: 0g
- Carbohydrates: 26g
- Fiber: 1g
- Protein: 2g
- Cholesterol: 30mg
Keywords: Perfect Dutch Oven Pumpkin Bread, Pumpkin Bread, Fall Recipes