Introduction to Crusty Italian Bread
There’s something magical about the aroma of freshly baked bread wafting through your home. For young professionals, learning how to make crusty Italian bread at home is not just about the taste; it’s a small but significant way to bring comfort and creativity into a busy lifestyle. In a world where takeout is often the default choice after a long day, baking can be a delightful and therapeutic escape.
Why Homemade Bread is a Game Changer for Young Professionals
Have you ever thought about how much time you spend eating out? According to a recent study, the average millennial dines out around four times a week. Imagine swapping just one of those takeout nights with homemade crusty Italian bread. Not only will you save money, but you’ll also know exactly what goes into your meals. With ingredients like flour, water, salt, and yeast, you can create something wholesome and satisfying.
Making your own bread allows for endless variations. You can experiment with different types of flour, herbs, or even mix in ingredients like olives or sun-dried tomatoes for a flavorful twist. Homemade bread can be a perfect canvas for tasty toppings—think turkey bacon, chicken ham, or a simple spread of fresh tomato and basil.
Moreover, the process of baking can be incredibly rewarding. It offers a meditative break from the hustle and bustle of work, turning an ordinary evening into a mini culinary adventure. And let’s not forget the joy of sharing your creation with friends and family. There’s nothing quite like the compliment of having guests enjoy a slice of your homemade crusty Italian bread.
So, gather your ingredients, roll up your sleeves, and let’s dive into the labor of love that is making this wonderful bread from scratch. It’s more than just a recipe; it’s an invitation to enjoy and create, even amidst the chaos of a young professional’s life.
Ready to transform your evenings? Let’s get started with this delightful recipe that welcomes the essence of Italy into your kitchen.

Ingredients for Crusty Italian Bread
Essential ingredients for the perfect loaf
Creating that crusty Italian bread at home is easier than you might think! To get started, you’ll need a handful of simple ingredients that combine to yield a warm, aromatic loaf that’s perfect for any meal. Here’s what you’ll need:
-
Bread flour: This high-protein flour is key to developing that beautiful crust and chewy interior. All-purpose flour can also work, but bread flour will give you the best results.
-
Water: Ideally, use lukewarm water (around 100°F or 38°C). It activates the yeast without killing it, leading to that perfect rise.
-
Yeast: You can use active dry yeast or instant yeast. Either works well, but instant yeast is often more reliable for home bakers.
-
Salt: This essential ingredient not only enhances flavor but also strengthens the dough.
-
Olive oil: While optional, a splash of good olive oil can add richness to the flavor of your crusty Italian bread.
Feel free to explore types of flour, like whole wheat or semolina, for different textures! For more tips on baking bread, check out resources from the Bread Bakers Guild of America. Happy baking!
Step-by-step Preparation of Crusty Italian Bread
Baking your own crusty Italian bread at home may sound daunting, but trust me, it’s a rewarding experience that brings the warm, inviting scent of freshly baked bread into your kitchen. Below, I’ve broken down the process into simple steps to guide you from activating the yeast to that perfect golden crust. Let’s dive in!
Activating the Yeast
Before we can start mixing up our ingredients, we first need to ensure our yeast is alive and kicking. This activation is crucial for a fluffy and airy loaf.
- In a small bowl, combine 1 packet of active dry yeast (about 2 ¼ teaspoons) with 1 cup of warm water—think lukewarm, like a cozy bath (approximately 100°F to 110°F).
- Add a tablespoon of sugar to the water, which feeds the yeast and helps it bloom; give it a gentle stir.
- Let this mixture sit for about 5-10 minutes until it becomes frothy and bubbly. If you don’t see this action, your yeast might be too old, and you should start over with fresh yeast. For more on yeast types and their importance, check out this expert guide.
Mixing and Kneading the Dough
Now it’s time to combine our ingredients. In a large mixing bowl, add:
- 4 cups of all-purpose flour
- 2 teaspoons of salt
- The activated yeast mixture
Using a wooden spoon or your hands, mix until everything is combined. You might be tempted to keep adding more flour, but resist the urge! Your dough should be slightly sticky.
Next comes the kneading:
- Transfer the dough to a floured surface and knead for about 10 minutes until it becomes smooth and elastic.
- Don’t worry if it sticks to your fingers a little; just sprinkle flour as needed.
Kneading develops gluten, which gives the crusty Italian bread its distinctive chewiness.
First Rise and Its Importance
Once kneaded, place your dough in a lightly oiled bowl and cover it with a clean kitchen towel. This is where the magic happens—allow the dough to rise in a warm, draft-free place for about 1 to 2 hours, or until it has doubled in size.
This first rise is crucial because it allows the yeast to ferment and produce carbon dioxide, leading to that lovely texture we crave in our bread. Don’t rush this process; a slow, steady rise often yields better flavor.
Shaping the Loaf
Once your dough has risen, it’s time to shape it into the classic loaf form.
- Gently punch down the dough to release some of the gas.
- Transfer it back to a floured surface and fold it into a ball, tucking the edges underneath.
At this point, you can also shape it into a baguette or any other preferred style. The key is to ensure that the surface is taut, which promotes an even bake.
Second Rise and Making Your Cuts
After shaping, place your loaf on a parchment-lined baking sheet or in a proofing basket. Cover it again with a towel to rise for about 30-60 minutes.
While the dough is rising, preheat your oven to 450°F (232°C). This is the perfect time to make those signature cuts on top of the loaf with a sharp knife or bread lame—this helps the bread expand during baking.
Baking to Perfection
Finally, we arrive at the thrilling moment: baking!
- Place a baking dish filled with water at the bottom of your oven; the steam created will contribute to that crunchy crust we adore.
- Bake your loaf for 25-30 minutes, or until it’s beautifully golden-brown and sounds hollow when tapped on the bottom.
Remove your crusty Italian bread from the oven and let it cool on a wire rack for at least 30 minutes before slicing. Patience pays off, as the flavors will meld and develop richer notes as it cools.
Enjoy the fruits of your labor with some olive oil and herbs or as a part of your favorite sandwich. Who knew that crafting crusty Italian bread at home could be this rewarding? Happy baking!

Variations of Crusty Italian Bread
Adding herbs and spices for flavor
Transforming your crusty Italian bread into a flavor powerhouse can be as simple as incorporating herbs and spices. Fresh rosemary, thyme, or basil not only add aroma but also provide an attractive visual element. Consider adding minced garlic or onion powder for a savory touch. A pinch of red pepper flakes can introduce a delightful kick, making each bite memorable.
Here are a few ideas to get you started:
- Rosemary and Garlic: Perfect for a rustic, aromatic finish.
- Oregano and Parmesan: This combo might just make your bread taste like it came straight from an Italian bakery.
- Dried herbs de Provence: Adds a Mediterranean flair that’s both complex and comforting.
For more inspiration on herb combinations, check out resources like The Spruce Eats.
Experimenting with different flours
Don’t shy away from mixing up your flours when crafting the perfect crusty Italian bread. While all-purpose flour is a staple, whole wheat or semolina can enhance the nutritional profile and texture. Whole wheat flour adds a nutty flavor, while semolina brings a unique graininess that elevates both the taste and the crust.
Consider exploring:
- Rye Flour: For a denser loaf with a slight tang.
- Gluten-Free Flour Blends: Perfect if you’re catering to dietary restrictions without sacrificing flavor.
You can even create a multi-grain blend for a heartier, more satisfying loaf. With so many options, the possibilities for your crusty Italian bread are limited only by your imagination! Don’t forget to check out King Arthur Baking for tips on flour substitutions and ratios.
With these variations, your crusty Italian bread can take on a life of its own, becoming a canvas for flavors that reflect your personal style. Whether you keep it classic or venture into creative territory, the choice is yours!
Cooking Tips and Notes for Crusty Italian Bread
Achieving the Perfect Crust
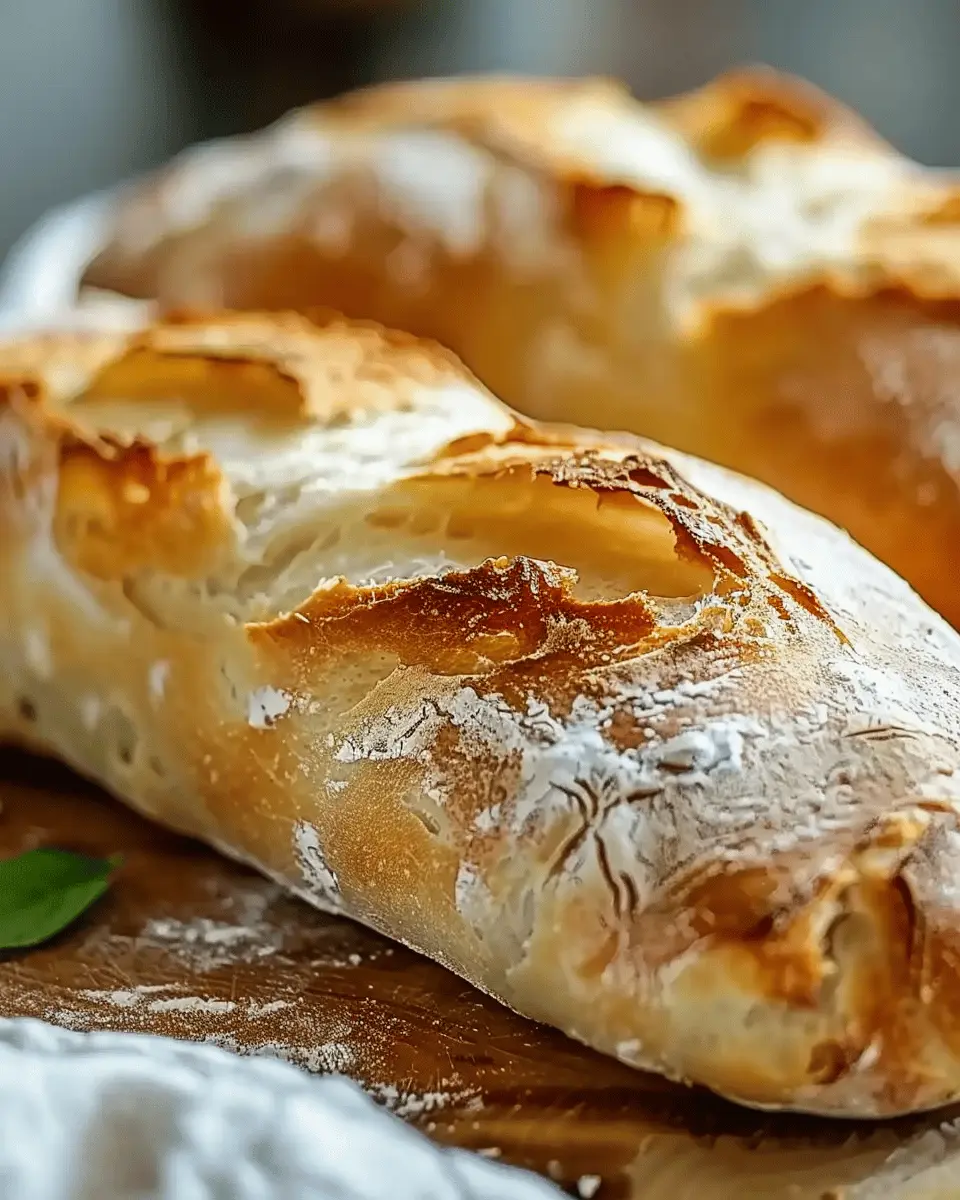
Creating that signature crusty Italian bread requires a few key techniques. First, steam is your best friend—place a pan of water in the oven while baking to generate the moisture necessary for a crispy interior and golden crust. Additionally, a preheated baking stone can help evenly distribute heat and enhance crust development. Try scoring the dough right before baking; this allows the bread to expand beautifully.
Common Pitfalls to Avoid
Even seasoned bakers can run into issues. Here are some common pitfalls to steer clear of:
- Under-kneading: This can lead to a dense loaf. Ensure the dough is smooth and elastic.
- Inaccurate baking temperature: Always use an oven thermometer to verify that your oven’s temperature is accurate.
- Skipping the resting period: Patience is essential. Allow your dough to rise fully for optimal flavor and structure.
For more tips on making artisan breads at home, check out resources from King Arthur Baking and The Bread Lab. Happy baking!

Serving Suggestions for Crusty Italian Bread
Perfect pairings for your crusty loaf
When you have a fresh loaf of crusty Italian bread, the possibilities seem endless! It’s not just about enjoying it plain; there are so many delightful ways to elevate your dining experience.
-
Savory Spreads: Try slathering on some creamy garlic aioli or a rich sun-dried tomato pesto. These spreads are a simple way to add layers of flavor that complement the bread’s crunchy texture.
-
Delicious Sandwiches: Imagine a fresh sandwich made with slices of turkey bacon, layered with creamy avocado and crisp lettuce. Or go for a classic chicken ham and cheese combo—perfect for lunch or a casual dinner.
-
Dipping Platters: Serve slices of your crusty Italian bread with olive oil and balsamic vinegar for a delightful dipping experience. You can also include marinated olives or roasted peppers for an elegant touch.
-
Soup Sides: Crusty bread is ideal for dunking in hearty soups like minestrone or creamy tomato—each bite is undeniably satisfying.
If you’re interested in more ideas, check out articles from resources like Fine Cooking for expert suggestions on serving and pairing your bread. Enjoy the journey of flavors!
Time Breakdown for Crusty Italian Bread
When it comes to making crusty Italian bread, understanding the timing is essential for achieving that perfect loaf. Here’s how the time breaks down:
Preparation time
You’ll spend about 20 minutes getting your ingredients together and mixing the dough. It’s the perfect time to roll up your sleeves and embrace the process!
Rising time
The real magic happens during the first rising, which takes around 1-2 hours, depending on the temperature of your kitchen. A warm environment will speed things up, so don’t forget to cover your dough with a cloth to keep it cozy!
Baking time
Once your dough has risen beautifully, it’s time to bake! Expect about 30-35 minutes in the oven for that golden, crusty exterior that everyone loves.
Total time
In total, you’re looking at around 2-3 hours to create your crusty Italian bread, most of which is hands-off waiting. Perfectly timed for when you want to whip up a delicious sandwich with Turkey Bacon or pair it with a comforting bowl of soup.
Want to know more about baking times? Check out this Helpful Baking Guide for additional tips!
Nutritional Facts for Crusty Italian Bread
Calories per slice
If you’re wondering just how many calories are packed into that slice of crusty Italian bread, the answer is about 80 to 90 calories per slice. Keep in mind, though, that this can vary slightly based on your recipe or any toppings you might decide to pile on!
Macronutrient breakdown
When it comes to nutrition, the macronutrient breakdown of crusty Italian bread is quite simple:
- Carbohydrates: Approximately 15 grams
- Protein: Around 3 grams
- Fat: Usually less than 1 gram
While bread is primarily a source of carbohydrates, it’s important to balance it with proteins and healthy fats in your meals. Integrating ingredients like olive oil or serving it alongside chicken ham or turkey bacon can enhance the nutritional profile. For more insights on the nutritional benefits of bread, check out resources from the USDA.
Remember, moderation is key! Homemade bread can be a delightful addition to your meals. Do you prefer your crusty Italian bread with a spread or on the side?
FAQs about Crusty Italian Bread
When it comes to crusty Italian bread, you might have a few burning questions. Let’s dive right into them!
How can I keep my bread crusty longer?
To maintain that delightful crust on your crusty Italian bread, here are some handy tips:
- Store it properly: Keep your bread in a paper bag for breathability and avoid plastic, which traps moisture.
- Cool it off: If you’ve freshly baked your bread, let it cool completely before wrapping it. This prevents steam from making the crust soft.
- Reheat to refresh: If your bread starts to lose its crunch, simply pop it in the oven at 350°F for about 10 minutes to revive that crispiness.
For more storage techniques, check out this great resource.
Can I freeze crusty Italian bread?
Absolutely! Freezing your crusty Italian bread is a fantastic way to prolong its life. Just follow these steps:
- Slice before freezing: This makes it easy to grab just what you need later.
- Wrap it tightly: Use plastic wrap followed by aluminum foil to protect against freezer burn.
- Thaw properly: When you’re ready to enjoy it, let it thaw at room temperature and then re-crisp it in the oven.
Don’t forget to read about the best practices for freezing bread over at Baker’s Journal.
What can I do with stale bread?
Stale bread should never be wasted; it’s a treasure waiting to be transformed! Consider these delicious options:
- Make croutons: Cube the bread, toss with olive oil and herbs, then bake until golden.
- Create breadcrumbs: Process stale bread in a food processor and use it for coating or as a filler.
- Delicious bread pudding: Stale bread is a key ingredient for this comforting dessert, soaking in custard and spices.
Using stale bread not only reduces waste but also allows you to get creative in the kitchen!
Feel free to explore more fun ideas and recipes with the help of resources like Serious Eats. Enjoy your bread journey!
Conclusion on Crusty Italian Bread
Baking at home is more than just a culinary task; it’s a joyful experience that brings comfort and satisfaction. Imagine pulling a loaf of crusty Italian bread from the oven, its golden crust crackling under your fingertips as you slice it warm. The aroma fills your kitchen, creating a cozy atmosphere that evokes memories and invites friends and family to join you.
Homemade bread allows you to control the ingredients and tailor flavors to your liking, making it a wholesome alternative to store-bought options. Whether you enjoy it with soups, as a sandwich base, or simply with a drizzle of olive oil, the joys of baking your own bread can’t be overstated. So roll up your sleeves and embrace this rewarding craft—you won’t regret it. For a deeper dive into bread baking, check out King Arthur Baking for expert tips and inspiration.
PrintCrusty Italian Bread: The Best Homemade Recipe You’ll Love

Learn how to make the best Crusty Italian Bread at home with this simple recipe that guarantees a delicious crunchy crust and soft interior.
- Prep Time: 20 minutes
- Cook Time: 35 minutes
- Total Time: 2 hours 30 minutes
- Yield: 1 large loaf 1x
- Category: Breads
- Method: Baking
- Cuisine: Italian
- Diet: Vegetarian
Ingredients
- 4 cups all-purpose flour
- 1 ½ cups warm water
- 2 teaspoons salt
- 1 teaspoon sugar
- 2 teaspoons active dry yeast
Instructions
- In a large bowl, combine warm water, sugar, and yeast. Let it sit for about 5 minutes until frothy.
- Add salt and flour, then mix until a dough forms.
- Knead the dough on a floured surface for about 10 minutes.
- Place the dough in an oiled bowl, cover with a damp cloth, and let rise until doubled in size, about 1 to 2 hours.
- Preheat your oven to 450°F (230°C) and place a baking stone inside if you have one.
- Shape the risen dough into a round loaf and place it on a baking sheet if not using a stone.
- Let it rest for another 30 minutes before baking.
- Score the top with a sharp knife and bake for 30-35 minutes until golden brown.
Notes
- For an extra crusty bread, place a pan of water in the oven while baking.
- Bread can be shaped into rolls for individual servings.
Nutrition
- Serving Size: 1 slice
- Calories: 120
- Sugar: 1g
- Sodium: 250mg
- Fat: 1g
- Saturated Fat: 0g
- Unsaturated Fat: 1g
- Trans Fat: 0g
- Carbohydrates: 25g
- Fiber: 1g
- Protein: 4g
- Cholesterol: 0mg
Keywords: Crusty Italian Bread, homemade bread, easy bread recipe