Introduction to Butterfinger Balls
The delightful allure of Butterfinger Balls
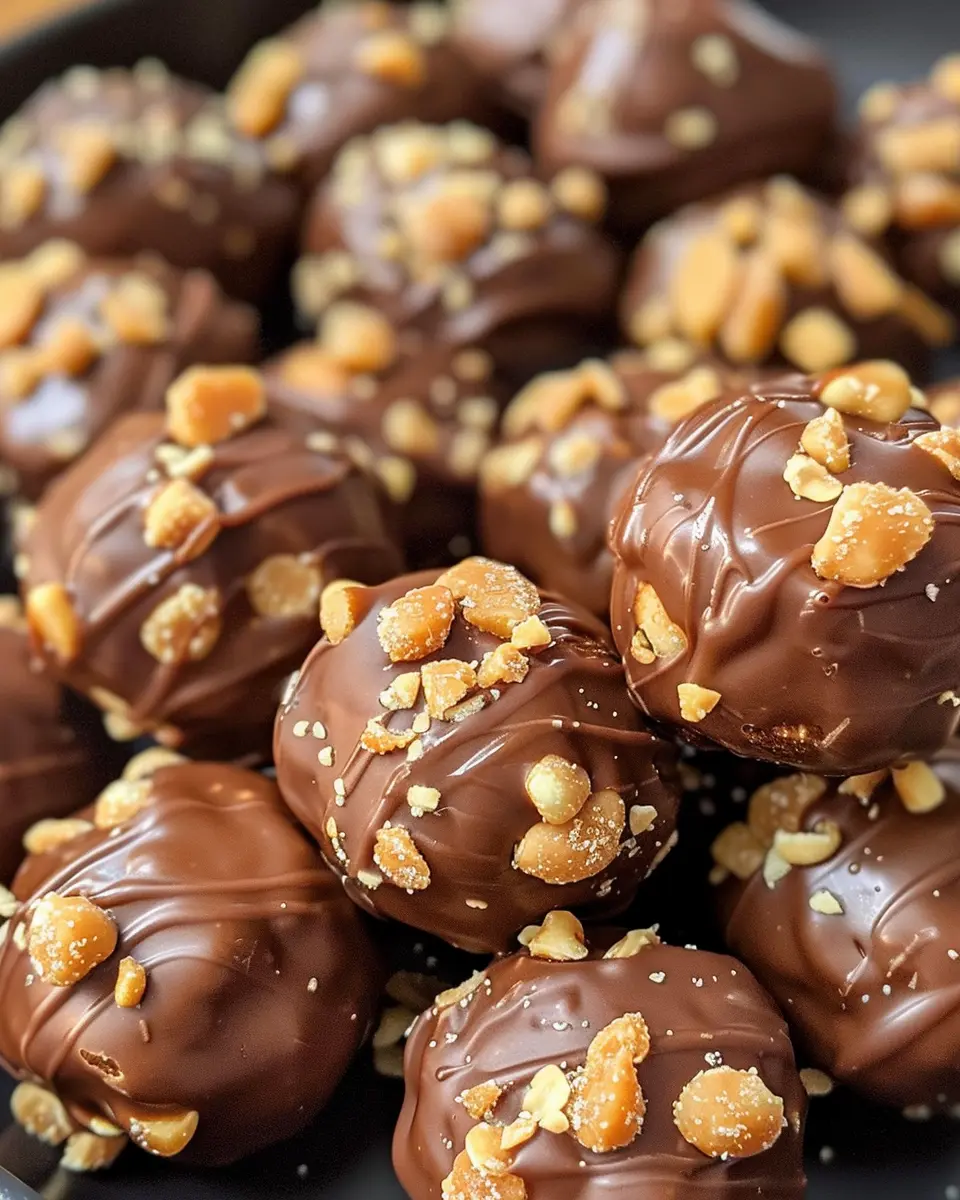
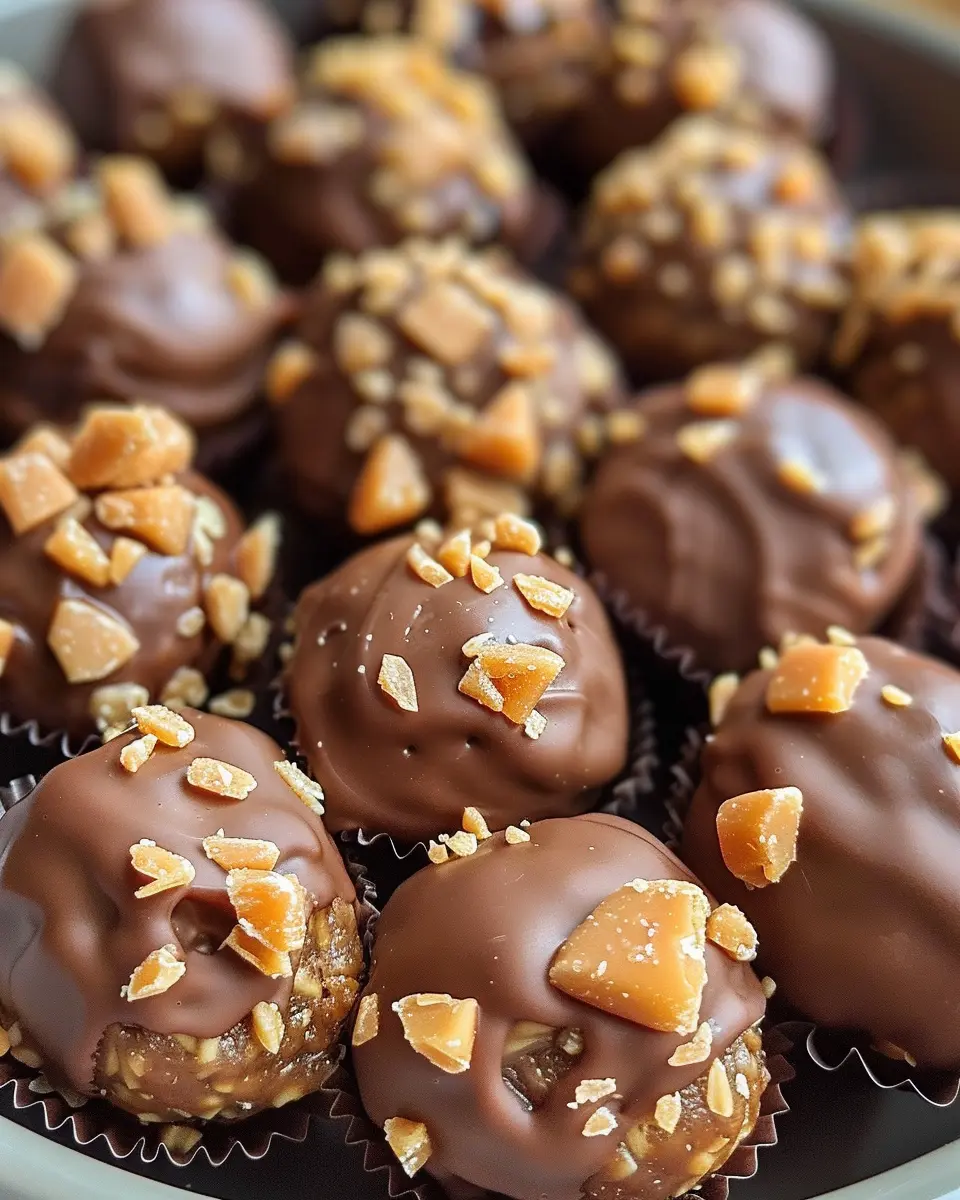
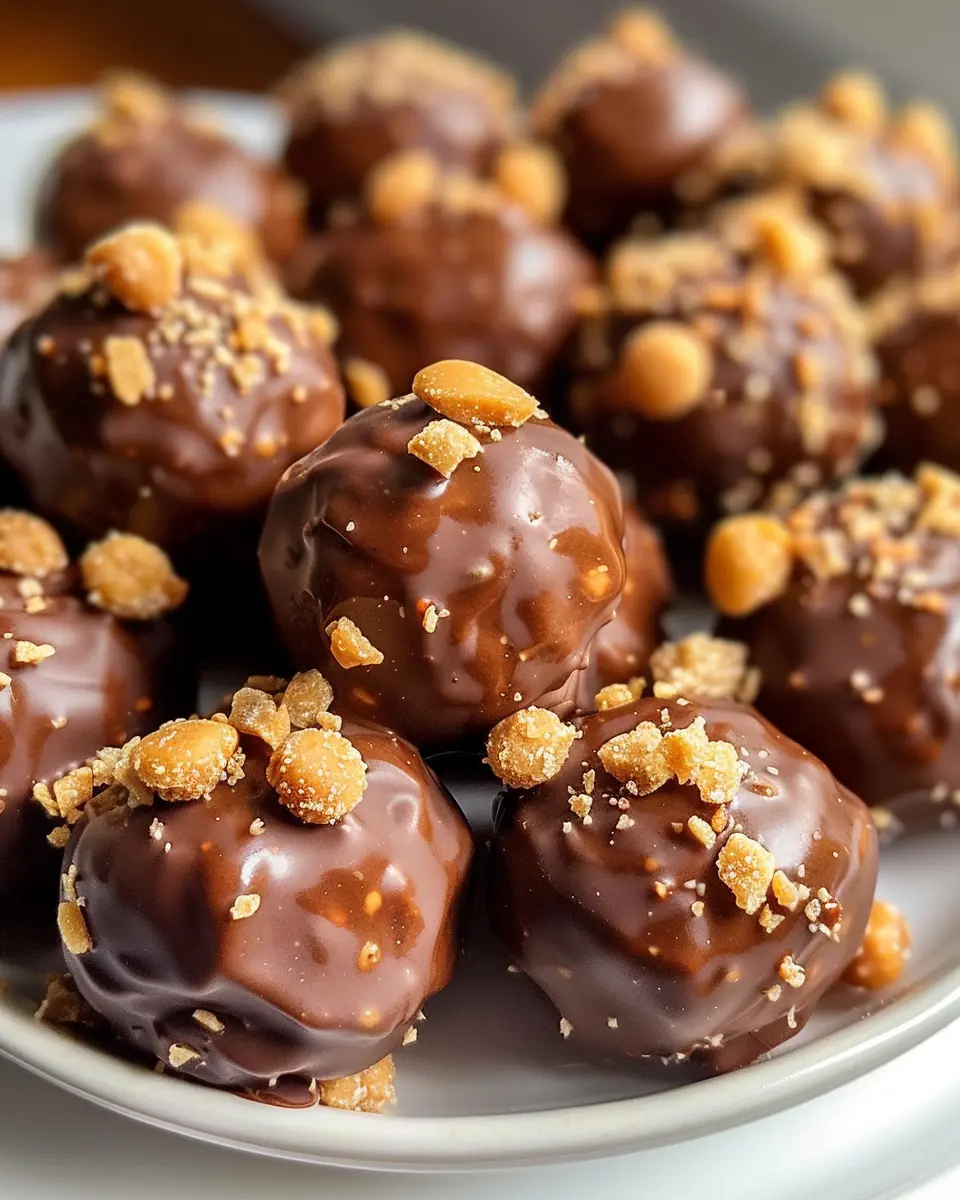
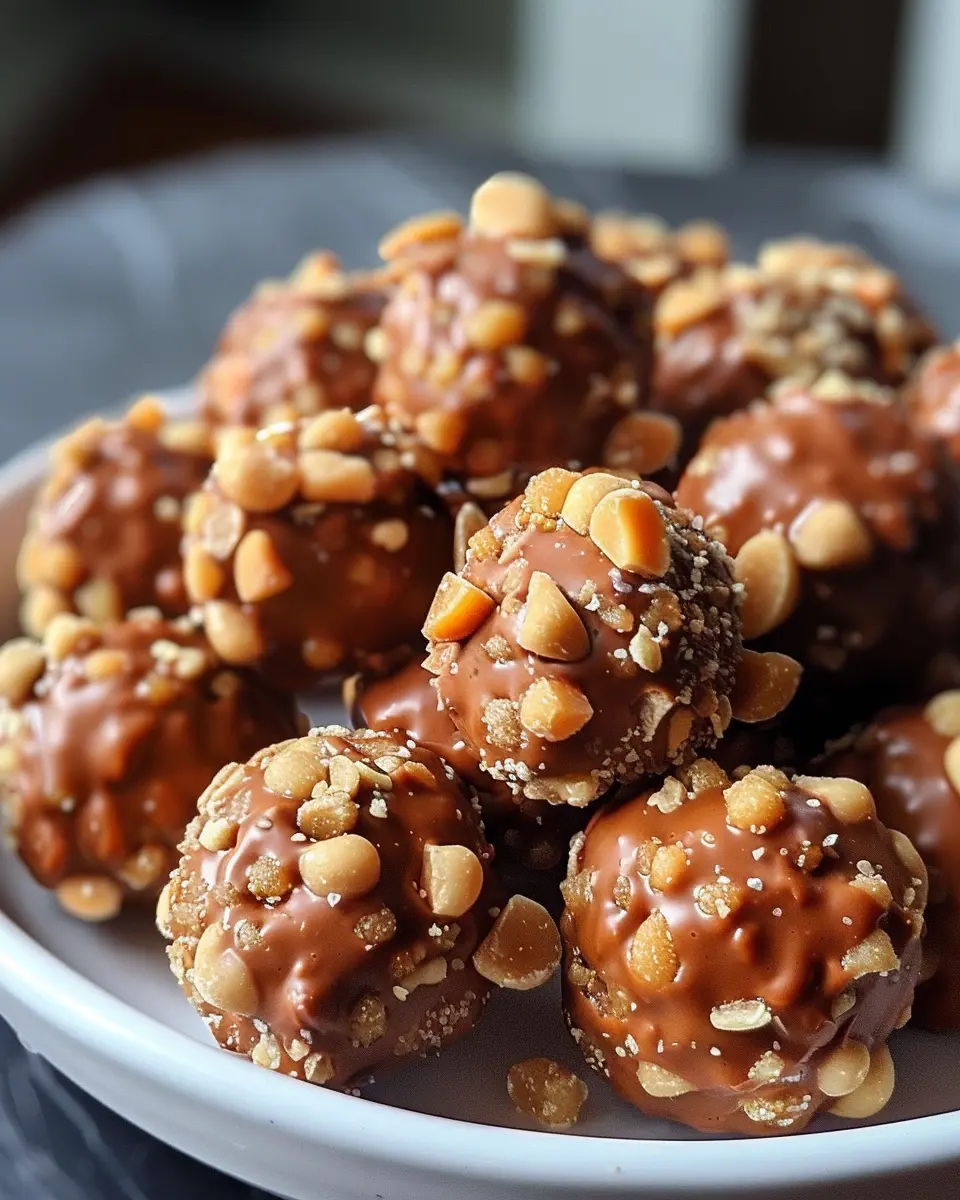
When it comes to sweet treats, few things bring a smile quite like butterfinger balls. These little bites of heaven combine the rich, crunchy goodness of Butterfinger candy bars with a creamy filling, resulting in a delightful dessert that’s hard to resist. Whether you’re making them for a cozy night in or a party with friends, butterfinger balls are guaranteed to impress.
What exactly makes these treats so special? For starters, it’s all about that flavor profile. The crispy peanut butter center, coated in luscious chocolate, offers a unique blend of textures and flavors that keep you coming back for more. Did you know that combining textures in desserts can significantly enhance the eating experience? An article published by the American Journal of Culinary Science indicates that contrasting textures can heighten our enjoyment and satisfaction. So, when you’re munching on those butterfinger balls, you’re not just indulging your sweet tooth; you’re engaging your senses!
But let’s not ignore the fun of creating these treats. Making butterfinger balls can be a delightful ritual; whether you tackle it solo or gather some friends for a mini bake party, the process invites creativity (and maybe a little friendly competition). Just imagine the laughter and excitement as you roll the mixture into balls, dip them in chocolate, and maybe even add a sprinkle of sea salt for that gourmet touch.
If you’re looking for a simple yet engaging recipe to try, butterfinger balls are a perfect fit. The ingredients are easy to find, and you can even customize them with extras like sprinkles or different types of chocolate. You can easily substitute classic Butterfinger bars with other similar candies for a twist.
So, are you ready to dive into the world of butterfinger balls? Not only will you satisfy your sweet cravings, but you might also find that these treats bring people together, creating shared moments and memories. For a full list of ingredients and step-by-step instructions, stay tuned as we reveal the magic of making butterfinger balls.
Ingredients for Butterfinger Balls
Making Butterfinger balls is not only simple but also a delightful project that brings out your inner candy maker. Here’s what you’ll need to whip up this tasty treat:
Key Ingredients
- Butterfinger Candy Bars: About 10 full-size bars. These are the star of the show, providing that iconic, crunchy flavor!
- Cream Cheese: 8 ounces of softened cream cheese. This helps bind your ingredients while adding a creamy texture.
- Chocolate Chips: 1 cup of semi-sweet chocolate chips for coating. You might want to go for a quality brand; it’ll make a difference in taste.
- Peanut Butter: ½ cup of creamy peanut butter. It enhances the flavor and gives that nutty goodness we all love.
- Powdered Sugar: 1 cup. This adds sweetness and structure to your Butterfinger balls.
Optional Ingredients
- Sprinkles or Chopped Nuts: For a fun finishing touch. It’ll make your treats look as good as they taste!
- Extra Chocolate for Drizzling: If you’re feeling fancy, drizzle some melted chocolate on top for that gourmet look.
Now that you’ve gathered everything, you’re ready to create these delicious bites. Trust me, once you taste them, you’ll want to share the love. For more insights into snack preparation, consider checking out resources like The Kitchn for tips on ingredient substitutions and blending techniques. Happy cooking!
Preparing Butterfinger Balls
Creating delectable Butterfinger balls is a delightful process that anyone can enjoy, whether you’re an experienced cook or just starting out. This no-bake treat is perfect for gatherings or as an indulgent snack on a cozy night in. Let’s break down the steps you’ll need to follow for successful preparation.
Gather and Prep Your Ingredients
First things first, ensure you have all your ingredients ready. For the perfect Butterfinger balls, you will need the following:
- 1 cup smooth peanut butter (creamy works best)
- 1/2 cup unsalted butter, softened
- 2 cups powdered sugar
- 1 1/2 cups graham cracker crumbs
- 3 to 5 Butterfinger candy bars, chopped
- 12 oz chocolate chips (dark or milk, depending on your preference)
Pro tip: Measure everything out in advance! This makes the process smoother and more enjoyable. As you gather, you might want to put on your favorite playlist or podcast to keep the cooking vibes light and fun.
Mix the Creamy Base
With your ingredients assembled, it’s time to whip up that creamy base for your Butterfinger balls.
- In a large mixing bowl, combine the softened butter and peanut butter. Use a spatula or a hand mixer to blend them together until the mixture is smooth and fluffy.
- Gradually add in the powdered sugar and mix until fully incorporated. This should create a nice, thick paste.
- Make sure you achieve a consistency that’s easy to scoop; you want it to hold together but not be overly sticky.
Here’s a great link for tips on working with peanut butter: The Best Peanut Butter Uses that might come in handy for future recipes!
Add the Crunch with Graham Crackers and Butterfingers
Now comes the fun part! It’s time to add the crunch.
- Stir in the graham cracker crumbs until they are fully absorbed into the mixture.
- Gently fold in the chopped Butterfinger pieces. You want to make sure they’re evenly distributed throughout the mixture, giving that classic Butterfinger texture and flavor in every bite.
This combination of butterfinger and graham cracker gives your balls a satisfying crunch that contrasts beautifully with the smooth peanut butter.
Shape the Balls and Prepare for Chilling
Here’s where you can get hands-on!
- Using your hands, begin to scoop out the mixture and roll it into bite-sized balls, about 1-inch in diameter.
- Place them on a parchment-lined baking sheet as you work.
Once you have all your Butterfinger balls shaped, pop the baking sheet into the fridge for about 30 minutes. Chilling ensures the balls firm up nicely, making them easier to coat later.
Melt the Chocolate and Coat the Balls
While your Butterfinger balls chill, it’s time to prepare the chocolate coating.
- In a microwave-safe bowl, heat your chocolate chips in 30-second intervals, stirring in between until the chocolate is completely melted and smooth.
- Once the chocolate is ready, remove the Butterfinger balls from the fridge. Dip each ball into the melted chocolate, allowing any excess chocolate to drip off before placing them back on the parchment-lined sheet.
For an extra touch, consider sprinkling mini crumbled Butterfingers on top of the chocolate coating before it sets!
Once coated, return the chocolate-covered balls to the fridge to harden completely.
And there you have it! This isn’t just a recipe; it’s an experience. Making Butterfinger balls is quick and fulfilling, leading to a delicious treat that you can proudly share with family and friends. Remember, these little gems aren’t just for special occasions—indulge whenever the mood strikes!
Variations on Butterfinger Balls
When it comes to butterfinger balls, the classic recipe offers endless potential for personalization. Whether you’re catering to specific tastes or looking for a fun twist, consider these delightful variations to impress your friends and family.
Peanut Butter Lovers’ Version
For those who can’t resist a bit more peanut flavor, this variation amps up the indulgence. Swap out the original peanut butter for a chunky variety or even try peanut butter powder for an extra crunch. By doing this, you create a textural contrast that takes these butterfinger balls to a new level. For a sweeter touch, consider mixing in a splash of vanilla extract to elevate the taste.
Dark Chocolate Delight
If you’re a fan of dark chocolate, why not switch from milk chocolate to a rich 70% cocoa dark chocolate? This variation not only adds a gourmet flair but also balances the sweetness of the filling. The slight bitterness of dark chocolate complements the sweet, peanut buttery interior beautifully. After dunking your butterfinger balls, you can also sprinkle some sea salt on top for that perfect salty-sweet contrast.
Festive Seasonal Versions
Looking to celebrate a season or holiday? Transform your butterfinger balls into festive treats! Incorporate seasonal flavors like pumpkin spice during fall or peppermint extract around the holidays. You can roll the balls in crushed candy canes or colorful sprinkles to make them even more appealing. These alterations not only enhance the flavor but also add visual appeal, making them perfect for parties.
With these variations, your butterfinger balls can suit any occasion or preference. Enjoy experimenting and let your creativity shine! For more ideas, check out The Kitchn or Serious Eats.
Cooking Tips and Notes for Butterfinger Balls
Creating the perfect butterfinger balls is all about finesse and a touch of creativity. Here are some essential tips to elevate your delightful treats.
Choose the Right Peanut Butter
Opt for a creamy, high-quality peanut butter. Natural brands often yield the best flavor and texture. If you prefer a bit of crunch, consider adding chopped peanuts for an extra layer of flavor.
Temper the Chocolate
When coating your butterfinger balls, tempering the chocolate ensures a shiny finish and a satisfying snap. It also helps to prevent the chocolate from melting too quickly when bitten into. Need a quick guide? Check out this resource for tips.
Chill Before Dipping
Allow your formed balls to chill in the refrigerator for at least 30 minutes before dipping in chocolate. This helps them hold their shape and makes the coating easier to manage.
Experiment with Flavors
Feel free to get creative with toppings. Chopped nuts, sprinkles, or even a drizzle of white chocolate can add a sophisticated touch to your butterfinger balls.
By following these simple yet effective tips, you’ll create delicious, crowd-pleasing treats that are perfect for any occasion. Happy cooking!
Serving Suggestions for Butterfinger Balls
When it comes to serving your delightful Butterfinger Balls, presentation can elevate these treats from simple snacks to stunning desserts. Here are some creative suggestions to make your treats even more appealing:
Pair with Fresh Fruit
Consider arranging your Butterfinger Balls alongside fresh fruits such as strawberries, bananas, or apples. The contrast of the crunchy, chocolatey goodness with the juiciness of the fruit can enhance both texture and flavor. For a colorful platter, mix in some grapes and citrus slices as well.
Fabulous Dips
Serving your Butterfinger Balls with a side of creamy dips can be a game-changer. Try pairing them with a light vanilla yogurt or a luscious chocolate ganache. This way, each bite can be a new experience!
Creative Gift Options
Looking for a unique gift idea? Package your Butterfinger Balls in a cute box or mason jar tied with a ribbon. It’s a thoughtful treat for friends, co-workers, or even for a special occasion. This personal touch can make a simple snack feel extra special.
Perfect Drinks to Accompany
On the drink side, consider serving these treats with a refreshing glass of iced coffee or a cool, non-alcoholic sparkling lemonade. The lightness of these beverages complements the rich flavor of the Butterfinger Balls beautifully.
Whether for a party, a casual gathering, or just a treat for yourself, these serving suggestions can help you take your Butterfinger Balls to the next level.
Time breakdown for Butterfinger Balls
Preparation Time
Getting started on your Butterfinger Balls is easy and quick! You’ll need about 15 minutes to mix the ingredients and roll the balls into shape. It’s a fun process, and trust me, the end result is definitely worth the effort.
Chilling Time
Once your Butterfinger Balls are shaped, they’ll need to chill in the refrigerator for 30 minutes. This step is crucial as it helps them firm up and makes them easier to dip in chocolate later.
Total Time
All in all, expect about 45 minutes from start to finish. This includes both preparation and chilling time. Perfect for those quick snack cravings or fun get-togethers!
For more tips on recipe timing and techniques, check out The Culinary Institute of America for expert insights. You may even find inspiration for your next dessert challenge!
Nutritional Facts for Butterfinger Balls
When it comes to indulging in treats, Butterfinger Balls are delectable bites that can fit into your lifestyle without too much guilt. Here’s what you need to know:
Calories
Each serving of Butterfinger Balls typically contains about 120 calories. While they are certainly a sweet treat, enjoying them in moderation can help you satisfy your sweet tooth without going overboard.
Sugars
With approximately 10 grams of sugar per ball, these candies are indeed sweet! If you’re keeping an eye on your sugar intake, this is worth noting. Consider pairing them with a protein-rich snack to balance the sweetness.
Protein
Surprisingly, Butterfinger Balls provide a small amount of protein, around 2 grams per serving. While they aren’t a primary source of protein, they can be a delightful treat to enjoy post-workout or during a midday slump.
For more information on maintaining a balanced diet while enjoying treats, you can check out resources like the American Heart Association or USDA’s Nutrition Data. Knowing the nutritional composition can help you make informed choices that align with your health goals!
FAQs about Butterfinger Balls
Can I use different types of candy?
Absolutely! The beauty of making Butterfinger Balls is that you can customize them to your taste. While the classic recipe uses Butterfinger candy bars for that distinct crunch and peanut butter flavor, feel free to experiment. Some great alternatives include:
- Reese’s Peanut Butter Cups for a richer, chocolatey twist.
- Snickers bars for a delightful caramel and nutty addition.
- Crunch bars if you’re looking for something with a similar texture but a different flavor profile.
Mixing candy can lead to some unique flavor combinations that your friends and family will love!
How to store leftover Butterfinger Balls?
Leftover Butterfinger Balls? Consider yourself lucky! To keep them fresh, store them in an airtight container. Here are some simple guidelines:
- Refrigerate: They can last up to a week in the fridge. Just make sure they’re in a sealed container to maintain their texture.
- Freeze: If you want to enjoy these treats months later, they can be frozen for up to three months. Simply layer them in a container with parchment paper between layers to prevent sticking.
What can I substitute for graham crackers?
If you’re looking to switch out the graham crackers in your Butterfinger Balls, there are plenty of tasty options. Some popular substitutes include:
- Vanilla wafers, which provide a nice sweetness and crumbly texture.
- Digestive biscuits for a richer flavor.
- Oats, if you’re in the mood for a healthier crunch.
Whichever you choose, remember that the aim is to get that perfect blend of crunch and flavor!
For more insights, check out this article on creative dessert substitutions.
Conclusion on Butterfinger Balls
In wrapping up our delightful journey into the world of Butterfinger Balls, it’s clear these treats are a simple yet indulgent addition to any dessert spread. With just a handful of ingredients, you can whip up a batch that combines the rich, chocolatey flavors with the irresistible crunch of peanut butter.
Here are a few highlights to keep in mind:
- Perfect for parties: These little bites make a memorable impression.
- Easy to customize: Add a sprinkle of sea salt for a gourmet touch or adjust the chocolate coating to find your perfect balance.
Whether you enjoy them fresh or share them as a thoughtful gift, Butterfinger Balls are sure to bring smiles all around. Ready to make your own? Don’t forget to check out this helpful guide on candy-making techniques for an extra boost!
PrintButterfinger Balls: Easy No-Bake Treats for Everyone’s Sweet Tooth
These Butterfinger Balls are a quick and easy no-bake treat that everyone will love. Perfect for satisfying your sweet tooth!
- Prep Time: 15 minutes
- Cook Time: 0 minutes
- Total Time: 45 minutes
- Yield: 24 balls 1x
- Category: Dessert
- Method: No-Bake
- Cuisine: American
- Diet: Vegetarian
Ingredients
- 1 cup crushed Butterfinger candy bars
- 1 cup smooth peanut butter
- 1 cup graham cracker crumbs
- 1 cup powdered sugar
- 2 cups chocolate chips
- 1 tablespoon vegetable oil
Instructions
- In a bowl, combine crushed Butterfinger candy bars, peanut butter, graham cracker crumbs, and powdered sugar until well mixed.
- Roll the mixture into small balls and place them on a baking sheet lined with parchment paper.
- Melt chocolate chips and vegetable oil together in a microwave or double boiler.
- Dip each ball into the chocolate mixture, ensuring they are fully coated, and return them to the baking sheet.
- Refrigerate until set, about 30 minutes.
Notes
- For a crunchy texture, you can leave some Butterfinger pieces aside and sprinkle them on top of the balls after coating.
- Store in an airtight container for up to one week.
Nutrition
- Serving Size: 1 ball
- Calories: 120
- Sugar: 10g
- Sodium: 50mg
- Fat: 6g
- Saturated Fat: 3g
- Unsaturated Fat: 2g
- Trans Fat: 0g
- Carbohydrates: 15g
- Fiber: 1g
- Protein: 3g
- Cholesterol: 0mg
Keywords: Butterfinger Balls, no-bake treats, desserts