
Introduction to Artisan Bread Recipe
Artisan bread is more than just a side to a meal; it embodies a sense of accomplishment and creativity that busy young professionals can truly appreciate. With its enticing crust and airy crumb, there’s something incredibly satisfying about biting into a loaf you’ve made yourself. If you’ve ever looked at artisanal bread in a bakery and thought, “I could never do that,” let me assure you, with the right artisan bread recipe, you absolutely can.
Why artisan bread is the perfect solution for busy young professionals
In today’s fast-paced world, finding the time to cook can be a challenge. Yet, preparing an artisan loaf can be surprisingly manageable, even during a hectic week. Think about it: most artisan bread recipes require minimal hands-on time. A little mixing and kneading, followed by some glorious hours of letting the dough rise—all while you catch up on your favorite TV show or finish that work presentation.
-
Time Efficient: Artisan bread can often be prepared in just a few steps, with the most substantial portion of time spent allowing the dough to rise. Some recipes even encourage overnight fermentation, which means you can whip up your dough before bed and bake it fresh in the morning.
-
Budget-Friendly: High-quality artisan loaves can be pricey, but crafting your own not only saves money, but allows you to control the ingredients and make flavors that truly excite your palate.
-
Healthier Choices: Unlike store-bought bread, you have the power to choose whole grains, seeds, and other nutritious ingredients which can boost your overall health.
-
Impress Your Friends: Nothing quite compares to breaking bread among friends. Whether it’s with fresh Turkey Bacon for breakfast or paired with creamy soups for dinner, your home-baked artisan loaf will surely be the star of the show.
By investing some time in making your own bread, you’re really investing in your meals, your health, and even your social life. Take a little step back from the takeout menus and embrace the magical world of baking—let’s explore how to craft your own delicious artisan bread!
Still hesitant? Check out The Bread Lab for expert insights on how simple baking bread can be!
Ingredients for Artisan Bread Recipe
When it comes to creating a mouthwatering artisan bread recipe, the magic truly lies in the simplicity of the ingredients. With just a handful of essentials, you can craft that delicious loaf in your own kitchen. Let’s break down what you’ll need for a no-knead artisan bread that impresses without the fuss.
Essential Ingredients for a No-Knead Artisan Bread
- All-Purpose Flour: About 3 cups is ideal. This versatile flour gives your bread the structure and chewiness it needs.
- Warm Water: You’ll require roughly 1.5 cups. This helps to activate the yeast, so make sure it’s comfortably warm, not too hot.
- Active Dry Yeast: Just 1/4 teaspoon works like a charm. If you’d like to dive deeper into yeast types, check out this expert guide.
- Salt: One teaspoon will enhance the flavor—thanks to salt, every bite will burst with goodness.
- Optional Olive Oil: A tablespoon adds richness and a slight crispiness to your crust.
Armed with these ingredients, you’ll be on your way to creating a rustic, artisanal loaf that’s perfect for any meal! Remember, the joy is in the simplicity, and with a little patience, you’ll have fresh, homemade bread that’s worth sharing.
Preparing Artisan Bread
Making your own artisan bread at home is not just about baking; it’s an enjoyable and rewarding experience that fills your kitchen with delightful aromas. Let’s walk through each step of the artisan bread recipe, ensuring that you achieve a crusty, delicious loaf that impresses everyone, from friends to family.
Gather Your Ingredients
Before diving into the mixing bowl, it’s essential to gather all your ingredients. For an authentic artisan bread recipe, you’ll need:
- 4 cups of all-purpose flour
- 2 teaspoons of salt
- 1 teaspoon of instant yeast
- 1½ cups of warm water (about 100°F or 38°C)
- A large mixing bowl and a wooden spoon or spatula
Preparation is key. Making sure you have everything at hand helps the process go smoothly, and you’ll feel like a pro from the get-go!
Mix the Dry Ingredients Together
In your large mixing bowl, combine the flour, salt, and instant yeast. Remember, the order matters! Mixing the yeast with the flour helps ensure even distribution throughout the dough. Utilize a spatula or a wooden spoon to thoroughly combine the dry ingredients. This step seems simple, but the right mixing ensures a balanced flavor and texture in your artisan loaf.
Combine with Warm Water
Now it’s time to incorporate the warm water into the mix. Pour the water into your dry ingredients and stir until everything comes together. You want a shaggy, sticky dough — resist the urge to add more flour! This will lead to the best artisan bread recipe with excellent crumb and texture. If you’re curious about hydration levels in bread, you can read more about it here to further your skills.
Let the Dough Rise
Cover your bowl with a clean kitchen towel or plastic wrap, and place it in a warm area of your kitchen. Allow the dough to rise for at least 12 to 18 hours. This slow fermentation allows the flavor profiles to develop naturally, giving your bread that distinctive taste that artisan loaves are known for. Using time to your advantage is key in baking!
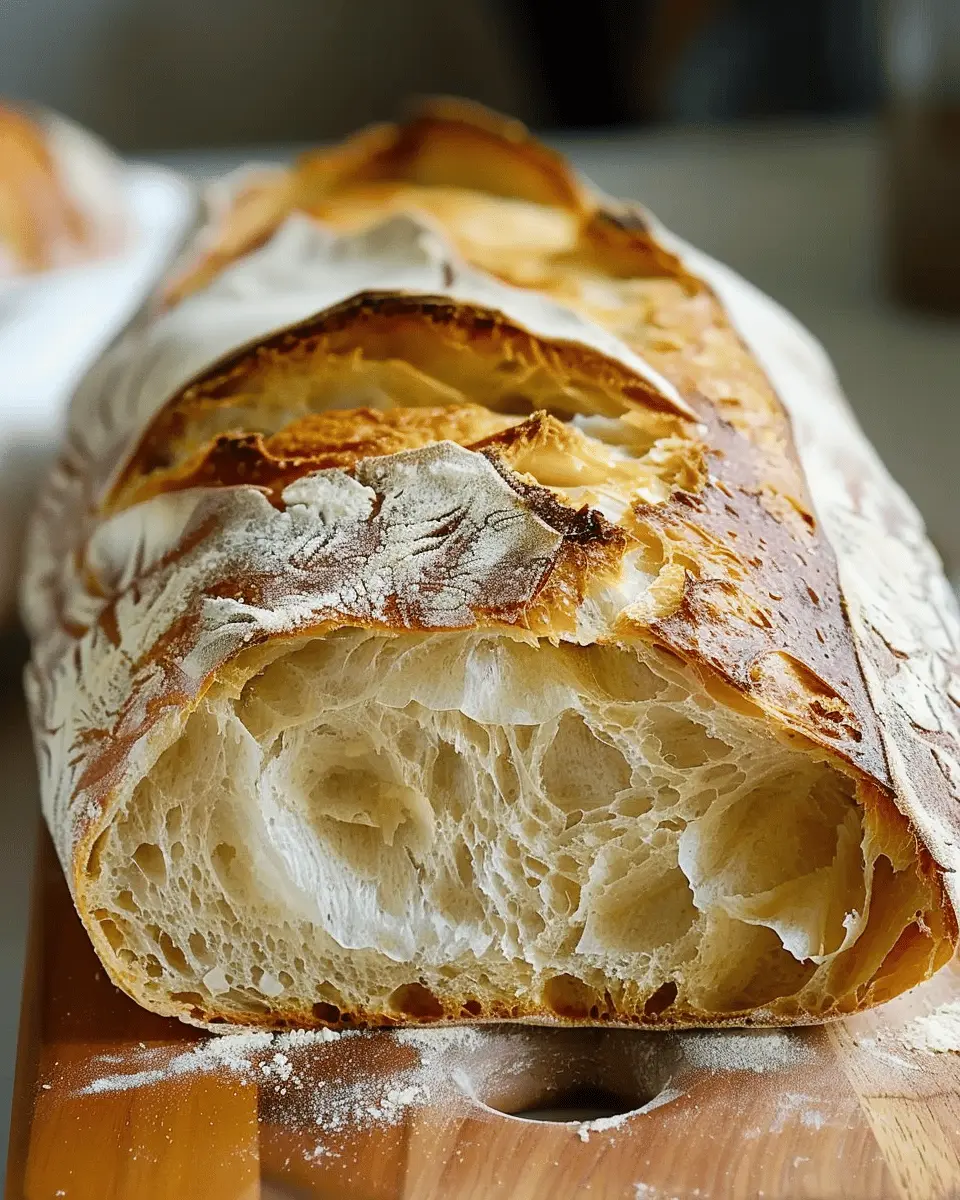
Shape Your Artisan Bread
After the dough has risen and become bubbly, it’s time to shape it. Lightly flour a clean surface and turn out the dough. With floured hands, gently fold the edges into the center of the dough, creating a round shape. Let it rest for about 15 minutes. After resting, subtly stretch and shape the dough into a round loaf or a baguette form, depending on your preference.
Preheat Your Oven
Place a Dutch oven inside your regular oven and preheat it to 450°F (232°C). Preheating the Dutch oven creates a steam environment, resulting in a crusty exterior. If you don’t have one, try placing a cast iron skillet on the bottom rack of your oven with some water to create steam instead.
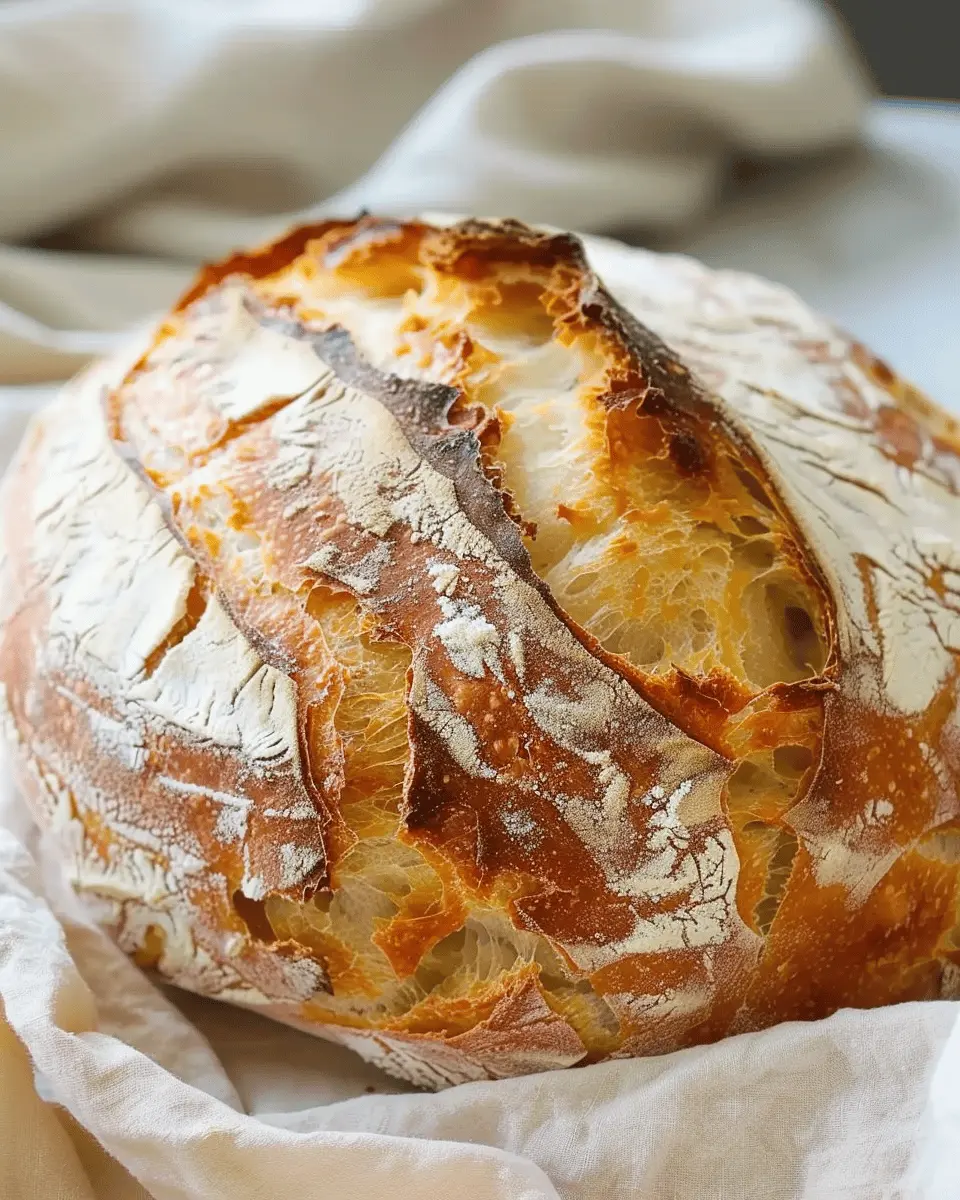
Bake the Bread for the Perfect Crust
Once the oven is preheated, carefully remove the Dutch oven. Gently place your shaped dough inside (you can use parchment paper to make this easier). Cover it and bake for 30 minutes. After that, remove the cover and continue baking for another 15-20 minutes until you achieve that beautiful golden crust. The internal temperature of the bread should be around 200°F (93°C) when it’s fully baked. You can check the temperature with a kitchen thermometer.
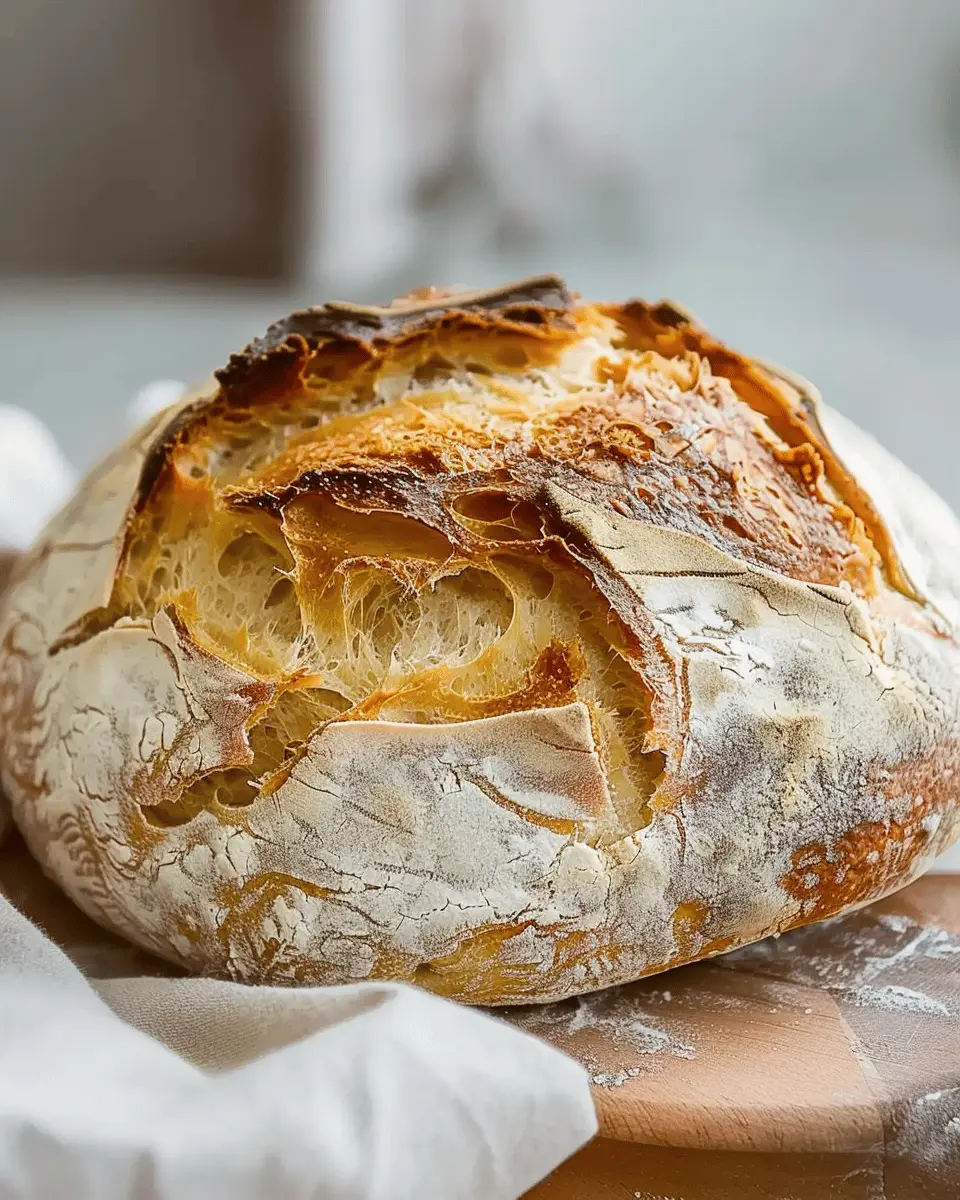
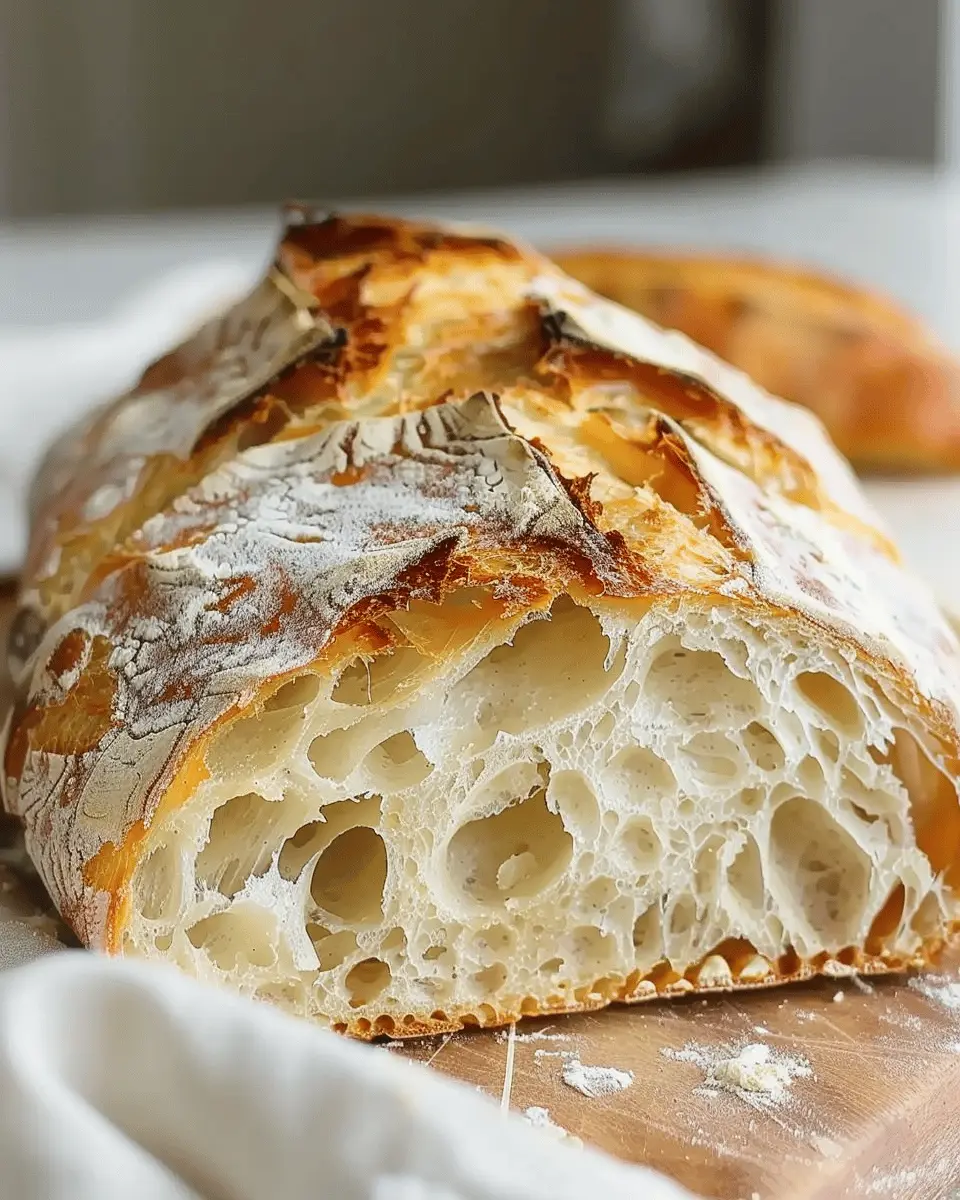
Cool and Slice Your Artisan Loaf
Once the bread is beautifully baked, remove it from the Dutch oven and let it cool on a wire rack for at least 30 minutes. This resting period is crucial for flavor and texture, as still-warm bread can become gummy. After cooling, slice your artisan loaf and enjoy it with olive oil, dipping sauces, or paired with your favorite Turkey Bacon or Chicken Ham.
By following these straightforward steps, you’ll master the art of baking artisan bread. Share your experience with others and don’t hesitate to experiment with flavors by adding herbs or spices in your next batch! Happy baking!
Variations on Artisan Bread
Artisan bread is remarkably versatile, allowing you to express your creativity in the kitchen. Here are three delightful variations you can try that will elevate your baking game.
Herb-infused Artisan Bread
Imagine slicing into a warm loaf of herb-infused artisan bread, the aroma of fresh herbs wafting through your kitchen. You can easily incorporate your favorite herbs into the dough, such as rosemary, thyme, or basil. Simply chop a handful of fresh herbs and knead them into the dough during the mixing stage. For a twist, consider pairing this bread with a robust olive oil for dipping.
Whole Wheat Artisan Bread
If you’re looking for a healthier twist, try baking whole wheat artisan bread. Not only does it add a nutritious punch, but it also gives your loaf a delightful nuttiness. When creating your artisan bread recipe, substitute about half of the all-purpose flour with whole wheat flour. You might want to add a bit more water to ensure the dough remains hydrated. This type of bread pairs wonderfully with salads or as a base for open-faced sandwiches.
Artisan Bread with Seeds and Nuts
For those who crave a bit of crunch, an artisan bread with seeds and nuts is the way to go! Think sesame seeds, sunflower seeds, or even chopped walnuts folded into your dough. These ingredients not only enhance the flavor but also boost the nutritional profile. You can mix them directly into your dough or sprinkle them on top before baking for an appealing presentation.
Ready to take your baking skills to the next level? These variations are just the beginning! Don’t hesitate to experiment further and make them your own. For more inspiration, check out resources like King Arthur Baking for expert tips and techniques. Happy baking!
Cooking Notes and Tips for Artisan Bread
Common Mistakes to Avoid
Making an artisan bread recipe at home is a rewarding experience, but errors can happen. Here are some common pitfalls to dodge:
- Inaccurate Measurements: Baking is a science! A digital scale can help ensure you get precise measurements.
- Under-kneading: Adequate kneading develops gluten, which gives your bread that perfect chewy texture. Don’t skimp on this step!
- Skipping the Fermentation: Allowing your dough to ferment properly enhances flavors. Patience is key.
Storing Your Bread Correctly
To preserve the freshness of your homemade bread, it’s essential to store it properly:
- Room Temperature: Keep your loaf wrapped in a clean kitchen towel or a paper bag at room temperature. This prevents it from becoming too dry.
- Freezing: If you want to save some for later, slice the bread and freeze it in an airtight bag. Just toast slices directly from frozen for the best results.
Looking for more cooking advice? Check out this guide for additional tips on artisan bread. Happy baking!
Serving Suggestions for Artisan Bread
Pairing with Oils and Vinegars
One of the most delightful ways to enjoy your artisan bread recipe is to pair it with high-quality oils and vinegars. Dipping a warm slice into a rich balsamic vinegar or extra virgin olive oil can elevate the flavor profile of your bread exponentially. Consider enhancing your experience with:
- Flavored Olive Oils: Garlic, herb, or chili-infused oils add a kick.
- Balsamic Reduction: Its sweetness beautifully complements the rustic texture of artisan bread.
- Herb-Infused Vinegar: Try rosemary or thyme for a punch of flavor.
These simple pairings not only accentuate the rich taste of your bread but also make for a stunning appetizer when hosting friends—after all, who doesn’t love sharing flavorful bites?
Using Artisan Bread for Sandwiches
If you’re in the mood for something hearty, artisan bread makes a fantastic base for sandwiches. The crusty exterior and soft interior provide a satisfying bite. Here are some scrumptious ideas:
- Turkey Bacon with Avocado: Layer crispy turkey bacon, smashed avocado, and a sprinkle of salt for a refreshing twist.
- Chicken Ham and Cheese: Combine thinly sliced chicken ham with your favorite aged cheese and some arugula for that perfect balance of flavors.
- Vegetarian Delight: Create a vibrant sandwich with roasted vegetables, hummus, and fresh greens for a guilt-free treat.
Your artisan creations not only satiate but also impress, whether it’s a lunch meal or a picnic treat. To dive deeper into the art of sandwich-making, check out this incredible guide that showcases unique combinations and tips!
Time Breakdown for Artisan Bread
When you’re diving into an artisan bread recipe, it’s crucial to keep track of time to achieve that perfect loaf. Here’s how the timing breaks down:
Prep Time
Expect to spend about 30 minutes on prep, which includes mixing your ingredients and shaping the dough. It’s a hands-on process but a rewarding one!
Rising Time
Rising is where the magic happens and can take anywhere from 2 to 4 hours. Be patient! A longer rise allows flavors to develop beautifully.
Cooking Time
Baking your bread will need around 30 minutes in the oven. This is the time when your kitchen will fill with the irresistible aroma of freshly baked bread.
Total Time
All things considered, your total time will be approximately 3 to 5 hours, depending on the rising time you choose. While it may seem lengthy, most of it is hands-off!
For more tips on how to make the perfect artisan bread at home, check out King Arthur Baking’s guide for additional insights and expert advice. Happy baking!
Nutritional Facts for Artisan Bread
Calories per slice
When you’re indulging in a slice of artisan bread, you’re typically consuming around 80-120 calories depending on the specific ingredients and portion size. This makes it a delightful yet moderate choice for your meals or snacks.
Key nutrients in artisan bread
So, what makes this artisan bread recipe a healthy option? Let’s break it down:
- Carbohydrates: A great source of energy, artisan bread boasts complex carbohydrates that keep you fueled throughout the day.
- Fiber: Whole grain versions provide ample dietary fiber, important for digestive health and maintaining a steady blood sugar level source.
- Protein: While not a significant source, the protein content can contribute to your daily intake, especially if enjoyed with toppings like turkey bacon or chicken ham.
- Vitamins & Minerals: Typically rich in B vitamins and essential minerals like iron and magnesium, artisan bread can help support overall health.
By including artisan bread in your diet, especially if you opt for whole grain or seeded varieties, you can savor a delicious treat while still staying mindful of your nutritional needs.
FAQs about Artisan Bread
What is the best yeast to use for artisan bread?
When it comes to an artisan bread recipe, active dry yeast and instant yeast are both excellent choices. Active dry yeast requires hydration before use, while instant yeast can be mixed directly with your dry ingredients. For a more traditional approach, you might consider using sourdough starter. It adds a unique flavor and texture, and it’s great for experimenting!
Can I use different types of flour?
Absolutely! The beauty of artisan bread lies in its versatility. You can mix and match flours to suit your taste. Common options include whole wheat, spelt, or even rye flour. Just keep in mind that different flours absorb water differently, so you may need to adjust your hydration levels accordingly. For more tips, check out resources like the King Arthur Baking Company.
How do I achieve a crusty loaf?
A crusty loaf is all about steam and temperature. Preheat your oven to a high temperature (around 450°F) and place a pan of water on the bottom rack to create steam. Additionally, using a baking stone can help imitate a professional oven. Lastly, don’t be afraid to experiment with baking times and temperatures until you find that perfect crust.
What should I do if my dough doesn’t rise?
If your dough isn’t rising, don’t panic! First, check if your yeast is fresh by proofing it in warm water with a bit of sugar; if it bubbles, you’re good to go! Ensure your dough is in a warm, draft-free place; sometimes, a simple shift in location can make a significant difference. If all else fails, you can always add flour to your next batch and incorporate more yeast to get that dough rising beautifully.
By addressing these common concerns, you’ll be well on your way to mastering your own artisan bread recipe! Happy baking!
Conclusion on Artisan Bread
Embracing homemade bread in your everyday life
Incorporating an artisan bread recipe into your routine can transform both your cooking and dining experiences. Imagine the warm, aromatic scent of fresh bread wafting through your kitchen, inviting everyone to gather around the table. Not only is making bread a delicious and rewarding endeavor, but it’s also a fantastic way to embrace a more mindful approach to eating.
Consider swapping store-bought options for your homemade loaves. This allows you to control ingredients and experiment with flavors—think herbs, spices, or even Turkey Bacon! Plus, the tangible satisfaction of kneading dough and watching it rise is second to none. To deepen your bread-making journey, check out resources like King Arthur Baking and The Bread Lab for inspiration, tips, and community support. Dive into this joyful culinary adventure and savor each bite!
PrintArtisan Bread Recipe: Easy Steps for Homemade Flavor Delights

Learn how to make artisan bread at home with this easy-to-follow recipe.
- Prep Time: 15 minutes
- Cook Time: 40 minutes
- Total Time: 18 hours 55 minutes
- Yield: 1 loaf 1x
- Category: Bread
- Method: Baking
- Cuisine: American
- Diet: Vegetarian
Ingredients
- 4 cups all-purpose flour
- 1 ½ cups warm water
- 1 tablespoon salt
- 1 teaspoon instant yeast
Instructions
- In a large bowl, mix the flour, salt, and yeast together.
- Add warm water and mix until a shaggy dough forms.
- Cover the bowl with plastic wrap and let it rise for 12 to 18 hours.
- Preheat the oven to 450°F (230°C).
- Shape the dough into a ball and let it rest for 30 minutes.
- Transfer to a preheated Dutch oven and bake for 30-40 minutes.
Notes
- For a crustier bread, use a baking stone instead of a Dutch oven.
- You can let the dough rise longer for a more complex flavor.
Nutrition
- Serving Size: 1 slice
- Calories: 120
- Sugar: 0
- Sodium: 200
- Fat: 1
- Saturated Fat: 0
- Unsaturated Fat: 0
- Trans Fat: 0
- Carbohydrates: 24
- Fiber: 1
- Protein: 4
- Cholesterol: 0
Keywords: artisan bread, homemade bread, easy bread recipe