
Introduction to Baked Italian Sub Sandwiches
Baked Italian sub sandwiches are not just your everyday lunches; they’re a delicious solution for young professionals balancing busy schedules while craving satisfying, homemade meals. Imagine coming home after a long day or rushing to prepare a quick dinner and having the ability to whip up a warm, hearty sandwich that satisfies both your hunger and taste buds! These subs are truly a game changer.
Why Baked Italian Sub Sandwiches are a Game Changer for Young Professionals
Time is key for many of us these days. Finding meals that are quick to prepare yet still taste incredible can feel like a daunting task. Thankfully, baked Italian sub sandwiches take convenience to a whole new level. Here’s why you should consider adding them to your regular meal rotation:
-
Quick Prep: With simple ingredients like Turkey Bacon, chicken ham, and assorted cheese, you can assemble your sandwich in less than 15 minutes. They’re perfect for those hectic weekday evenings.
-
Incredible Flavor: Baking these sandwiches melds the flavors beautifully. The crispy edges of the bread paired with melted cheese and savory meats create an irresistible combination.
-
Adaptable and Versatile: Not a fan of a certain ingredient? No problem! You can easily swap out the meats or add your favorite vegetables. Try adding fresh spinach, roasted peppers, or even olives for a Mediterranean twist.
-
Budget-Friendly: Many young professionals are looking to save a buck or two. These sandwiches can be made in bulk and stored for future meals, making them a cost-effective option for both lunch and dinner.
According to The U.S. Bureau of Labor Statistics, 26% of working professionals dine out at least once a day, and with the rising costs of eating out, it’s becoming increasingly wise to opt for homemade meals whenever possible. Baked Italian sub sandwiches not only save money but also allow you to enjoy a tasty, fulfilling meal without all the additives often found in restaurant fare.
Incorporating baked Italian sub sandwiches into your meal planning is a delicious way to ensure you’re eating well, even on the busiest days. So, are you ready to dive into this delightful recipe? Let’s get started!
Ingredients for Baked Italian Sub Sandwiches
Creating the oh-so-delicious Baked Italian Sub Sandwiches doesn’t have to be daunting! With a well-curated list of ingredients, you’ll be on your way to a savory feast in no time. Here’s what you’ll need:
- Sub rolls: Opt for fresh, crusty Italian sub rolls that will hold all your fillings without getting soggy.
- Turkey Bacon: For that smoky flavor that pairs beautifully with the hearty ingredients.
- Chicken Ham: A lighter twist on traditional ham, this adds a savory depth.
- Beef: Choose thinly sliced roast beef to enhance the sandwich’s overall taste.
- Provolone cheese: The perfect melty cheese to bring it all together.
- Peppers and onions: Fresh bell peppers and caramelized onions will add a delightful crunch and sweetness.
- Italian seasoning: A blend of oregano, basil, and garlic that elevates every bite.
- Olive oil: A drizzle before baking ensures a golden, crispy finish.
Feel free to adjust these ingredients as per your taste! For more tips on selecting the best meats and cheeses, check out reputable culinary sources like Serious Eats or Bon Appétit. Happy baking!
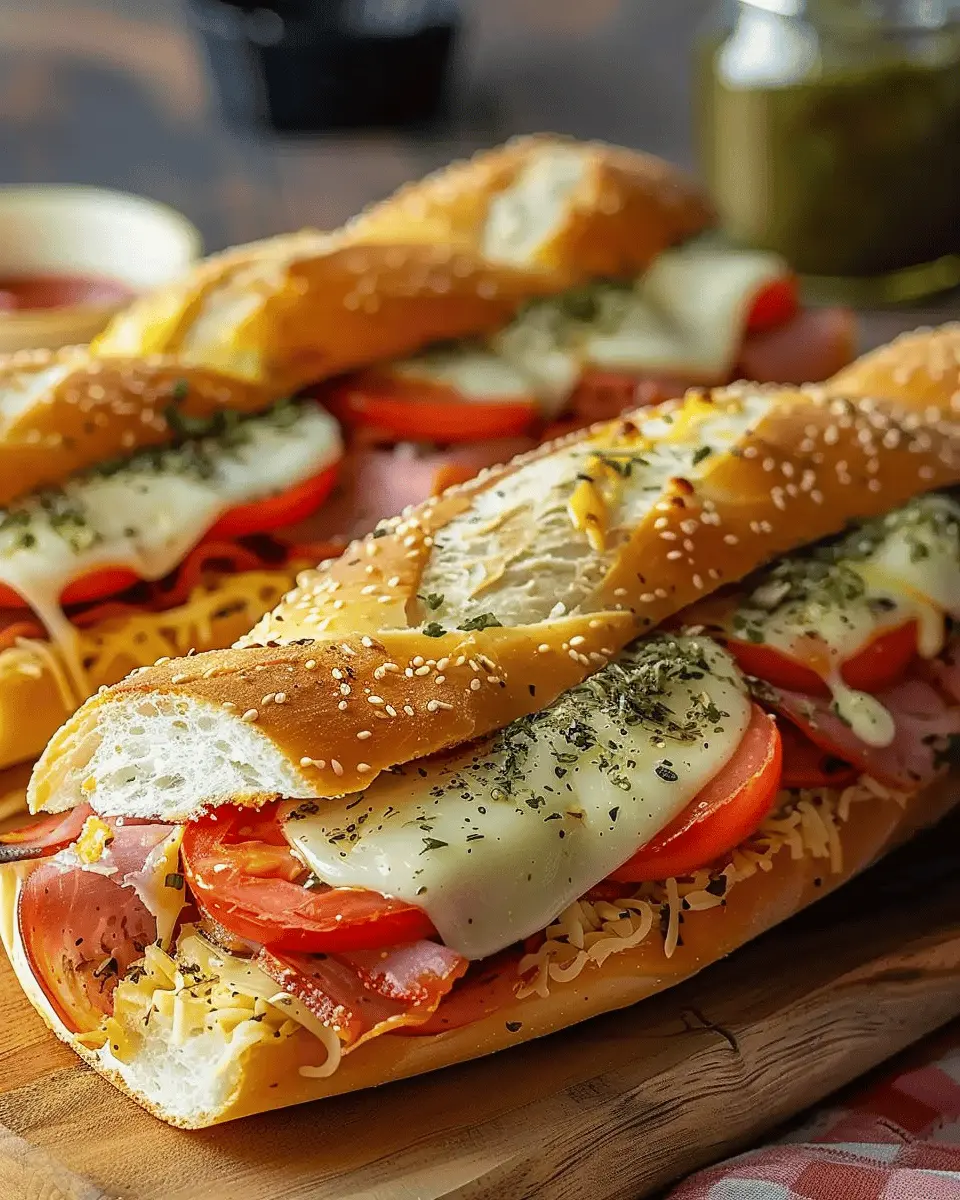
Preparing Baked Italian Sub Sandwiches
Baked Italian sub sandwiches are a delicious treat that combines layers of savory meats, flavorful cheeses, and fresh veggies, all enveloped in warm, crusty bread. The great thing about this recipe is its convenience and the ease of preparation, making it perfect for busy young professionals looking to impress friends or simply indulge in a comforting meal at home. Let’s dive into the steps for crafting these mouthwatering sandwiches!
Gather Your Ingredients
To kick off your sandwich-making adventure, it’s important to have all your ingredients on hand. Here’s what you’ll need for these Baked Italian Sub Sandwiches:
- Sub rolls (hoagie or Italian rolls work great)
- Chicken ham – sliced
- Turkey bacon – crispy for added flavor
- Provolone or mozzarella cheese – slices or shredded
- Bell peppers – thinly sliced (red, green, or yellow for a colorful touch)
- Red onions – thinly sliced
- Lettuce – shredded or whole leaves for crunch
- Olive oil – for drizzling
- Italian seasoning – a mix of oregano, basil, and thyme
- Salt and pepper – to taste
After gathering your ingredients, consider checking your pantry for extras like pepperoncini or roasted red peppers for a little more zing.
Preheat the Oven and Prepare the Baking Dish
Before you start assembling your Baked Italian Sub Sandwiches, it’s best to preheat your oven. Set it to 375°F (190°C) to ensure it’s hot and ready to go when your sandwiches are assembled. While that’s heating up, grab your baking dish and lightly coat it with olive oil or non-stick spray to prevent sticking. This small step helps in achieving that golden-brown crust that everyone loves.
Assemble the Sandwich Layers
Now comes the fun part—assembly! Here’s how to build your sandwich layers:
-
Slice the rolls: Start by slicing your sub rolls lengthwise, ensuring not to cut all the way through. You want them to hold all those delicious fillings!
-
Layer the meats: Start with a layer of chicken ham, followed by crispy turkey bacon. You can adjust the amounts based on how hearty you want your sandwiches.
-
Cheese it up: Next, add a generous slice of provolone or mozzarella cheese. The cheese melts beautifully, binding all the ingredients together.
-
Veggie love: Add those colorful bell pepper slices and red onions. This not only adds flavor but also makes the sandwich visually appealing. Don’t forget the lettuce for that refreshing crunch!
-
Repeat for each sandwich, ensuring all layers are well-distributed for even flavor.
Drizzle with Olive Oil and Season
Once your sandwiches are assembled and nestled in the baking dish, it’s time to give them a finishing touch. Drizzle a little olive oil over each sandwich, as this will encourage browning and add a lovely richness. Next, sprinkle your favorite Italian seasoning across the top along with a pinch of salt and pepper.
Bake to Perfection
Slide your baking dish into the oven and let it work its magic. Bake the Baked Italian Sub Sandwiches for about 15–20 minutes, or until the cheese is melted and bubbly, and the bread is golden. Keep an eye on them towards the end. You want that perfect melt without overcooking!
Once they’re out of the oven, let them cool for a minute before serving. Slice them up and enjoy with a side salad or some crispy chips for a complete meal.
Enjoy!
There you have it—a detailed guide to preparing Baked Italian Sub Sandwiches that will surely impress anyone lucky enough to enjoy one. These sandwiches are versatile, allowing for customization and creativity, so feel free to make them your own! For more tips on sandwich-making and variations, consider checking out Food Network for inspiring ideas. Happy cooking!

Variations on Baked Italian Sub Sandwiches
Baked Italian Sub Sandwiches are a fantastic base that you can easily customize to fit different tastes and dietary needs. Here are a few delicious variations that will cater to everyone in your group!
Exploring Vegetarian Italian Sub Options
If you or your friends are looking for a meat-free alternative, consider a Vegetarian Italian Sub. Start with an assortment of roasted veggies like bell peppers, zucchini, and eggplant. Add layers of fresh mozzarella, ripe tomatoes, and a generous drizzle of balsamic glaze to enhance that Italian flair. For a protein boost, sprinkle on some chickpeas or tofu. This combination is not only filling but also packed with nutrients!
Feel free to explore additional recipes for vegetarian options on sites like EatingWell to keep your meals fresh and exciting.
Kick it Up with Spicy Italian Subs
For those who love a little heat, try crafting a Spicy Italian Sub with Jalapeños. Start with your traditional base of toasted bread and add Turkey Bacon, Chicken Ham, and a kick of pickled jalapeños. Throw in pepper jack cheese for extra creaminess and let it melt beautifully in the oven. This fiery twist will tantalize your taste buds and impress your friends!
Gluten-Free Baked Italian Substitutions
If gluten is a concern, you can easily adapt your Baked Italian Sub Sandwiches. Look for gluten-free bread that you genuinely enjoy—that’s the key! Many grocery stores offer tasty options that won’t sacrifice flavor. Fill your bread with your choice of proteins like Turkey Bacon and Chicken Ham, along with your favorite veggies and cheeses. Check out Celiac.org for more tips on gluten-free ingredients!
With these variations in mind, you’ll create a spread that both meat-lovers and vegetarians will appreciate. Enjoy experimenting with flavors, and don’t hesitate to make your own twists on this Italian classic!
Cooking Tips and Notes for Baked Italian Sub Sandwiches
When crafting your Baked Italian Sub Sandwiches, there are a few key tips to elevate your game and ensure they turn out perfectly every time.
Quality Ingredients Matter
Start with fresh, quality bread. A crusty baguette or ciabatta will hold up better under the broiler. The ingredients you choose also make a difference; try opting for high-quality turkey bacon and chicken ham for a delicious twist. Additionally, using fresh greens like arugula or basil can brighten your sandwich.
Don’t Rush the Assembly
Layer your ingredients thoughtfully. Start with a spread, add meats, and then cheese; this helps everything melt together nicely. If you want an extra kick, consider adding sliced jalapeños or a drizzle of pesto.
Experiment With Flavors
Feel free to mix and match your toppings! A little garlic powder or Italian seasoning sprinkled on top can enhance the flavor profile. If you want an upgraded side, try a simple salad dressed with balsamic vinaigrette from Healthline or serve with homemade potato chips.
Craft these little adjustments, and watch your friends and family rave about your Baked Italian Sub Sandwiches!
Serving Suggestions for Baked Italian Sub Sandwiches
When it comes to enjoying Baked Italian Sub Sandwiches, the right accompaniments can elevate your meal from delicious to unforgettable. Here are some enticing serving suggestions that will make your lunch or dinner a real treat:
Pair with Savory Sides
- Chips or Crisps: A classic option! Choose something like kettle-cooked chips for that perfect crunch.
- Fresh Salad: A light mixed greens salad dressed with balsamic vinaigrette adds a refreshing contrast to the hearty sub.
Beverages that Complement
For a delightful beverage pairing, consider sparkling water with a twist of lemon or refreshing iced tea. These options bring a hint of zest that balances the rich flavors of the Baked Italian Sub Sandwiches.
Fun Dipping Sauces
To take your sandwich experience to another level, offer a side of marinara sauce or a zesty homemade garlic aioli for dipping. This adds an interactive element to your meal, making each bite a new flavor adventure.
Family or Friends? Share the Love!
Gather friends or family around for a cozy meal! You might even consider a “sub bar,” where everyone can customize their own version of Baked Italian Sub Sandwiches. It’s a fun way to enjoy a family-style meal or a casual get-together.
By incorporating these suggestions, you can create a well-rounded dining experience that highlights the deliciousness of your Baked Italian Sub Sandwiches. Want more sandwich ideas? Check out this fantastic recipe site for inspiration!
Time Breakdown for Baked Italian Sub Sandwiches
Preparation Time
Getting ready for your Baked Italian Sub Sandwiches is a breeze! Plan for about 15 minutes to chop veggies, layer your favorite meats, and assemble those delightful sandwiches. If you’re like me, you might enjoy cranking up some music while you prepare, turning the kitchen into a little concert.
Baking Time
Now, the real magic happens in the oven. You’ll want to bake your sandwiches for about 20-25 minutes at 350°F (175°C) until they’re wonderfully golden and the cheese is perfectly melted. You’ll know they’re ready when your kitchen fills with that irresistible, cheesy aroma.
Total Time
Overall, you’re looking at a total time of around 40-45 minutes. That’s just enough time to whip up a quick side salad or catch up on a podcast while you wait. These Baked Italian Sub Sandwiches are great for meal prep or a cozy weeknight dinner—it’s all about balancing deliciousness with efficiency!
For a detailed guide on various meats and toppings, check out culinary websites like Epicurious or Bon Appétit for more delicious inspiration. Happy cooking!
Nutritional Facts for Baked Italian Sub Sandwiches
When you’re diving into the deliciousness of Baked Italian Sub Sandwiches, it’s a good idea to know what you’re eating. Here’s a quick breakdown of the nutritional facts to keep in mind:
Calories
A single Baked Italian Sub Sandwich typically contains around 450 calories. This makes it a satisfying meal choice without overindulging.
Protein
These sandwiches pack a protein punch, with about 22 grams per serving. The combination of turkey bacon and chicken ham contributes to your daily protein needs, making it great for muscle recovery after a workout.
Sodium
While tasty, be mindful of the sodium content, which can reach about 1,200 mg. If you’re watching your salt intake, consider using low-sodium alternatives for the meats or condiments. For more tips on managing sodium in your diet, check out this helpful guide from the American Heart Association.
Being aware of these figures can help you enjoy your meal while staying on track with your health goals. Remember, balance is key!
FAQs About Baked Italian Sub Sandwiches
Can I make these sandwiches ahead of time?
Absolutely! Baked Italian Sub Sandwiches are perfect for meal prep. You can assemble the sandwiches a day in advance, wrap them tightly in foil, and refrigerate. When you’re ready to enjoy them, simply toss them in the oven and bake until they’re golden and melty. This not only saves you time but also allows the flavors to meld beautifully. Just make sure to add a few extra minutes to the baking time if they’re coming straight from the fridge.
What are the best sides to serve with Italian subs?
Pairing sides with your Baked Italian Sub Sandwiches can elevate your meal to the next level. Consider these delicious options:
- Crispy French Fries or Sweet Potato Fries: A classic accompaniment.
- Italian Pasta Salad: Offers a refreshing crunch and complements the sandwich flavors.
- Chips or Garlic Bread: For that extra crunch or buttery goodness.
- A Simple Green Salad: Lightens the meal and adds a healthy touch.
You can explore more side options on sites like Food Network or Allrecipes.
How do I store leftovers?
If you have leftovers (which might be rare with these delicious subs!), store them in an airtight container in the fridge. They should stay fresh for about 2-3 days. To reheat, pop them in the oven at a low temperature until warmed through, and if you like, cover them with foil to keep the bread from getting too crusty. Be mindful that the bread might lose some of its initial crunch, but reheating will revive those flavors!
Now, you’re all set to enjoy these delightful sandwiches! Get ready to savor the layers of flavor with every bite.
Conclusion on Baked Italian Sub Sandwiches
In wrapping up our delicious journey with Baked Italian Sub Sandwiches, it’s clear that this dish is a delightful solution for busy professionals seeking comfort food without sacrificing taste. Not only are these sandwiches filled with savory ingredients like Turkey Bacon and Chicken Ham, but they also come together quickly, making them perfect for a weeknight meal.
Consider customizing your sub with your favorite toppings or experimenting with different cheeses for a personalized touch! For a refreshing drink pairing, why not try a sparkling water with fresh citrus? This combination complements the rich flavors beautifully. Dive into this recipe and bring a little taste of Italy to your dinner table!
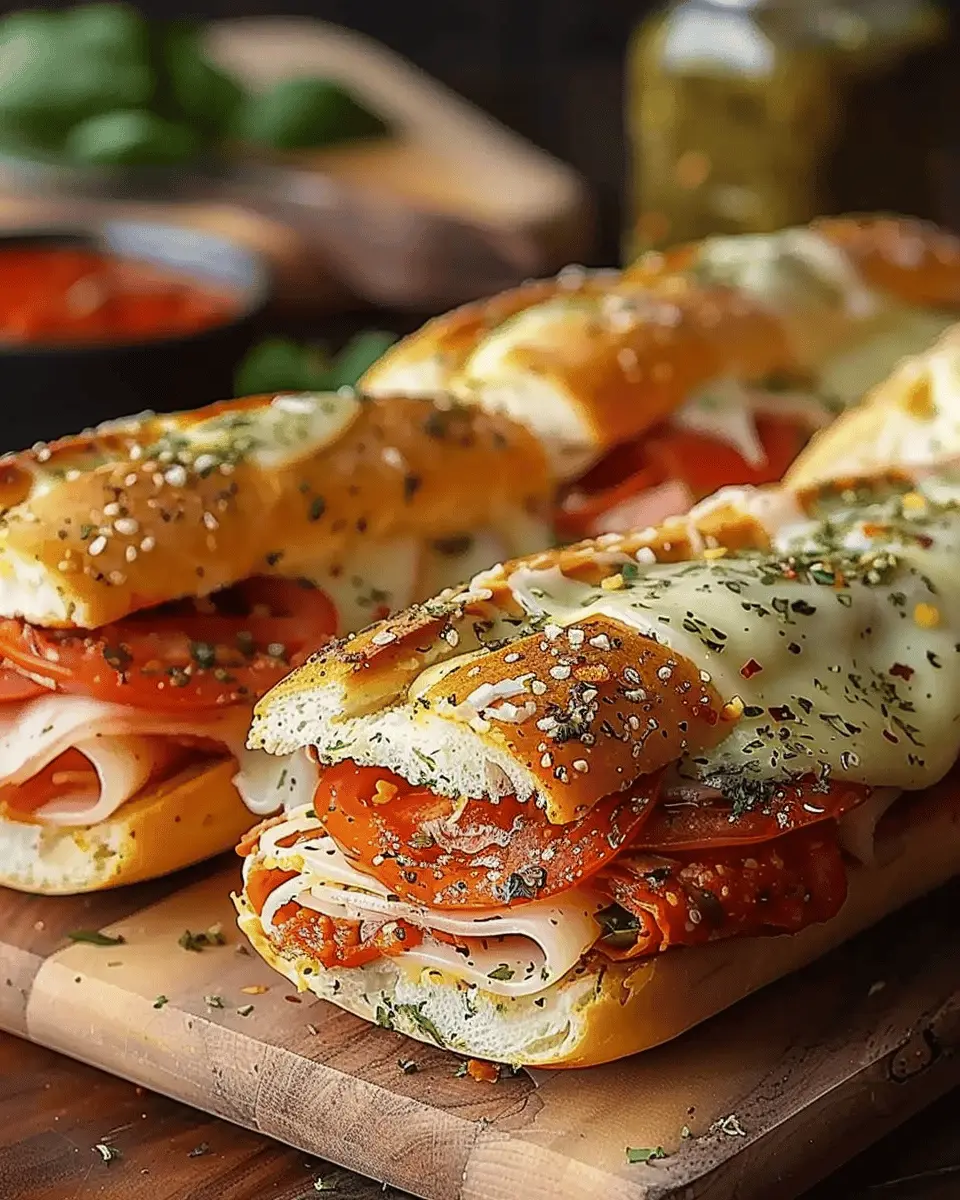
PrintBaked Italian Sub Sandwiches: Easy Turkey Bacon & Chicken Ham Delight

A delicious and easy recipe for baked Italian sub sandwiches loaded with turkey bacon and chicken ham.
- Prep Time: 10 minutes
- Cook Time: 20 minutes
- Total Time: 30 minutes
- Yield: 4 servings 1x
- Category: Sandwiches
- Method: Baking
- Cuisine: Italian
- Diet: Gluten-Free
Ingredients
- 1 loaf Italian bread
- 8 slices turkey bacon
- 8 ounces chicken ham
- 4 slices provolone cheese
- 1/2 cup marinara sauce
- 1 tablespoon Italian seasoning
- 1/4 cup shredded lettuce
- 1/4 cup sliced tomatoes
Instructions
- Preheat the oven to 350°F (175°C).
- Slice the Italian bread in half horizontally.
- Layer turkey bacon, chicken ham, and provolone cheese on the bread.
- Spread marinara sauce evenly over the meat and cheese.
- Sprinkle Italian seasoning on top.
- Close the sandwich and wrap it in foil.
- Bake in the preheated oven for 15-20 minutes.
- Unwrap and bake for an additional 5 minutes to crisp the bread.
- Remove from oven and add lettuce and tomatoes before serving.
Notes
- For extra flavor, add sliced olives or peppers.
- Make it a meal by serving with a side salad.
Nutrition
- Serving Size: 1 sandwich
- Calories: 450
- Sugar: 3g
- Sodium: 1200mg
- Fat: 25g
- Saturated Fat: 10g
- Unsaturated Fat: 10g
- Trans Fat: 0g
- Carbohydrates: 40g
- Fiber: 2g
- Protein: 25g
- Cholesterol: 70mg
Keywords: Baked Italian Sub Sandwiches, Turkey Bacon, Chicken Ham, Easy Recipe