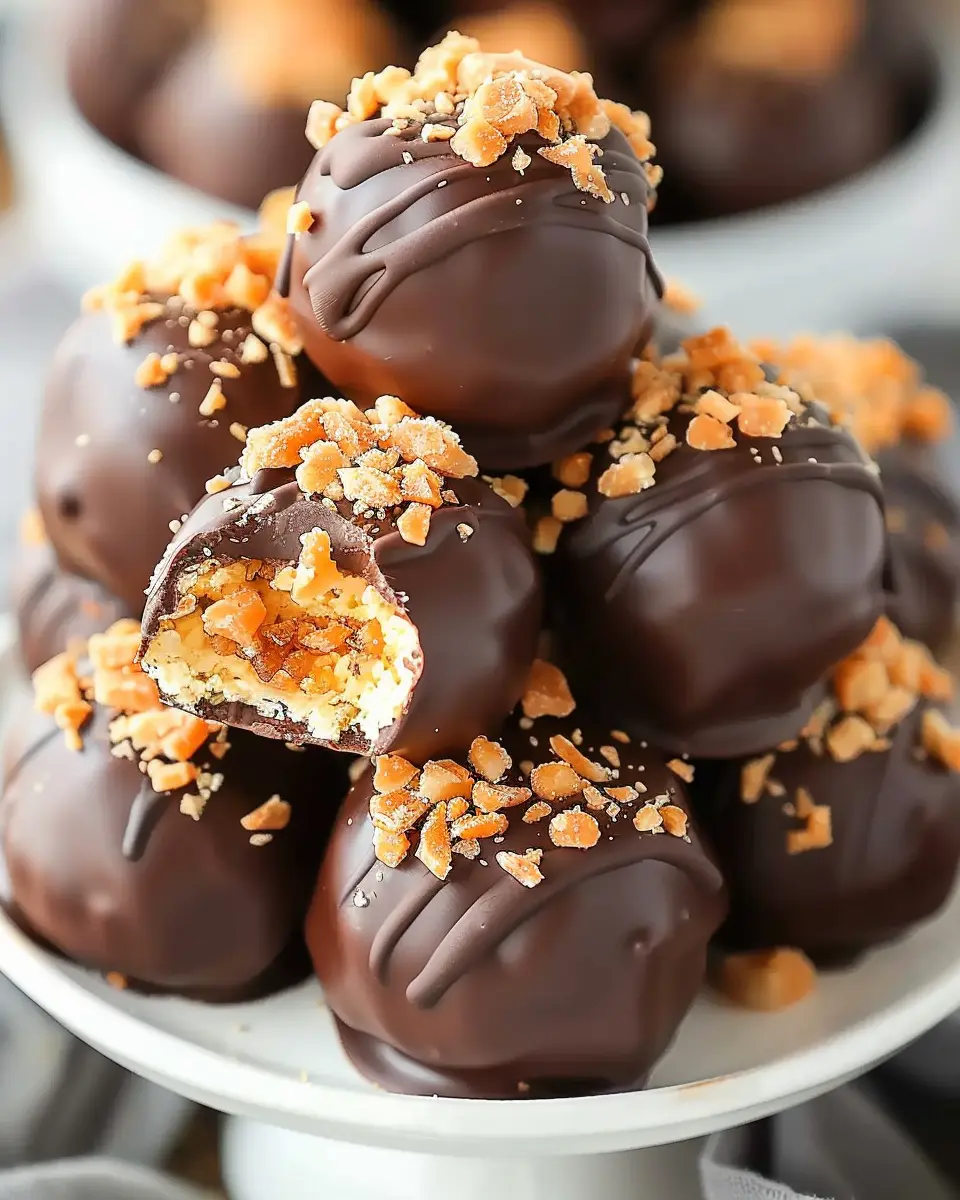
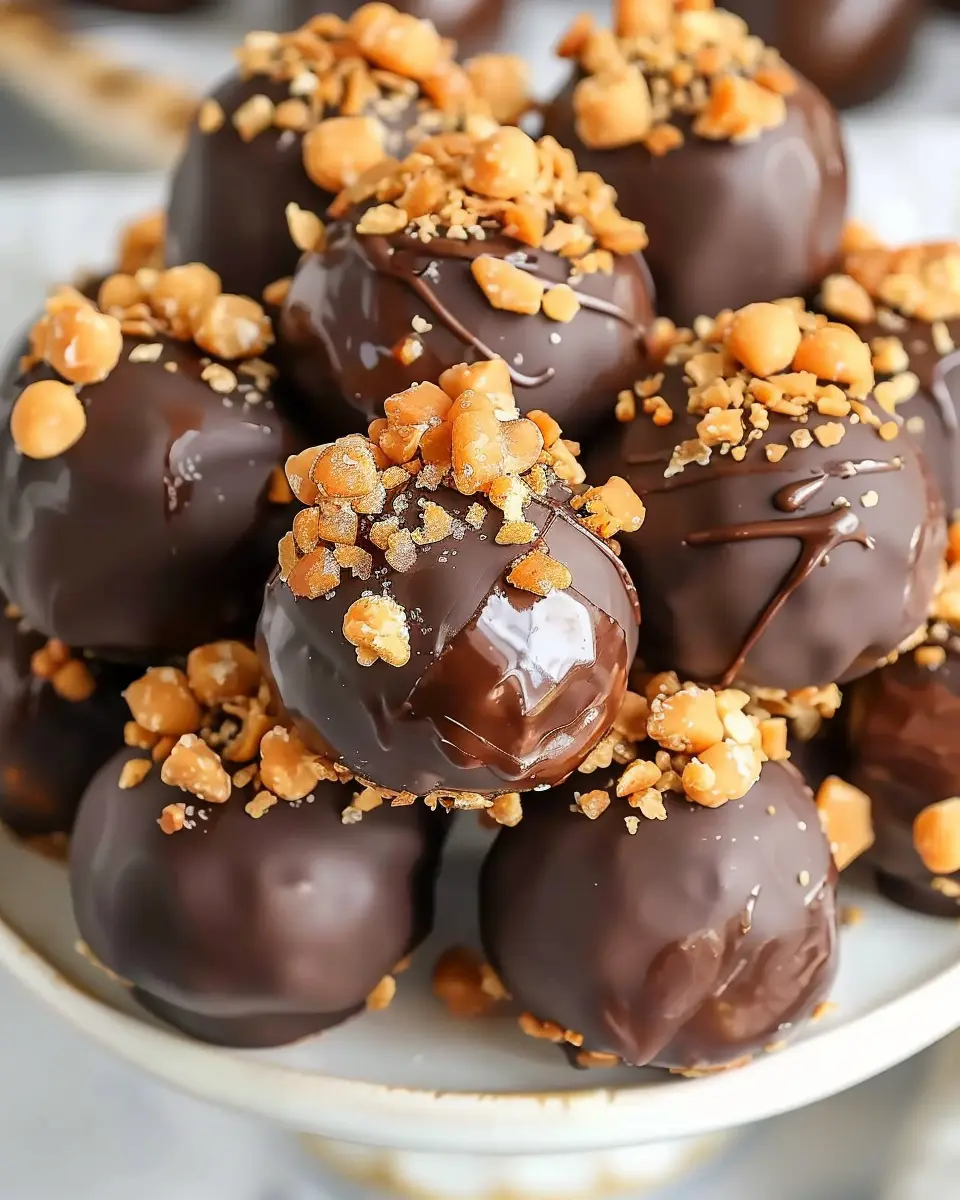
Introduction to Butterfinger Balls
When it comes to homemade treats, few can rival the sheer joy of Butterfinger Balls. These delightful bites combine the irresistible crunch and creamy taste of Butterfinger candy bars into a simple, no-bake dessert. They are the perfect treat for any occasion—be it a cozy night in, a holiday gathering, or a last-minute potluck dish.
Why Butterfinger Balls are the Ultimate Homemade Treat
What sets Butterfinger Balls apart from other homemade goodies? First, they’re incredibly easy to make. With just a few ingredients and minimal cooking, you can whip up a batch in less than 30 minutes. Think of ingredients like crushed Butterfinger bars, creamy peanut butter, and melted chocolate—sounds delicious, right? The harmonious blend of crunchy and creamy textures, along with that unmistakable peanut butter flavor, makes these little treats impossible to resist.
Imagine serving these at your next gathering—your friends won’t believe you made them from scratch! Plus, you can customize them by adding toppings or different types of chocolate. If you’re keen on trying alternatives, like dark or white chocolate, the options are truly endless.
In a world overflowing with sweet options, why not go with a treat that blends nostalgia with creativity? For a fantastic celebration treat, consider pairing Butterfinger Balls with a refreshing homemade lemonade or even a vibrant fruit salad.
Easy Customization
One of the best features about Butterfinger Balls is their adaptability. You can enhance the recipe by incorporating various toppings such as:
- Chopped nuts
- Sprinkles
- Drizzles of caramel
- A sprinkle of sea salt for a sweet-savory twist
If you’re curious about the health impacts of certain ingredients, check out Healthline’s nutrition section for some great insights on what you’re putting into those yummy morsels.
To sum it up, whether you’re a novice in the kitchen or a seasoned pro, Butterfinger Balls offer a delightful, stress-free way to indulge your sweet tooth or impress your friends. So, gather your ingredients and let’s delve into making these scrumptious treats!
Ingredients for Butterfinger Balls
Essential ingredients for the perfect Butterfinger Balls
Creating delightful butterfinger balls at home is not only simple but incredibly satisfying. To achieve that perfect blend of flavors and textures, you’ll need just a few essential ingredients. Here’s what you’ll want to gather:
- Peanut Butter: The star of the show! Creamy or chunky, choose according to your preference.
- Powdered Sugar: This provides sweetness and helps bind the mixture.
- Vanilla Extract: A hint of this elevates the flavors perfectly.
- Chocolate Chips: Opt for semi-sweet or milk chocolate for that ultimate coating.
- Crushed Butterfinger Candy Bars: This adds the signature crunchy texture that makes these treats irresistible.
You might be thinking, “What makes butterfinger balls stand out?” It’s all about the balance of sweet and salty, creamy and crunchy. Plus, these delightful bites are perfect for sharing with friends or indulging after a long day. Check out this detailed guide on candy-making techniques for more tips on perfecting your sweets!
No matter where you live, these ingredients are easy to find—you can even order them online if you’re in a pinch. Happy baking!
Preparing Butterfinger Balls
Making Butterfinger Balls is a fun and rewarding experience—perfect for a cozy evening at home or to impress guests at your next gathering. With just a few simple steps, you can create these delicious treats that are sure to satisfy any sweet tooth!
Gather Your Materials
The first step in preparing your Butterfinger Balls is to make sure you have everything you need. Here’s a quick checklist:
- 1 cup of crushed Butterfinger candy bars (about 4 full-sized bars)
- 1 cup of creamy peanut butter
- 1 cup of powdered sugar
- 1 cup of crushed graham crackers
- 12 ounces of chocolate (milk or dark, depending on your preference)
- Wax paper or parchment paper for cooling
Make sure you have a mixing bowl, a baking sheet, and a microwave-safe bowl handy for melting the chocolate. Having everything prepped in advance makes the process smoother and more enjoyable.
Mix the Base Ingredients
Now, it’s time to dive into the mixing! In a large mixing bowl, combine the creamy peanut butter, powdered sugar, and crushed graham crackers. The peanut butter acts as the glue that brings everything together, while the graham crackers give your Butterfinger Balls that classic crunch. Use a spatula to mix until you have a thick, cohesive dough. This step is critical because it sets the foundation for your delicious treat!
Incorporate the Butterfinger Candy
Next up, add those crushed Butterfinger candy bars to your mixture. If you want to create a more uniform texture, you can process them in a food processor to get finer pieces. But for a delightful crunch, leaving them in slightly larger chunks can add texture. Gently fold the candy into the mixture using your spatula until evenly distributed. The combination of chocolate and peanut butter is simply irresistible, don’t you think?
Shape the Balls
With your base ready, it’s time to shape the mixture into balls. Use your hands to scoop out about a tablespoon of the mixture and roll it into a ball. The Butterfinger Balls should be about the size of a golf ball. Place each ball on a baking sheet lined with wax paper, leaving a bit of space between them. At this point, feel free to taste any leftover mixture—you know, quality control!
Melt the Chocolate for Dipping
While your Butterfinger Balls chill in the fridge for about 30 minutes, let’s get that chocolate ready! Place your chocolate in a microwave-safe bowl and heat it in increments of 30 seconds, stirring in between until fully melted and smooth. You can also use a double boiler if you prefer. If you want to get fancy, consider adding a splash of coconut oil to the chocolate to give it a nice sheen.
Dip and Coat the Balls
Once the chocolate is melted, it’s time for the fun part: dipping! Use a fork or a toothpick to dip each Butterfinger Ball into the chocolate. Make sure to coat them thoroughly, then shake off any excess chocolate before transferring them back to the wax paper. For a finishing touch, you can sprinkle them with a tiny bit of crushed Butterfinger on top while the chocolate is still warm. It makes for a beautiful presentation!
Chill and Set Your Butterfinger Balls
Finally, pop your tray of Butterfinger Balls back into the fridge or freezer to let the chocolate set. This should take about 20-30 minutes. Once they’re firm, you can store them in an airtight container in the fridge for up to a week—if they last that long! These little bites of heaven are a hit at parties or perfect for an indulgent treat during movie night.
And there you have it! With these simple steps, you’ll have the most scrumptious Butterfinger Balls ready to enjoy. Everyone will be asking for the recipe—feel free to share your newfound skills! If you want to enhance your dessert-making repertoire, check out other no-bake treats that can delight your friends and family. Happy cooking!
Variations on Butterfinger Balls
When it comes to those delightful Butterfinger Balls, the possibilities are endless! Whether you’re craving something classic or adventurous, here are two variations that are sure to satisfy your sweet tooth.
Peanut Butter Crunch Balls
If you love the creamy texture of peanut butter but want a little extra crunch, these Peanut Butter Crunch Balls are just what you need! Simply tweak the original recipe by adding crushed pretzels or Rice Krispies to the mix.
- Ingredients:
- 1 cup peanut butter
- 2 cups crushed pretzels or Rice Krispies
- 1 cup powdered sugar
- Milk chocolate for coating
Mix the peanut butter and powdered sugar until well combined, then fold in the crunchy addition. Roll them into balls, dip them in melted chocolate, and voila! These additions not only offer a textural contrast but also boost the flavor profile, making them a fun twist on your classic Butterfinger Balls.
Cookie Dough Butterfinger Balls
For the cookie dough aficionados, these Cookie Dough Butterfinger Balls will undoubtedly be your new obsession. You can make them by combining the butterfinger mixture with egg-free cookie dough for that irresistible taste of nostalgia.
- Ingredients:
- 1 cup chocolate chip cookie dough (egg-free)
- 1 cup crushed Butterfingers
- 1 cup white chocolate for coating
Start by blending the crushed Butterfingers into the cookie dough before rolling them into bite-sized balls. After chilling, dip them in melted white chocolate for a decadent finish. This variation is a perfect treat for gatherings and will likely make you the star of your next potluck!
These variations elevate your Butterfinger Balls experience and let you get creative in the kitchen. Don’t forget to share your creations on social media—friends will love to see what you’ve whipped up! For more inspiration on variations of classic treats, check out resources from Food Network or Serious Eats.
Cooking Tips for Butterfinger Balls
Secret Tips for Perfectly Textured Balls
When it comes to making Butterfinger Balls, texture is everything. To achieve that ideal balance between crunchy and creamy, consider these tips:
- Chill Your Mixture: After combining crushed Butterfinger candies with cream cheese, chill the mixture for about 30 minutes. This helps it firm up, making it easier to roll into perfect balls.
- Use Quality Chocolate: A good-quality chocolate or candy coating can elevate the flavor and texture. Opt for melting chocolate from a reputable brand to ensure a smoother finish.
Common Mistakes to Avoid
Navigating the path to delicious Butterfinger Balls can be tricky. Here are some pitfalls to avoid:
- Overmixing: While you want to ensure everything is well-combined, overmixing can lead to a too-dense texture. Mix just until everything is blended.
- Not Using Enough Butterfinger: It might be tempting to skimp on the Butterfinger crumbs to save time, but the flavor will suffer. Stick to the recommended measurement for an authentic taste.
For more insights on texture in candy recipes, check out resources from The Kitchn or Serious Eats. These can really help you nail those delicious flavors while making the cooking process more enjoyable!
Serving Suggestions for Butterfinger Balls
Creative ways to present your Butterfinger Balls
You can elevate your Butterfinger Balls from simple treats to a stunning dessert centerpiece with a few creative touches. Consider using decorative cupcake liners to showcase each ball individually—this not only adds a pop of color but also makes them easy to grab at parties. For an extra flair, drizzle melted chocolate on top and sprinkle crushed Butterfinger bits to create a visually enticing finish. Alternatively, arrange the Butterfinger Balls on a beautiful platter and garnish with fresh mint leaves for a touch of elegance.
Pairing suggestions for the perfect snack attack
For the ultimate snack experience, consider pairing your Butterfinger Balls with:
- Fresh fruits: Think apples or bananas that complement the sweetness.
- Hot chocolate or coffee: Both provide a cozy drink option to balance the rich flavors.
- Savory snacks: Try serving them alongside turkey bacon bites or chicken ham sandwiches to contrast the sweetness.
These combinations will not only enhance the enjoyment but also cater to a variety of taste preferences. For more ideas on pairing snacks, check out Food Pairing for expert recommendations!
Time Breakdown for Butterfinger Balls
When preparing to create your delicious Butterfinger Balls, knowing how much time to allocate can make the process smoother and more enjoyable. Here’s how the time breaks down for this delightful treat:
Preparation time
To whip up these tasty Butterfinger Balls, you’ll need about 15 minutes of prep time. This involves mixing the ingredients and shaping the bites. It’s a quick process that ensures you spend more time indulging and less time bustling in the kitchen.
Chilling time
After shaping the balls, it’s crucial to let them chill in the refrigerator for about 30 minutes. This step helps them firm up, making them easier to coat with chocolate and ensuring a perfect bite.
Total time
In total, you’re looking at around 45 minutes from start to delicious finish. With this simple breakdown, you can easily fit making Butterfinger Balls into your day—perfect for those last-minute gatherings or satisfying a sweet craving!
For more culinary inspiration, check out this quick dessert guide.
Nutritional Facts for Butterfinger Balls
When diving into the world of Butterfinger Balls, it’s good to keep an eye on their nutritional profile. Here’s what you need to know:
Calories per serving
Each serving of Butterfinger Balls contains approximately 120 calories. Perfect for a tasty treat without the guilt, but remember moderation is key!
Sugar content
These delightful bites pack a sweet punch, with about 10 grams of sugar per serving. While it’s a sweet indulgence, it’s always wise to balance it with other nutrition throughout the day.
Protein count
On the plus side, you’ll find around 2 grams of protein in each serving. While not enough to replace a meal, it’s a nice boost for those on-the-go snack moments.
For more information on maintaining a balanced diet, the American Heart Association offers great resources to help you navigate your nutritional needs while enjoying your favorite treats!
FAQs about Butterfinger Balls
How long will Butterfinger Balls last?
Once you’ve made your delicious Butterfinger Balls, you’ll want to know how to store them properly. These sweet treats can last in the fridge for about two weeks when stored in an airtight container. If you’re feeling ambitious and plan ahead, you can also freeze them! In the freezer, they can comfortably stay good for about three months. Just make sure to separate them with parchment paper to prevent sticking—nobody likes a clump of chocolate balls!
Can I make Butterfinger Balls without chocolate?
Absolutely! While chocolate gives Butterfinger Balls that classic sweet crunch, you can opt for alternatives. Consider rolling your Butterfinger Balls in crushed graham crackers or powdered sugar for a nifty twist. If you’re looking to skip the chocolate altogether, try a drizzle of almond butter or peanut butter. It keeps the flavor intriguing while maintaining that smooth texture we all love.
What are some other toppings I could use?
When it comes to toppings, the world is your oyster! Here are a few ideas to get your creative juices flowing:
- Coconut flakes: For an added tropical touch.
- Chopped nuts: Pecans, almonds, or walnuts can add a delightful crunch.
- Mini chocolate chips: If you can’t get enough chocolate, sprinkle these on top.
- Candy sprinkles: Perfect for a festive look.
Feel free to mix and match these toppings to cater to your taste preferences or themed parties. Discover more about these ingredient swaps on culinary sites like Serious Eats for further inspiration!
Now that you have the lowdown, go ahead and whip up those Butterfinger Balls—your friends will be asking for seconds!
Conclusion on Butterfinger Balls
The joy of making and sharing Butterfinger Balls
Creating Butterfinger balls is not just about the delicious flavor-packed treats; it’s about the joy that comes from sharing them with friends and family. Whether you bring them to a potluck, offer them as a sweet gift, or simply enjoy them at home, these bites are sure to bring smiles and delightful memories.
As you gather around to indulge, consider the stories each bite can inspire—like laughter-filled kitchen moments or spontaneous recipe swaps with friends. Embrace the fun of experimenting with different toppings or variations. Remember, the best part of cooking is the connection it fosters. So why not whip up a batch, share the love, and make some lasting memories together?
For more inspiration, check out this guide on homemade candies for ideas on variations and creative presentations!
PrintButterfinger Balls: The Best Indulgent Treat You’ll Love

Make delicious and easy Butterfinger Balls with the perfect blend of crunch and sweetness that everyone will love!
- Prep Time: 15 minutes
- Cook Time: 0 minutes
- Total Time: 30 minutes
- Yield: 24 balls 1x
- Category: Desserts
- Method: No-bake
- Cuisine: American
- Diet: Vegetarian
Ingredients
- 1 cup crushed Butterfinger bars
- 1 cup creamy peanut butter
- 2 cups powdered sugar
- 2 cups chocolate chips
- 1 tablespoon coconut oil
Instructions
- In a large bowl, mix crushed Butterfinger bars, peanut butter, and powdered sugar until well combined.
- Roll mixture into small balls and place on a parchment-lined baking sheet.
- Melt chocolate chips with coconut oil in a microwave-safe bowl.
- Dip each ball into the melted chocolate, ensuring they are well coated.
- Return the coated balls to the baking sheet and refrigerate until set.
Notes
- For a crunchier texture, you can add chopped nuts.
- Store leftovers in an airtight container.
Nutrition
- Serving Size: 1 ball
- Calories: 130
- Sugar: 14g
- Sodium: 30mg
- Fat: 7g
- Saturated Fat: 3.5g
- Unsaturated Fat: 3g
- Trans Fat: 0g
- Carbohydrates: 17g
- Fiber: 0g
- Protein: 2g
- Cholesterol: 0mg
Keywords: Butterfinger Balls, chocolate treats, indulgent snacks