Introduction to Garlic Herb Braided Bread
Baking your own bread can feel so rewarding, especially when that bread is a delightful Garlic Herb Braided Bread. Imagine this: you’re at home, the comforting aroma of warm, garlic-infused herbs fills the air, and you’re about to create an incredible addition to your dinner table that will impress your family and friends. Sounds inviting, doesn’t it?
Why Bake Your Own Garlic Herb Braided Bread?
There are a multitude of reasons why you should consider whipping up your own Garlic Herb Braided Bread. For starters, baking at home allows you to control the quality of ingredients you use. You can select organic flour, fresh herbs, and even opt for whole-grain variations if you prefer a healthier take.
- A Sensory Experience: When you bake, you’re engaging your senses in a way that simply can’t be replicated by store-bought breads. The smell of garlic and herbs wafting through your kitchen will be like a warm hug.
- Customization: Perhaps you want a bit of extra parmesan cheese or prefer a specific blend of fresh herbs like rosemary and thyme. Baking at home lets you tailor the flavors to fit your personal palate perfectly.
- Healthier Choice: Many commercial breads are loaded with preservatives and additives that you might want to steer clear of. By making your own Garlic Herb Braided Bread, you know exactly what goes into it—something comforting in today’s health-conscious world.
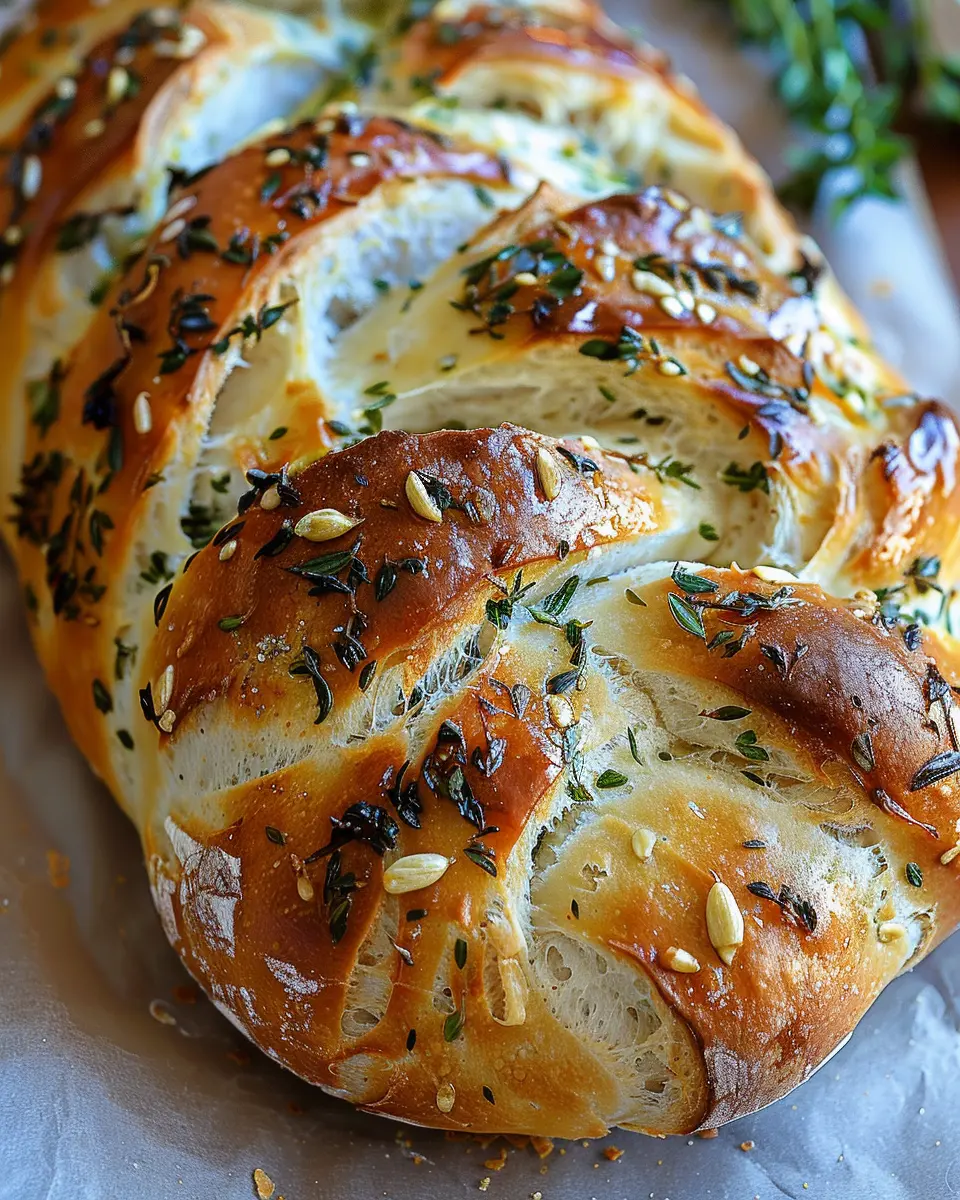
Moreover, the art of braiding the dough not only creates a beautiful presentation but gives the bread an intriguing texture, making each bite satisfying.
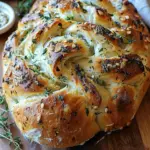
Imagine slicing into this golden, flaky bread to reveal its tender, flavorful interior. It’s an impressive centerpiece for any meal, be it a casual gathering with friends or a cozy Sunday dinner.
Using the right kneading technique enhances gluten formation, ensuring that your Garlic Herb Braided Bread has that perfect chewiness—something that every aspiring and seasoned baker can learn. Plus, if you’re curious about the science of how bread rises, check out this article on bread baking fundamentals from the King Arthur Baking Company.
So, gather your ingredients, roll up your sleeves, and let’s get baking! You won’t regret diving into this delightful and aromatic cooking adventure. After all, the best meals are often the ones made with love and a bit of experimentation.
Ingredients for Garlic Herb Braided Bread
Essential ingredients for a flavorful loaf
To create a delightful Garlic Herb Braided Bread, start with the essentials. You’ll need:
- All-purpose flour: The backbone of your bread, giving it that perfect texture.
- Yeast: Go for active dry yeast for a fluffy rise.
- Water: Warm, not hot; this helps activate the yeast without killing it.
- Olive oil: Adds moisture and flavor—opt for extra virgin for richness.
- Garlic: Freshly minced for a robust taste.
- Herbs: A blend of fresh or dried parsley, basil, and oregano elevates the flavor profile.
- Salt: Essential for enhancing all the flavors.
These ingredients give your bread a mouthwatering aroma and taste that’s hard to resist.
Optional add-ins for a twist
Feel like experimenting? Here are some fun optional add-ins to customize your Garlic Herb Braided Bread:
- Cheese: Consider shredded mozzarella or crumbled feta for a creamy surprise.
- Turkey bacon or chicken ham: Adding bits of these meats can provide a savory touch.
- Olives: Chopped black or green olives bring a briny contrast.
- Nuts: Chopped walnuts or pine nuts can add crunch and depth.
These additions can transform your loaf into a signature dish that suits your taste. Check out sources like BBC Good Food for more ways to enhance breads and baked goods!
Preparing Garlic Herb Braided Bread
Making your own Garlic Herb Braided Bread is a rewarding experience that fills your kitchen with a comforting aroma and creates a delightful bread to share with loved ones. Let’s walk through the steps together.
Activate the yeast
The first step in crafting the perfect Garlic Herb Braided Bread is activating the yeast. Using active dry yeast is key here. You’ll need about 2¼ teaspoons. Warm up approximately 1 cup of water to around 110°F (43°C) — this is the ideal temperature for yeast to thrive. If it’s too hot, you risk killing the yeast; too cold, and it won’t activate.
- In a small bowl, combine the warm water, the yeast, and a teaspoon of sugar to feed the yeast.
- Let it sit for about 5 to 10 minutes until it becomes frothy and bubbly. If it doesn’t foam up, you’ll need new yeast – fresh ingredients make all the difference!
Combine wet and dry ingredients
While your yeast is working its magic, it’s time to gather your other ingredients. In a large mixing bowl, combine 3 cups of all-purpose flour, 4 tablespoons of chopped fresh herbs (think rosemary, thyme, or parsley — whatever tickles your fancy), and 1 teaspoon of salt. Why herbs? They enhance the bread’s flavor profile and harmonize beautifully with garlic.
- Once this is mixed well, add 2 tablespoons of olive oil and the activated yeast mixture.
Stir until everything is incorporated; the dough should start to come together but will still be slightly sticky.
Knead the dough to perfection
Now comes the fun part — kneading. This step is crucial for developing gluten, which gives the bread its structure.
- Turn your sticky dough onto a floured surface.
- Knead it for about 8-10 minutes, until it’s smooth and elastic. Here’s a tip: If the dough sticks to your hands, sprinkle a little more flour as needed, but be cautious not to add too much; you want it just right!
Let the dough rise
After kneading, place the dough in a lightly oiled bowl, cover it with a damp cloth, and let it rise in a warm place for about 1 hour, or until it has doubled in size. This is a great moment to read up on the importance of fermentation and how it enhances flavors, as noted in this article.
Shape and braid the dough
Once your dough has risen, it’s time for shaping. Punch it down gently to release some air, then divide it into three equal pieces. Roll each piece into a rope about 1-inch thick.
- Now, it’s braiding time! Lay the three ropes side by side, pinch the top ends together, and start braiding.
- Secure the ends by pinching them.
This is your opportunity to show off your skills! Don’t worry if it’s not perfect; it will still taste amazing.
Final rise before baking
Now that your Garlic Herb Braided Bread is shaped, place it on a greased baking sheet. Cover it again and let it rise for an additional 30 minutes. This final rise is essential for a light, fluffy texture.
Bake and enjoy the aroma
Preheat your oven to 375°F (190°C). Before baking, brush the top of your braid with an egg wash (1 beaten egg with a splash of water) for that golden finish.
- Bake for about 25-30 minutes, or until the bread is golden brown on top.
- You’ll want to pull it out when it sounds hollow when tapped on the bottom.
Once it’s out of the oven, resist the urge to dive in immediately. Let it cool for a few minutes; this helps set the inside and makes slicing easier. Enjoy your Garlic Herb Braided Bread warm or toasted with a spread of butter, and watch it disappear at the dinner table!
With this recipe under your belt, you’ll be the star of any gathering, and who knows? You might just become known for the best bread in your circle!

Variations on Garlic Herb Braided Bread
When it comes to Garlic Herb Braided Bread, the base recipe is simply delightful, but there are so many ways to jazz it up! Here are two delicious variations that will keep you and your guests coming back for more.
Spicy Garlic Herb Braided Bread
If you can’t resist a little heat, this variation is for you. Add a kick by incorporating crushed red pepper flakes or a dash of cayenne pepper into your garlic and herb mixture. You can also mix in some finely chopped jalapeños or serrano peppers for a fresh burst of spice. The combination of warmth and flavor will elevate your Garlic Herb Braided Bread to a new level of deliciousness. Trust me, it’s the perfect accompaniment to a creamy soup or a fresh salad.
Tip: Pair it with a cool dipping sauce made from yogurt and herbs to balance the heat!
Cheese-stuffed Garlic Herb Braided Bread
Who doesn’t love the melty goodness of cheese? For a gooey twist, create a cheese-stuffed version of your Garlic Herb Braided Bread. Choose your favorite cheese—mozzarella, cheddar, or even a bit of feta for a tangy delight. Simply create a pocket in the dough before braiding and fill it generously with your cheese of choice. As the bread bakes, the cheese will melt and infuse the bread with savory goodness, making each bite a cheesy delight.
Final Thoughts
Both of these variations allow you to customize your experience. Remember, the beauty of Garlic Herb Braided Bread is that it’s adaptable. Whether you’re hosting a dinner party or just seeking a snack, these tweaks will impress anyone who tries them. For more baking tips, check out King Arthur Baking or Serious Eats for expert advice! Enjoy your baking adventure!
Cooking Tips for Garlic Herb Braided Bread
How to Ensure Your Bread Rises Perfectly
To achieve that light and fluffy texture in your Garlic Herb Braided Bread, start by making sure your yeast is active. A simple test is mixing it with warm water and a pinch of sugar; it should foam within minutes. Make sure your dough is in a warm, draft-free area for rising. A quick tip: if you’re in a colder climate, placing your bowl in the oven (turned off) with the light on can create the perfect cozy environment!
Secret Ingredient for Added Flavor
For an extra punch of flavor, consider adding fresh herbs like rosemary or thyme to your dough. They complement the garlic beautifully and elevate the overall taste of your bread. I often sprinkle in a bit of Parmesan cheese for that irresistible cheesy aroma. Pairing these ingredients not only enhances the bread’s flavor but also makes it a delightful centerpiece at any meal. For a deeper dive into enhancing flavors, check out some professional baking tips that can truly elevate your baking game!
Serving Suggestions for Garlic Herb Braided Bread
Best Pairings for Your Delicious Bread
When you whip up a batch of Garlic Herb Braided Bread, you’re in for a treat, but how can you elevate this flavorful masterpiece? Consider pairing your bread with rich dipping oils infused with balsamic vinegar or a homemade garlic aioli. The herby notes of the bread meld beautifully with roasted vegetables or creamy soups, making it an ideal companion for a hearty minestrone or Italian wedding soup.
If you’re feeling adventurous, don’t shy away from serving it alongside sliced Chicken Ham or Turkey Bacon for a savory brunch vibe. And for something lighter, try it with a salad topped with feta and a drizzle of olive oil—the freshness counterbalances the bread’s robust flavors splendidly.
Creative Ways to Use Leftover Bread
What if you find yourself with extra Garlic Herb Braided Bread? Don’t fret! Use it to create mouthwatering croutons by simply cubing the bread, tossing it with olive oil and herbs, and roasting until golden. They’ll add a delightful crunch to any salad. Alternatively, think about turning it into a unique French toast by soaking slices in an egg and milk mixture and then pan-frying them. This way, you can enjoy this aromatic bread in a whole new light!
For more ideas, check out this article on bread innovations from Serious Eats. It’s packed with inspiration!
Time breakdown for Garlic Herb Braided Bread
Preparation time
Making your own Garlic Herb Braided Bread is a delightful experience that starts with about 20 minutes of hands-on preparation. You’ll mix the ingredients, knead the dough, and get it ready for its first rise. This is the perfect time to turn up your favorite playlist or catch up on a quick podcast!
Rising time
The dough needs some love, so allow it to rise for about 1 to 1.5 hours. This step is crucial for achieving that fluffy texture we all crave. A warm environment is ideal, so consider placing the dough in a slightly heated oven (with it turned off!) to help it along.
Baking time
Once your dough is beautifully risen, it’s time for the oven! Bake your Garlic Herb Braided Bread for about 25-30 minutes until it’s golden brown and aromatic. The heavenly scent will fill your kitchen, making it hard to resist!
Total time
In total, from start to finish, you’re looking at around 2 to 2.5 hours. While it may seem lengthy, most of that time is just waiting for your bread to rise and bake, giving you ample time to prepare a delicious meal or unwind a bit.
For more tips on bread making, check out King Arthur Baking for expert advice and recipes!
Nutritional Facts for Garlic Herb Braided Bread
Garlic Herb Braided Bread is not only a delight to the senses but also packs a nutritious punch. Here’s what you can expect from each serving:
Calories
This delightful bread contains around 150 calories per slice, making it a reasonable choice for comfort food lovers. You can enjoy it without feeling guilty about your caloric intake.
Carbohydrates
With approximately 30 grams of carbohydrates per slice, this bread is a fantastic energy source. The combination of flour and herbs creates a satisfying base that pairs well with various meals.
Protein
You’ll find about 4 grams of protein in each serving of Garlic Herb Braided Bread. While it may not be a primary protein source, it complements many dishes, making it a versatile addition to your diet.
Not only does this bread taste amazing, but it can also fit well into a balanced eating plan. For more detailed information on health and nutrition, you can check out resources like the USDA Nutrition Database.
FAQs about Garlic Herb Braided Bread
Can I make this bread gluten-free?
Absolutely! If you’re looking to enjoy Garlic Herb Braided Bread without gluten, simply swap out the all-purpose flour for a good gluten-free blend. Many brands are available that perform well in baking, such as Bob’s Red Mill or King Arthur Flour. Be sure to incorporate additional binders like xanthan gum according to package instructions, which helps mimic the elasticity of gluten and keeps your bread from crumbling.
How should I store my leftover Garlic Herb Braided Bread?
After enjoying your delicious Garlic Herb Braided Bread, you might be wondering how to keep it fresh. The best way to store it is in an airtight container or wrapped in plastic wrap at room temperature for up to three days. If you want to extend its shelf life, consider freezing the bread. Just slice it beforehand for easy access, wrap it well in foil, or place it in a freezer bag. It should stay good for up to three months. To enjoy it later, simply thaw at room temperature and pop it in the oven for a few minutes to regain that warm, fresh-baked vibe.
What are some good substitutions for parmesan cheese?
If you’re not a fan of parmesan or simply don’t have it on hand, don’t worry! There are plenty of delicious alternatives you can try. Grated Pecorino Romano or nutritional yeast (for a dairy-free option) can both add that lovely cheesy flavor you’re after. You could also use shredded mozzarella for a gooey twist—think cheesy pull-apart goodness! Feel free to experiment based on your taste preferences or dietary needs.
Feel free to explore more details about making the perfect bread at King Arthur Baking and elevate your culinary skills!
Conclusion on Garlic Herb Braided Bread
Why You Should Try Baking This Bread Today!
Baking Garlic Herb Braided Bread is more than just a culinary task; it’s a delightful experience waiting to unfold in your kitchen. The aroma of fresh herbs and garlic wafting through the air will make your home feel inviting and cozy.
Trying out this recipe allows you to impress friends and family with your skills, whether it’s for a casual weeknight dinner or a special gathering. Plus, homemade bread elevates any meal, making it more perfect.
So why wait? Grab your ingredients and experience the joy of baking Garlic Herb Braided Bread today. If you’re looking for more recipes, check out King Arthur Baking for inspiration.
PrintGarlic Herb Braided Bread: The Best Homemade Delight to Savor
A delightful recipe for homemade garlic herb braided bread that is sure to impress.
- Prep Time: 20 minutes
- Cook Time: 30 minutes
- Total Time: 1 hour 50 minutes
- Yield: 1 loaf 1x
- Category: Bread
- Method: Baking
- Cuisine: Italian
- Diet: Vegetarian
Ingredients
- 4 cups all-purpose flour
- 1 tablespoon sugar
- 1 tablespoon salt
- 2 teaspoons instant yeast
- 1/4 cup olive oil
- 1 1/2 cups warm water
- 2 tablespoons minced garlic
- 2 tablespoons chopped fresh parsley
- 1 tablespoon chopped fresh rosemary
Instructions
- In a large bowl, combine flour, sugar, salt, and yeast.
- Mix in olive oil and warm water until a dough forms.
- Knead the dough for 5-7 minutes until smooth.
- Add garlic and herbs to the dough and knead until well incorporated.
- Let the dough rise in a warm place for 1 hour, or until doubled in size.
- Once risen, punch down the dough, divide it into three equal parts, and braid the pieces together.
- Place the braided bread onto a baking sheet and let it rise for another 30 minutes.
- Bake in a preheated oven at 350°F (175°C) for 25-30 minutes until golden brown.
Notes
- For added flavor, brush the top with melted butter before baking.
- Feel free to experiment with different herbs.
Nutrition
- Serving Size: 1 slice
- Calories: 150
- Sugar: 1g
- Sodium: 200mg
- Fat: 6g
- Saturated Fat: 1g
- Unsaturated Fat: 4g
- Trans Fat: 0g
- Carbohydrates: 22g
- Fiber: 1g
- Protein: 4g
- Cholesterol: 0mg
Keywords: Garlic Herb Braided Bread, homemade bread, garlic bread, braided bread