Introduction to Oreo Balls Recipe
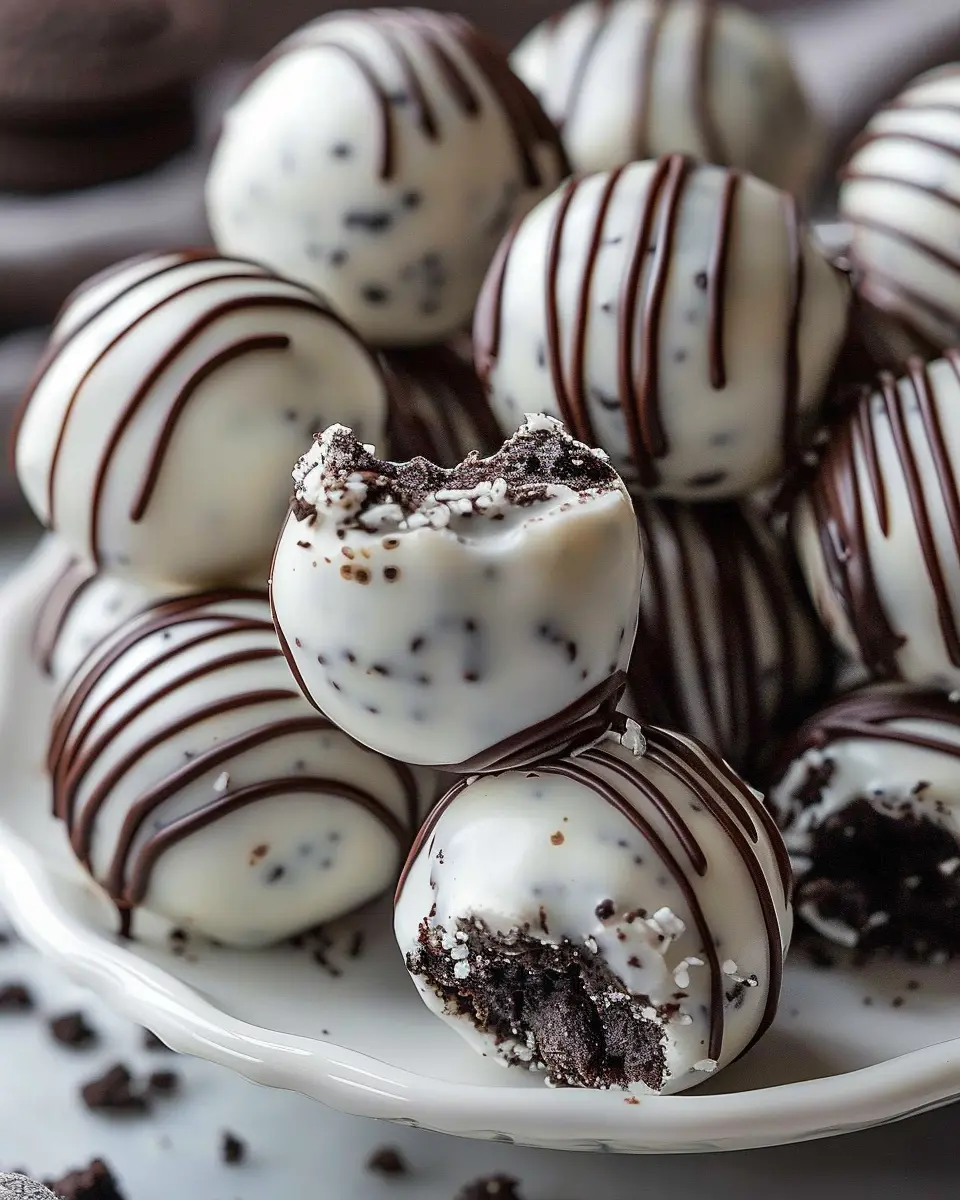
When it comes to effortless desserts that leave a lasting impression, Oreo Balls are the quintessential choice. If you’re in the market for something quick, delicious, and pleases crowds of all ages, then this Oreo Balls Recipe is your answer. These sweet treats combine the beloved flavor of Oreo cookies with cream cheese and a rich chocolate coating, creating the perfect bite-sized indulgence. Whether you’re sharing them at a party, giving them as gifts, or simply treating yourself, they never disappoint.
Why Oreo Balls Are the Perfect No-Bake Treat
One of the most appealing aspects of Oreo Balls is their no-bake nature. You can whip them up in under 30 minutes, making them perfect for those last-minute plans. Imagine this: you’re invited to a gathering, and you want to bring something homemade but have limited time. No worries! With just three ingredients—Oreo cookies, cream cheese, and chocolate—you can impress everyone without breaking a sweat.
-
Easy Preparation: All you need to do is crush the Oreos (you can even use a food processor for speed!), mix them with softened cream cheese, form them into balls, and dip them in chocolate. It’s simple enough that even a novice baker can succeed.
-
Customizable Flavors and Coatings: You can get creative with this recipe! Consider alternating white and dark chocolate or rolling them in crushed nuts or sprinkles for added flair. It’s a fun way to express your personality and cater to different taste preferences.
-
Perfect for Special Occasions: From holiday parties to birthdays or just a cozy night in, Oreo Balls fit the bill perfectly. They’re not just treats; they’re a conversation starter, bringing people together over sweet indulgence.
If you want to dive deeper into other quick dessert recipes, check out resources like the Food Network or Taste of Home. Both can inspire you with countless options to satisfy your sweet tooth. As you get into the Oreo Balls Recipe, you’ll find that the joy of creating and sharing desserts goes hand in hand with delicious results. Whether you stick to the classic version or experiment with variations, these treats are sure to become a staple in your dessert repertoire.
Ingredients for Oreo Balls
Creating Oreo Balls is as simple as it is delicious. All you need are a few core ingredients to bring this treat to life!
Essential Ingredients for the Recipe
To whip up your Oreo Balls, make sure you have the following essentials on hand:
- Oreo Cookies: The star of the show! You can use classic Oreos or even try flavored varieties for a fun twist.
- Cream Cheese: This ingredient binds everything together and provides a rich, creamy texture that contrasts perfectly with the crunch of the cookies.
- Chocolate: Use melting chocolate or chocolate chips for coating. Dark, milk, or white chocolate all work beautifully depending on your preference.
These basic ingredients can create a satisfyingly indulgent treat. For more insights on the versatility of Oreos, check out this article for some creative ideas.
Optional Ingredients for Customization
Once you’ve mastered the basic Oreo Balls recipe, consider adding your personal touch. Some tasty options include:
- Sprinkles: Add festive colors for a special occasion.
- Nuts: Chopped walnuts or pecans can introduce a delightful crunch.
- Peanut Butter: A tablespoon can give your treats a nutty flavor that pairs exquisitely with chocolate.
Experimenting with these optional ingredients allows you to craft a unique Oreo Ball that reflects your taste perfectly!
Step-by-Step Preparation of Oreo Balls
Making Oreo balls is a delightful experience that combines simplicity with a satisfying taste. These easy-to-make treats are perfect for gatherings, holidays, or just a cozy night in. Let’s dive into the process of creating these delicious bites with our step-by-step guide.
Start with the Oreos
First things first, grab a package of your favorite Oreo cookies. You’ll want to use about 36 cookies, which usually equates to one standard package. Don’t worry about the flavor too much; classic Oreos work wonderfully, but feel free to experiment with variants like mint or peanut butter if you’re in the mood for something different.
- Tip: Double the recipe if you’re making them for a crowd; the last thing you want is to run out of these delightful treats!
Now, crush those cookies! You can use a food processor for quick and even grinding. Alternatively, you can place the cookies in a plastic bag and crush them with a rolling pin or a heavy pan. Highlight the fun part of this step: it can be incredibly stress-relieving to crush those cookies!
Mix in the Cream Cheese
Once your Oreos are crushed into fine crumbs, it’s time to mix them with cream cheese to create that luscious filling. You’ll need about 8 ounces of softened cream cheese.
- Important Note: Make sure the cream cheese is at room temperature for smoother mixing. If it’s cold, you’ll find it hard to incorporate fully with the Oreo crumbs.
In a mixing bowl, combine the Oreo crumbs and cream cheese using a spatula or your hands (if you’re feeling adventurous). The goal is to create a dough-like consistency that holds its shape when rolled into balls. Now, if you’re feeling creative, you could add a splash of vanilla extract to elevate the flavor.
Shape the Balls
Now comes the fun part—shaping the balls! Taking small amounts of the mixture (about one tablespoon each), roll them into smooth balls. This step can be a great opportunity to get your friends or family involved, making it a fun group activity.
- Tip: You can use a cookie scoop to ensure they’re all the same size, which not only makes them look pretty but also ensures a consistent taste in every bite.
After rolling, set the formed balls on a parchment-lined baking sheet to prepare them for chilling.
Chill to Firm Them Up
Refrigeration is key for achieving the ideal texture. Chill the balls in the refrigerator for at least 30 minutes or until firm to the touch. This step helps them hold their shape when they are dipped in chocolate later.
- Quick Fact: Chilling them allows the flavors to meld wonderfully, making every bite a flavorful experience.
While waiting, you can think about how you’ll decorate these tasty treats! Maybe you’re a fan of sprinkles, or perhaps drizzled chocolate is more your style?
Melt the Chocolate
Next, it’s time to melt some chocolate. You can use dark, milk, or even white chocolate, depending on your taste preference. For a smoother consistency, chop the chocolate into small pieces and melt it in a microwave-safe bowl, heating in 30-second intervals and stirring with each interval to prevent burning.
Alternatively, you can use a double boiler if you prefer a more hands-on approach.
- Pro Tip: Add a teaspoon of vegetable shortening to the chocolate to make it thinner and easier to work with, which can result in a smoother coating.
Dip and Decorate
Now the moment you’ve been waiting for: dipping those chilled balls! Using a fork or a dipping tool, submerge each ball into the melted chocolate until it is fully coated. Let the excess chocolate drip back into the bowl, then transfer the coated ball back to the parchment paper.
- Final Touch: For added flair, sprinkle crushed Oreos, drizzles of contrasting chocolate, or colorful sprinkles on top before the chocolate hardens.
Let the dipped Oreo balls sit at room temperature until the chocolate sets, or you can refrigerate them for a faster process.
And there you have it! Your homemade Oreo Balls are ready to be shared (or kept all to yourself!). Enjoy this simple yet delicious treat that combines the simplicity of cookies and the creaminess of cream cheese, guaranteed to be a hit!
For more fun dessert ideas, you might also want to explore these tips for creative cookie baking – there’s a whole world of flavors waiting to be discovered!
Variations on Oreo Balls
Oreo balls are already a crowd-pleaser, but why stop at one flavor? The beauty of this Oreo Balls recipe lies in its versatility. Let’s dive into some delightful variations that can transform your next batch into new and exciting treats.
Classic Oreo Balls
The traditional version of Oreo balls combines crushed Oreos and cream cheese, then dips them in chocolate. They’re simple yet scrumptious. Here’s how to make them classic:
- Ingredients: 1 package of Oreos, 8 ounces of cream cheese, and chocolate coating (dark, milk, or white).
- Instructions: Crush the Oreos into a fine crumb, mix with cream cheese until smooth, roll into balls, and dip in melted chocolate.
These treats are perfect for any occasion and never fail to impress. You can also check out more about the original recipe here.
Peanut Butter Oreo Balls
If you’re a fan of the classic peanut butter and chocolate combo, you’ll love these Peanut Butter Oreo Balls! Simply swap out half of the cream cheese with peanut butter.
- Ingredients: 1 package Oreos, 4 ounces cream cheese, and 4 ounces peanut butter, plus chocolate coating.
- Instructions: Follow the classic instructions but mix in peanut butter for a delicious twist.
These are a hit at parties and gatherings—who can resist that delightful crunch paired with creamy peanut butter?
Mint Oreo Balls
For a refreshing change, consider making Mint Oreo Balls. The minty flavor brings a fun twist that’s great for holiday gatherings or a casual snack.
- Ingredients: 1 package Mint Oreos, 8 ounces cream cheese, and mint chocolate coating.
- Instructions: Simply substitute Mint Oreos for the regular ones and use green chocolate for dipping.
These treats have a festive flair and a refreshing taste that most people find irresistible.
Experimenting with different flavors can add a new dimension to your Oreo Balls recipe. Which variation will you try first?
Cooking Tips and Notes for Oreo Balls
Ensuring Smooth Coating
To achieve a beautifully smooth coating for your Oreo Balls, start with high-quality melting chocolate or candy melts. Make sure to melt it slowly over low heat or using a microwave in short intervals, stirring frequently. This prevents it from burning and helps create a silky texture. When dipping the balls, use a fork to allow excess chocolate to drip off before placing them on parchment paper to cool. Feeling adventurous? Try adding a splash of coconut oil to your melted chocolate for an extra glossy finish.
Storing and Freezing Tips
Once your Oreo Balls are complete, store them in an airtight container in the refrigerator for up to two weeks. For longer storage, you can freeze them! Just make sure they are in a single layer initially, then transfer to a freezer-safe container, separating layers with parchment paper. When you’re ready to enjoy, simply thaw them in the fridge for a few hours. Perfect for last-minute treats or a sweet surprise.
For more tips on ingredient substitutions and decorating ideas, check out this resource on food storage strategies from Nourish by Whole Foods.
Serving Suggestions for Oreo Balls
Perfect Pairings with Your Oreo Balls
If you’re wondering what to serve alongside your Oreo Balls, think about contrasting flavors! These delightful treats are fabulous with a side of fresh fruit, like strawberries or blueberries, which offer a refreshing balance. For a whimsical twist, why not pair them with a scoop of vanilla ice cream? The creaminess complements the rich chocolate coating beautifully. Additionally, serving them with a glass of cold milk can elevate the experience to nostalgic heights, reminding you of childhood treats!
Creative Ways to Present Them
Presentation can make all the difference, and your Oreo Balls Recipe deserves a show-stopping reveal. Arrange them on a decorative platter, interspersed with colorful sprinkles or themed decorations, especially for parties. Another creative touch is to place them in mini cupcake liners for an upscale look. For a festive vibe, consider drizzling melted white chocolate over them or rolling some in crushed nuts or coconut flakes.
For inspiration, explore food styling tips to learn more about making your desserts dazzle!
Time Breakdown for Oreo Balls
When it comes to whipping up a delicious treat like these Oreo Balls, knowing your time commitments can really help streamline the process. Here’s a quick rundown to keep you organized and efficient as you embark on this delightful recipe journey!
Preparation Time
Getting started on your Oreo Balls Recipe doesn’t take much time at all! Expect to spend around 20 minutes mixing your crushed Oreos with cream cheese and rolling them into balls. It’s the perfect excuse to crank up your favorite tunes or podcast!
Chilling Time
After you’ve shaped those tasty bites, pop them in the refrigerator for at least an hour. This chilling time is crucial; it helps them firm up and makes for easier dipping in chocolate. Patience is key, trust me!
Total Time
In total, you’re looking at about 1 hour and 20 minutes from start to finish. That’s time well spent for a dessert that’s sure to impress. For some extra ideas on how to personalize your Oreo Balls, check out this guide on fun toppings and flavors!
By planning your time effectively, you’ll be savoring these delectable treats in no time!
Nutritional Facts for Oreo Balls
When indulging in a delicious Oreo Balls Recipe, it’s good to know what you’re treating yourself to. Here are the nutritional facts you should consider:
Calories per Serving
Each serving of these delightful treats typically contains around 150 calories. If you’re counting calories or just curious, this makes Oreo balls a sweet yet manageable dessert option when enjoyed in moderation.
Sugar Content
Oreo balls can be quite sweet, with sugar content ranging from 8 to 12 grams per ball. This sweetness comes from the crushed Oreos and the cream cheese used to bind everything together. Be mindful of the sugar if you’re watching your intake!
Protein and Fiber
While Oreo balls aren’t a protein powerhouse, they do offer about 1 gram of protein per serving, thanks to the cream cheese. However, they lack significant fiber (less than 1 gram), so consider pairing them with a fiber-rich snack for balance.
For more nutritional tips, check out Healthline or NutritionData for additional info on desserts and their nutritional profiles!
Enjoy your Oreo balls, but remember—moderation is key!
FAQ about Oreo Balls
Can I make these gluten-free?
Absolutely! To whip up a gluten-free version of this Oreo Balls recipe, simply swap regular Oreos for gluten-free Oreos. Many brands offer delicious gluten-free cookie options that will taste fantastic in this treat. Just check the packaging to ensure they meet your dietary requirements.
How long do they last in the fridge?
Once you’ve made these delectable treats, they can last up to a week in the fridge. Just store them in an airtight container to keep them fresh. For optimal taste, try to enjoy them within the first few days; that way, you’re treated to their wonderful texture and flavor at its peak.
Can I use other cookies besides Oreos?
Yes, you can get creative! While the traditional Oreo Balls recipe features Oreos, feel free to experiment with other cookies like Nutter Butter, Chips Ahoy, or even homemade cookies. Just keep in mind that the texture and flavor will change based on your choice, but that’s part of the fun! For some inspiration, check out this comprehensive list of cookie options that could work wonderfully.
Whether you’re celebrating a birthday party or just treating yourself, these tips will help elevate your Oreo Balls experience. Have fun, and don’t hesitate to share your delicious results with friends and family!
Conclusion on Oreo Balls Recipe
Why You’ll Love Making Oreo Balls
Making these delightful Oreo Balls is not just about satisfying your sweet tooth—it’s a fun and easy culinary adventure! You’ll love how simple it is to combine a few ingredients to create such a rich, delectable treat. The satisfaction of rolling each ball and dipping it in chocolate makes this recipe not just a cooking task but a mini celebration in your kitchen.
Plus, they’re perfect for sharing at gatherings, and everyone seems to have fond memories associated with Oreo treats. Whether enjoyed at parties or as a late-night snack, these Oreo Balls are sure to be a crowd-pleaser. So grab your Oreo cookies and get rolling—deliciousness awaits!
PrintOreo Balls Recipe: Indulgent Treats for Every Chocolate Lover

Delicious and easy to make, Oreo balls are a perfect treat for any chocolate lover.
- Prep Time: 30 minutes
- Cook Time: 0 minutes
- Total Time: 30 minutes
- Yield: 24 balls 1x
- Category: Dessert
- Method: No-bake
- Cuisine: American
- Diet: Vegetarian
Ingredients
- 1 package Oreo cookies
- 8 ounces cream cheese, softened
- 1 package chocolate bark or melting chocolate
Instructions
- Crush the Oreo cookies in a food processor until fine.
- Mix the crushed cookies with softened cream cheese until well combined.
- Roll the mixture into balls and place on a baking sheet.
- Melt the chocolate according to package instructions.
- Dip each ball into the melted chocolate and place back on the baking sheet.
- Refrigerate until the chocolate is set.
Notes
- For added flavor, you can mix in some vanilla extract with the cream cheese.
- Try using different flavors of Oreo cookies for variety.
Nutrition
- Serving Size: 1 ball
- Calories: 100
- Sugar: 8g
- Sodium: 50mg
- Fat: 5g
- Saturated Fat: 3g
- Unsaturated Fat: 1g
- Trans Fat: 0g
- Carbohydrates: 12g
- Fiber: 1g
- Protein: 2g
- Cholesterol: 10mg
Keywords: Oreo Balls Recipe, Chocolate, Dessert, Treats