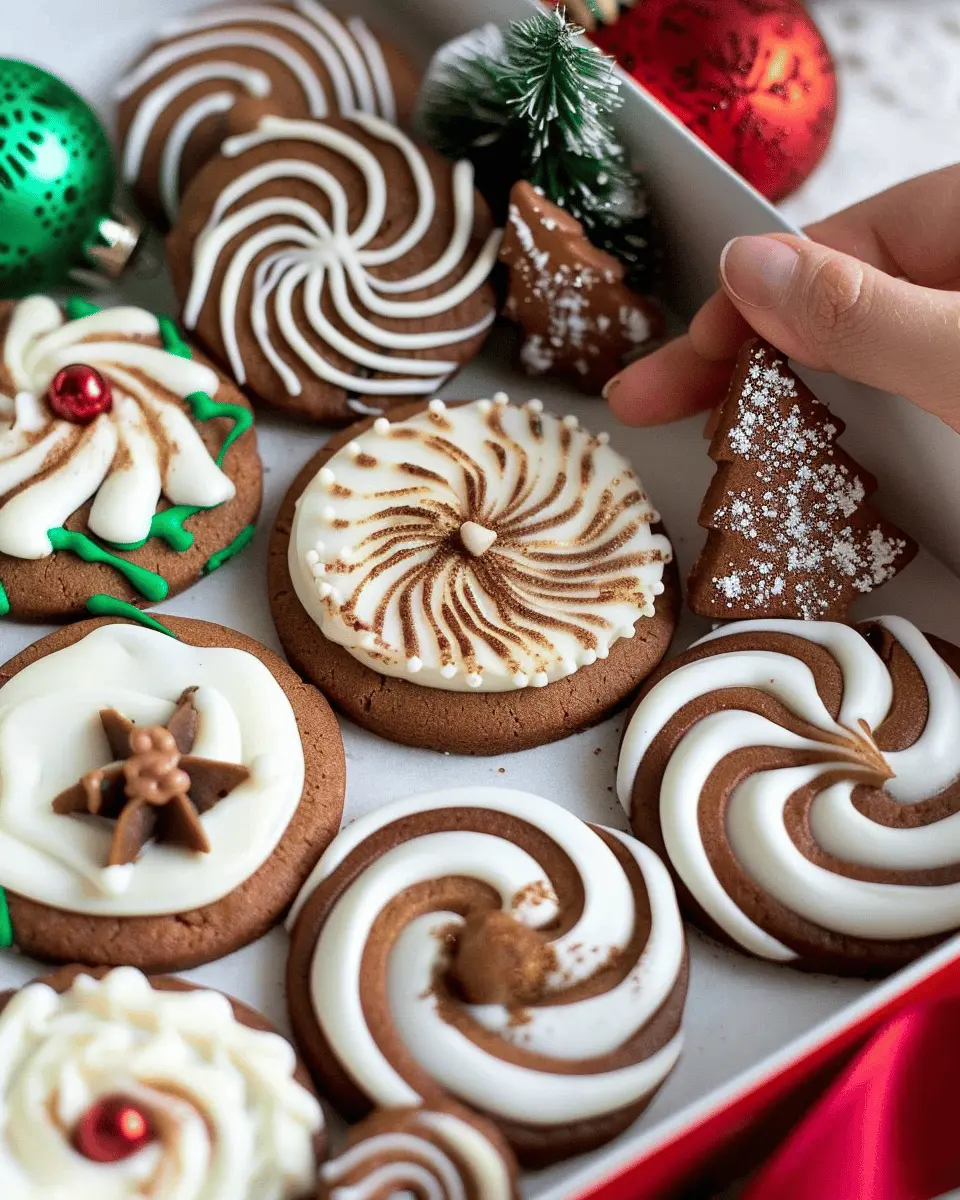
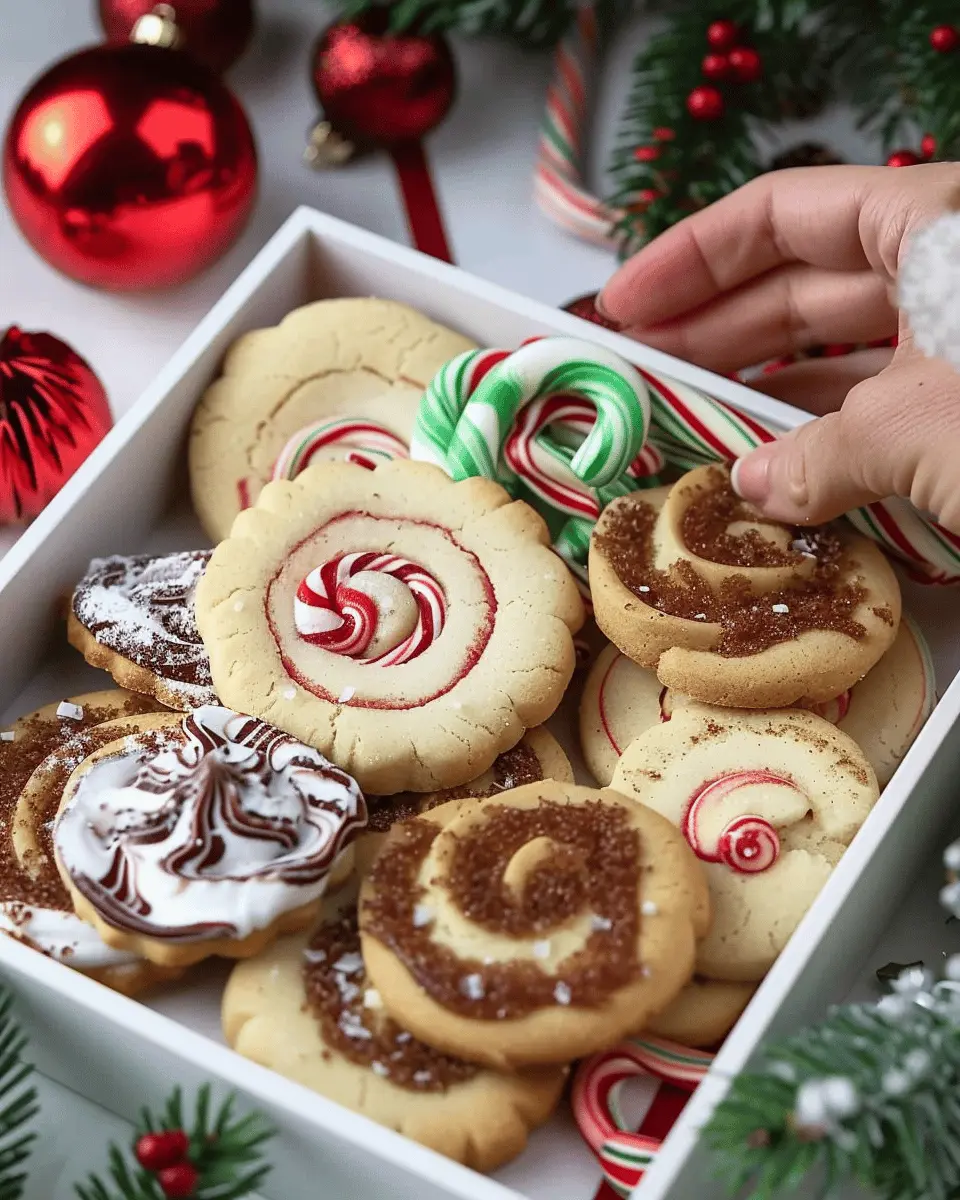
Introduction to Swirled Christmas Cookies
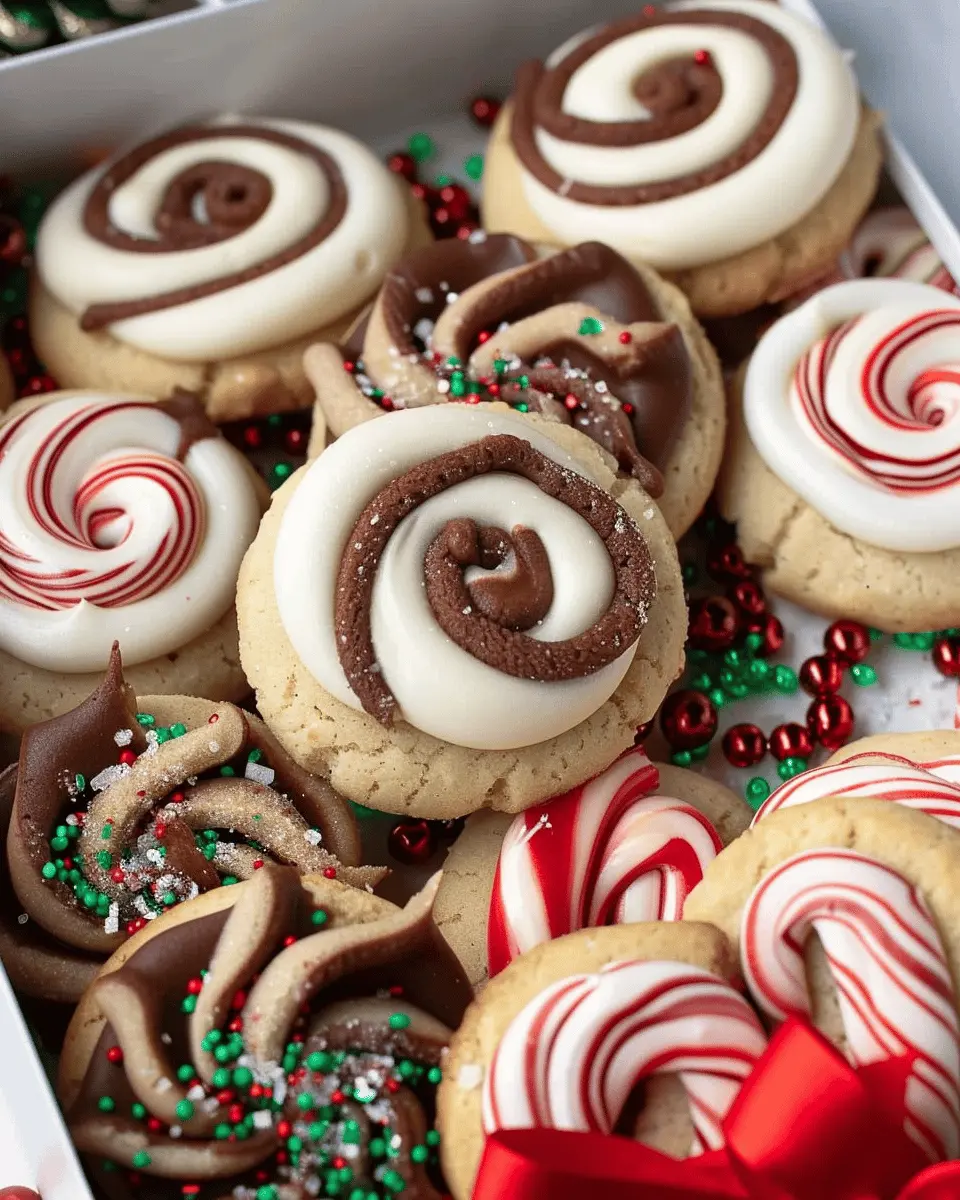
When it comes to decorating for the holiday season, few treats shine as brightly on a dessert table as swirled Christmas cookies. These delightful confections are not only a feast for the eyes but also a tasty delight for the palate. Their colorful swirls of dough can be reminiscent of holiday ribbons, making them a perfect match for your festive gatherings.
Why Swirled Christmas Cookies are a Holiday Favorite
So, what makes swirled Christmas cookies a beloved tradition in many households? It all starts with their visual appeal. The beautiful, vibrant colors invite you in, sparking joy and nostalgia as you remember holiday baking with family. Each cookie can be a little work of art and a canvas for creativity. With just a few simple ingredients, you can transform standard cookie dough into something magical.
Moreover, these cookies offer tremendous versatility. You can customize the colors to match your holiday theme—think red and green for Christmas, or even pastel colors for other celebrations. The best part? They are surprisingly easy to make. A basic cookie dough can be divided and tinted with food coloring, then rolled and swirled. It’s a fun activity to engage with friends and family, whether you’re a seasoned baker or a complete beginner.
According to a study by the American Baking Association, an impressive 95% of Americans enjoy baking during the holiday season. This shows just how deeply rooted the tradition of holiday baking is in our culture. By incorporating swirled cookies into your repertoire, you not only embrace tradition but also create new memories to pass on.
But it doesn’t end there. The flavors can be tailored to suit different tastes—perhaps a hint of peppermint for winter or a touch of vanilla for a classic feel. You might find inspiration by exploring various frosting options or different textures.
For an insightful look at holiday cookies, consider checking out resources from sources like the Food Network or Bakerella, which offer tips and tricks to enhance your baking experience.
In essence, swirled Christmas cookies are more than just desserts; they’re a celebration of creativity, togetherness, and all the joys that the holiday season brings. So roll up your sleeves, gather your ingredients, and let’s make some magic in the kitchen this festive season!
Ingredients for Swirled Christmas Cookies
Creating delightful swirled Christmas cookies starts with some essential ingredients that set the foundation for both flavor and texture. Here’s what you’ll need to get started:
Essential ingredients for a successful cookie
- Butter: Use unsalted for the best control over flavor.
- Granulated Sugar: This gives your cookies a crisp edge.
- Brown Sugar: Adds moisture and a rich, caramel-like taste.
- Eggs: Bind everything together; you’ll typically need one large egg.
- All-Purpose Flour: The base of your cookie dough for a perfect chew.
- Baking Soda: Helps cookies rise and creates that fluffy texture.
- Salt: Balances sweetness.
- Vanilla Extract: A must for that warm, inviting flavor.
Optional ingredients for customization
Want to add your twist to these swirled Christmas cookies? Consider these options:
- Food Coloring: Create vibrant swirls; gel colors work best.
- Chocolate Chips or Nuts: Mix in for extra texture.
- Sprinkles: Perfect for a festive touch.
- Zest: Add lemon or orange zest for a citrus burst.
Feel free to explore and make these cookies uniquely yours. If you’re looking for more inspiration on cookie customization, check out King Arthur Baking for expert tips and techniques!
Step-by-Step Preparation of Swirled Christmas Cookies
Swirled Christmas cookies are a festive treat that can make your holiday baking extra special. With their vibrant colors and delightful textures, these cookies not only taste amazing but also look fantastic on any holiday dessert table. Let’s dive into the step-by-step preparation of these delightful treats.
Cream the butter and sugar
Start by grabbing a mixing bowl and your electric mixer. You want to cream together one cup of softened butter and one cup of granulated sugar until the mixture is light and fluffy. This process usually takes about 3-5 minutes. The air you incorporate during this step is vital for a tender cookie, so don’t rush!
If you have a stand mixer, using the paddle attachment can make this step even easier. Need inspiration? You can learn more about creaming butter and sugar from King Arthur Baking which provides great tips for baking basics.
Add the eggs and extracts
Once your butter and sugar are beautifully blended, it’s time to add two large eggs and one teaspoon of vanilla extract along with one teaspoon of almond extract for that extra festive flavor. Mix these ingredients in until fully combined, creating a smooth batter. The combination of the vanilla and almond is truly magical and can elevate the cookie’s flavor profile significantly.
Combine the dry ingredients
In a separate bowl, whisk together two and a half cups of all-purpose flour, one teaspoon of baking soda, and a pinch of salt. Gradually add this flour mixture into your wet batter, mixing until just combined. It’s crucial not to overmix at this stage, as you want your cookies to stay tender. If you find lumps, it’s okay! They will bake out.
Divide and color the dough
Now comes the fun part! Divide your dough into two or three parts, depending on how many colors you want. If you’re aiming for the classic red and green of the holidays, divide the dough into two balls. In each bowl, add food coloring—gel or liquid works great. Work the color into the dough until you achieve the desired hue.
Chill the dough
Chilling your dough is an essential step to ensure that your swirled Christmas cookies hold their shape while baking. Wrap each colored dough in plastic wrap and refrigerate for at least an hour. This also gives the flavors time to develop.
Roll and stack the dough
After the dough has chilled, it’s time to roll it out. On a lightly floured surface, roll each colored dough into a rectangle (about ¼ inch thick). Lay one colored dough on top of the other, and gently press down so they stick together. Don’t worry about perfection; these cookies will be swirled, and a bit of texture adds to their charm!
Cut and shape the cookies
Once stacked, carefully roll the dough into a log, making sure it’s tight enough to hold its shape but not too tight that the colors meld. Once rolled, you can slice the log into ½-inch thick rounds. If you want a more uniform shape, chill the log for about 15 minutes after rolling, and then slice.
Bake the swirled cookies
Preheat your oven to 350°F (175°C). Place the cookie rounds on a baking sheet lined with parchment paper, leaving some space between each cookie. Bake for about 10-12 minutes or until the edges are slightly golden. The aroma that fills your kitchen during this time is nothing short of heavenly! Let them cool on the baking sheet for a few minutes before transferring them to a wire rack.
Baking swirled Christmas cookies is not only about the end product but the joy of the process. Whether you’re enjoying them with family or giving them as gifts, these cookies bring a festive spirit to your holiday season!
Variations on Swirled Christmas Cookies
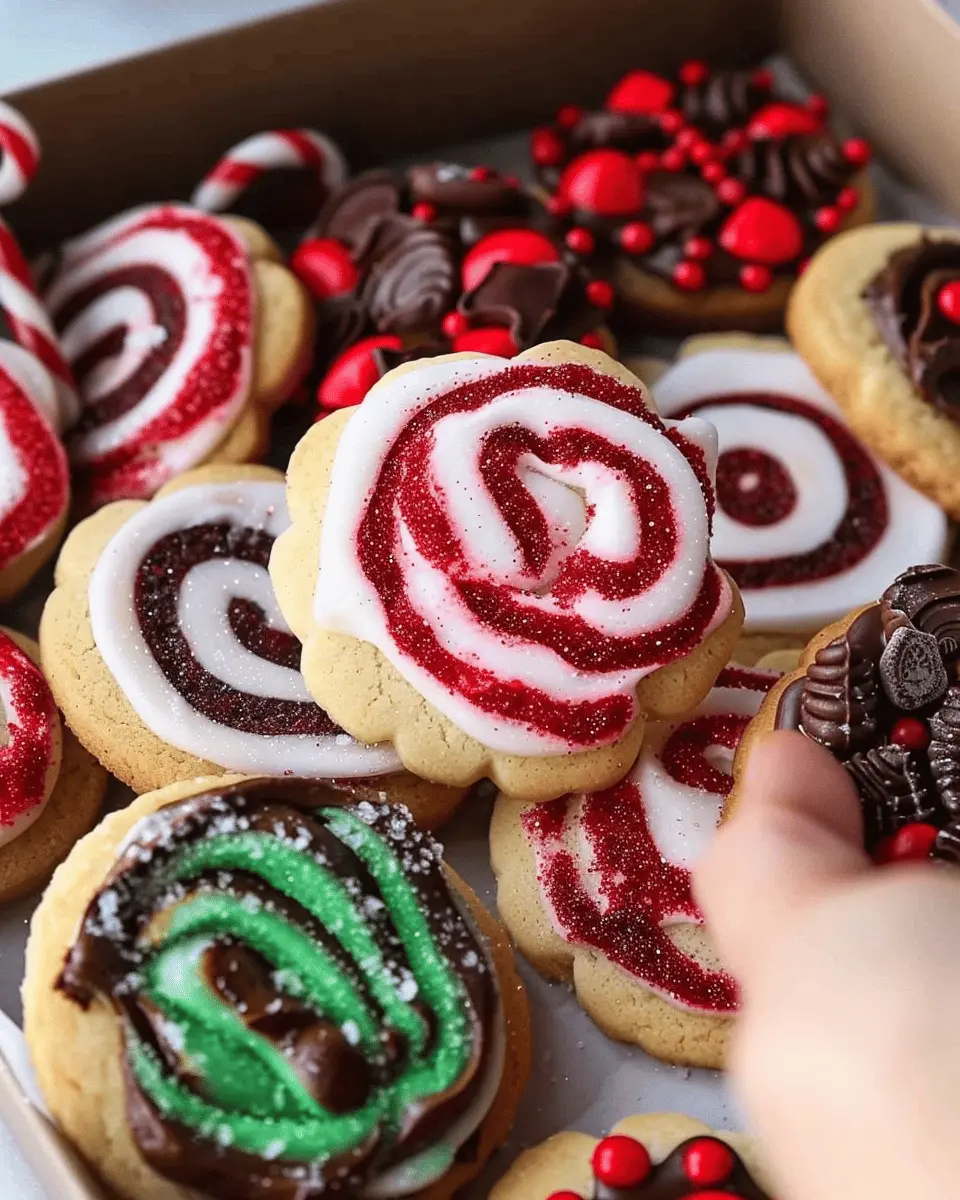
Swirled Cookies with Different Color Themes
One of the highlights of making swirled Christmas cookies is the opportunity to play with color! You can create a stunning display by using different hues.
- Red and Green: The classic holiday colors invoke that festive spirit. Add red and green food coloring to your dough. This is perfect for blending together with a little creativity—think peppermint or cherry.
- Pastel Shades: If you prefer a more subtle approach, consider soft pinks, blues, and greens. They can evoke a winter wonderland feel. Use natural food coloring for a gentler option, such as beet juice for pink or spirulina for blue.
- Metallic Golds and Silvers: For a touch of elegance, add edible glitter or luster dust in gold or silver shades atop your swirled Christmas cookies. They’re sure to impress at any holiday gathering!
Flavor Variations for Swirled Cookies
While traditional vanilla or almond flavors are lovely, experimenting with different flavor profiles can elevate your swirled cookies to new heights!
- Chocolate Mint: Use cocoa powder for one of the doughs, and add peppermint extract for a refreshing twist.
- Cinnamon Spice: Add ground cinnamon and nutmeg to another dough; this festive flavor will make your entire kitchen smell like the holidays.
- Lemon Zest: Incorporate lemon zest into your basic cookie dough for a bright, citrusy kick that pairs well with vanilla.
With these delightful twists, your swirled Christmas cookies will not only look beautiful but taste exquisite too! Don’t hesitate to mix and match flavors and colors based on your personal preferences or the themes of your holiday celebrations. What’s your favorite color or flavor to add to holiday treats?
Baking Tips and Notes for Swirled Christmas Cookies
Key Tips for Perfect Swirls
Achieving stunning swirled Christmas cookies is all about the technique. Ensure your dough is well-chilled — this will help maintain the swirls during baking. When you roll out your doughs, keep them at a uniform thickness for even swirls. To achieve that marbled effect, use a knife or a skewer to gently swirl the layers together; avoid overmixing, or you might wind up with a solid color.
Preparation Notes for Hassle-Free Baking
Planning is key for a stress-free baking experience! Gather all your ingredients ahead of time, ensuring that your butter is soft but not melted. Preheat your oven to the correct temperature before you prep your dough to save time. Consider using parchment paper on your baking sheets for easy cleanup and a perfect cookie release. And remember, chilled dough not only improves swirls but also enhances flavor!
For additional inspiration and techniques, check out King Arthur Baking for expert tips on crafting cookies that even Santa would love!
Serving Suggestions for Swirled Christmas Cookies
Creative ways to present your cookies
Elevate the charm of your swirled Christmas cookies with some thoughtful presentation. Consider placing them on a tiered cake stand for a delightful visual appeal at holiday gatherings. You could also wrap individual cookies in clear cellophane and tie them with festive ribbons as personalized gifts. For an interactive touch, set up a DIY cookie decorating station where guests can add their own colorful sprinkle toppings, creating a delightful and engaging experience. To inspire your creativity, check out this guide on cookie presentation for more fun ideas!
Pairing options for festive gatherings
When it comes to pairing, think beyond the standard treats! Serve your swirled Christmas cookies alongside a warm cup of spiced hot chocolate or creamy eggnog. Attention to detail can make all the difference—use a sprinkle of nutmeg or a cinnamon stick for that extra layer of flavor. Additionally, consider a selection of seasonal teas, like gingerbread or peppermint, which can perfectly complement the festive flavors of your cookies. The goal is to create a cozy atmosphere where your cookies shine while enhancing the overall experience. Happy baking!
Time Breakdown for Swirled Christmas Cookies
Preparation Time
Getting your ingredients ready for these swirled Christmas cookies is a delightful part of the process. You’ll need about 20 minutes for this. Gather your flour, butter, sugar, and the vibrant food coloring that adds that festive touch.
Baking Time
Once your cookies are carefully rolled and swirled, they’ll need about 10-12 minutes to bake perfectly. Keep an eye on them; you want that lovely golden edge without overdoing it!
Total Time
In total, you’re looking at around 30-35 minutes from start to finish. It’s a quick way to fill your home with the smell of warm, freshly baked treats. Perfect for guests or a cozy night in! For further tips on holiday baking, check out resources from culinary experts like America’s Test Kitchen. Happy baking!
Nutritional Facts for Swirled Christmas Cookies
Calories per cookie
These delightful swirled Christmas cookies are not just a feast for the eyes; they also pack a moderate caloric punch! Each cookie contains approximately 120 calories, making them a sweet treat to enjoy during the holidays without going overboard.
Breakdown of major nutrients
When indulging in these festive gems, here’s what you can expect in terms of nutrition:
- Carbohydrates: About 18g, mostly from flour and sugar, giving you that satisfying crunch.
- Fat: Roughly 5g, which contributes to their rich texture, thanks to the butter!
- Protein: Each cookie offers about 1g. While we don’t eat cookies for protein, it’s a nice little bonus!
Considering their taste and texture, swirled Christmas cookies can be a delightful addition to your holiday treats. Remember to balance indulgence with nutrition—check out Healthline for tips on festive eating!
FAQs about Swirled Christmas Cookies
How can I ensure the cookies keep their shape?
To ensure that your swirled Christmas cookies keep their shape, it’s essential to chill the dough before baking. After making the dough, wrap it tightly in plastic wrap and refrigerate for at least an hour. This will firm up the butter, reducing the spread during baking. You can also shape the dough into logs, chill it, and slice it right before baking. Using parchment paper on your baking sheets can also help maintain their shape by providing a non-stick surface. For more tips on cookie shapes, check out this informative resource from King Arthur Baking.
Can I make the dough in advance?
Absolutely! Making the dough ahead of time is a great way to save time, especially during the busy holiday season. You can prepare the swirled Christmas cookie dough up to five days in advance. Just be sure to wrap it tightly in plastic wrap and store it in the refrigerator. If you need even longer storage, freeze the dough for up to three months. When you’re ready to bake, simply thaw it in the fridge overnight before slicing and baking.
What are the best ways to store these cookies?
To keep your swirled Christmas cookies tasting fresh, store them in an airtight container at room temperature. They will stay good for up to a week. If you want to keep them longer, consider freezing the cookies. Place them in a single layer in a freezer-safe container, separating layers with parchment paper, and they can last up to three months. For more storage tips, check out Food Network’s suggestions on cookie preservation techniques.
By following these simple tips, you can enjoy beautifully shaped, fresh cookies that are perfect for sharing with family and friends during the holidays!
Conclusion on Swirled Christmas Cookies
Final thoughts on baking and sharing joy during the holidays
As we wrap up our delightful journey with these swirled Christmas cookies, remember that baking isn’t just about the ingredients; it’s an experience that brings people together. The scent of cookies wafting through your home can evoke cherished memories and create new traditions. Consider sharing your treats with neighbors or friends, spreading that warmth and joy during the holidays.
Baking can be a delightful stress relief, and there’s something magical about a beautifully decorated cookie plate that brightens anyone’s day. Don’t hesitate to experiment with flavors or colors, encouraging your creativity. Explore more about cookie baking from resources like King Arthur Baking or Food52 for tips and tricks. Happy baking!
PrintSwirled Christmas Cookies: Easy Festive Treats for Everyone
Enjoy these easy and festive swirled Christmas cookies perfect for holiday gatherings.
- Prep Time: 30 minutes
- Cook Time: 12 minutes
- Total Time: 42 minutes
- Yield: 24 cookies 1x
- Category: Dessert
- Method: Baking
- Cuisine: American
- Diet: Vegetarian
Ingredients
- 2 cups all-purpose flour
- 1 cup unsalted butter, softened
- 1 cup granulated sugar
- 1 teaspoon vanilla extract
- 1/2 teaspoon salt
- 1/2 cup red food coloring
- 1/2 cup green food coloring
Instructions
- Preheat the oven to 350°F (175°C).
- In a bowl, cream together the butter and sugar.
- Add the vanilla extract and mix well.
- Gradually add the flour and salt until combined.
- Divide the dough in half. Color one half with red food coloring and the other half with green.
- Roll out each color into a rectangle, then layer the two rectangles on top of each other and roll them up.
- Slice the roll into cookies and place them on a baking sheet.
- Bake for 10-12 minutes or until edges are lightly golden.
- Let cool before serving.
Notes
- For variety, try adding different food colorings or sprinkles.
Nutrition
- Serving Size: 1 cookie
- Calories: 120
- Sugar: 8g
- Sodium: 50mg
- Fat: 7g
- Saturated Fat: 4g
- Unsaturated Fat: 2g
- Trans Fat: 0g
- Carbohydrates: 15g
- Fiber: 0g
- Protein: 1g
- Cholesterol: 30mg
Keywords: Swirled Christmas Cookies